Website Design Service: Using the Text Editor
Please use the “Print” function at the bottom of the page to create a PDF.
For the Website Design Service
After your new website has been completed, the website design team activates the Text Editor at the end of the acceptance meeting. The Text Editor allows you to modify existing text on your own. This article explains how to do that.
You can find out how to edit images yourself in the article Website Design Service: Editing images.
Instructions for using the Text Editor
If you want to have one or more texts changed before the acceptance meeting, you can upload them as a document in the Upload Center. After receiving the texts, they will be entered by the Website Design team.
We recommend that you use the Text Editor for minor changes. For other, larger changes, we suggest using the maintenance service.
You can only change content in existing text fields. New text fields cannot be created with the text editor.
Activating the text editor does not change the setup fee or the monthly fee.
To restore deleted content, please contact the Website Design team.
When the Website Design team is working on the website, it is not possible to launch the text editor. In this case, the pen icon is not displayed.
Tip
Have empty text fields added during creation of your website. This way you can add more information yourself without having to overwrite existing content, such as for a special holiday sale.
Possible text changes
You can change the following texts with the Text Editor:
Texts you have created yourself
Texts on buttons
Privacy policy (including the global areas)
Legal notice (including the global areas)
As part of the editing process, you can make the text bold, italic, superscript, or subscript. Furthermore, you can underline or strikethrough the text, and align it left, center, or right. Additionally, you can insert hyperlinks and choose text colors that match your website's design.
Note
The global areas are displayed on each subpage and can be changed centrally.
Using the Text Editor
To use the text editor, proceed as follows:
- Log in to your IONOS account.
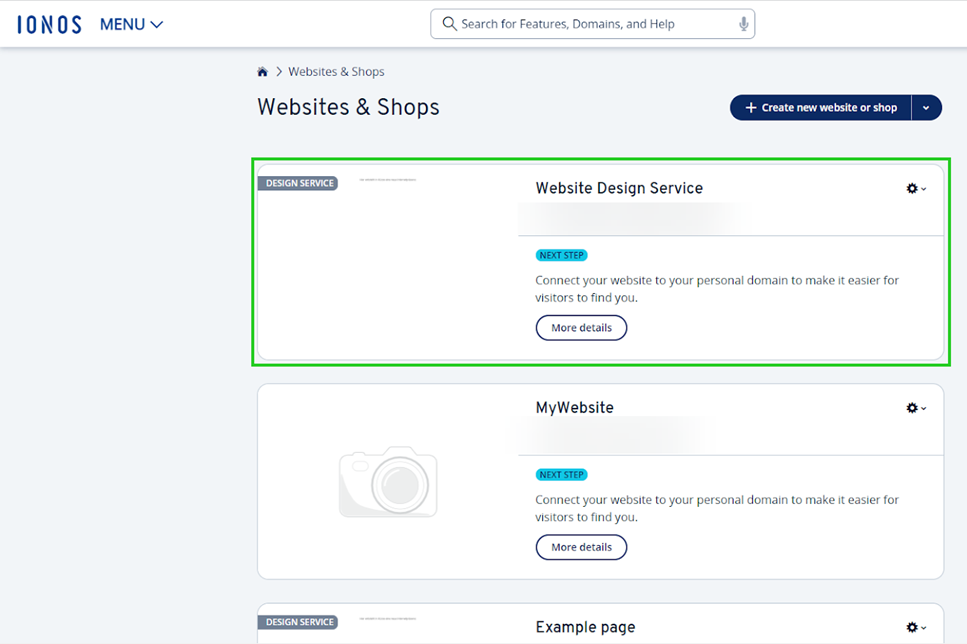
Click Menu > Websites & Stores in the title bar.
Click on the tile related to your website design service contract.

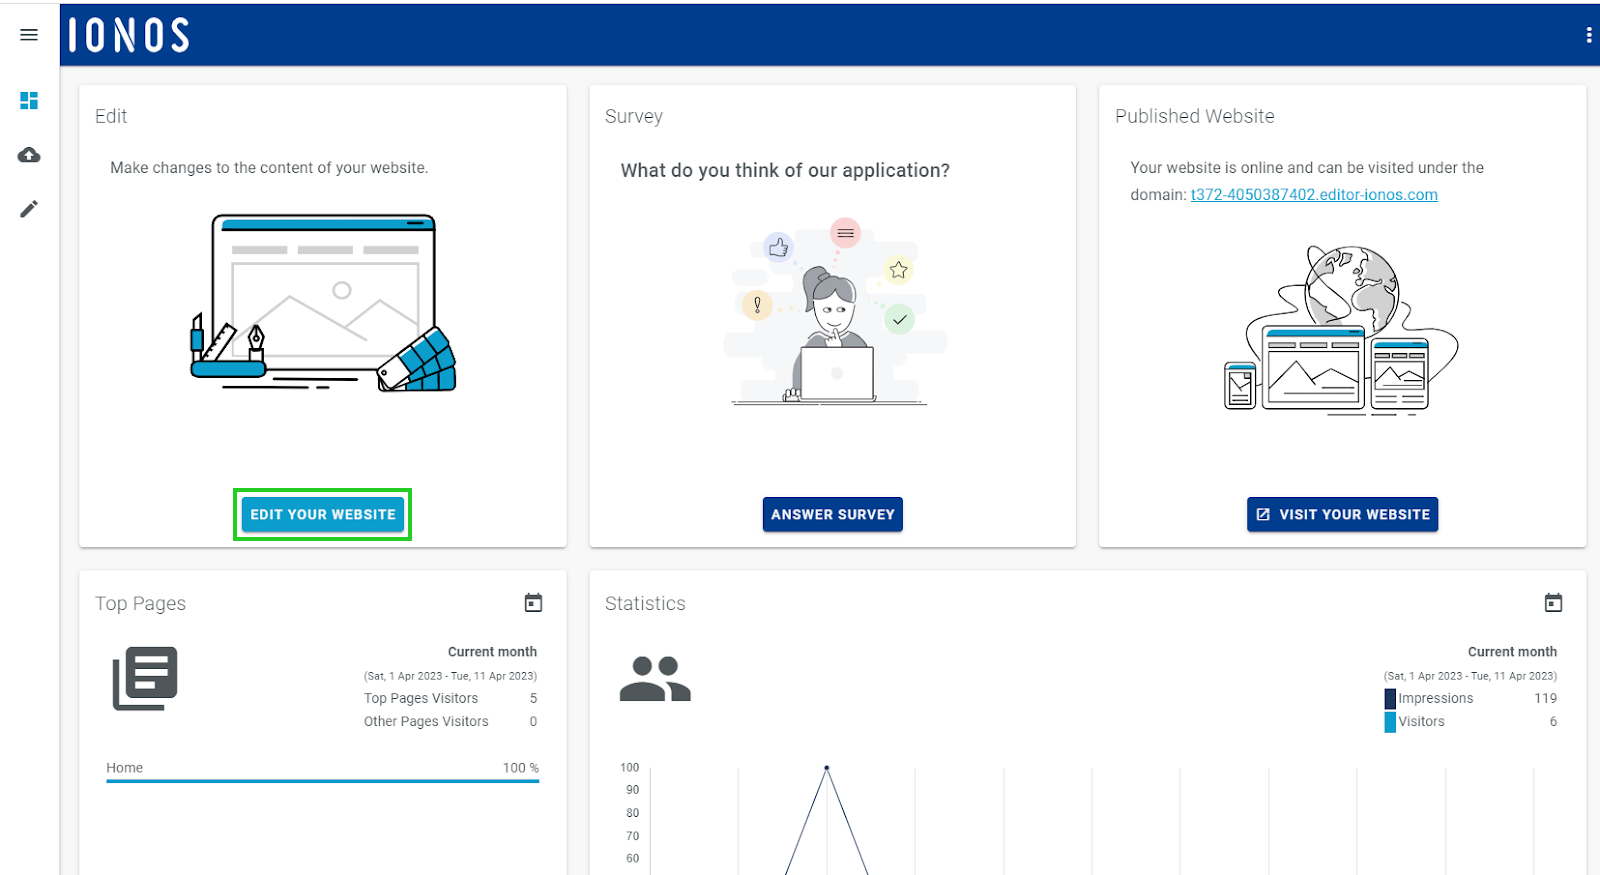
Click Edit your website.

The CoOperator opens in a new window.
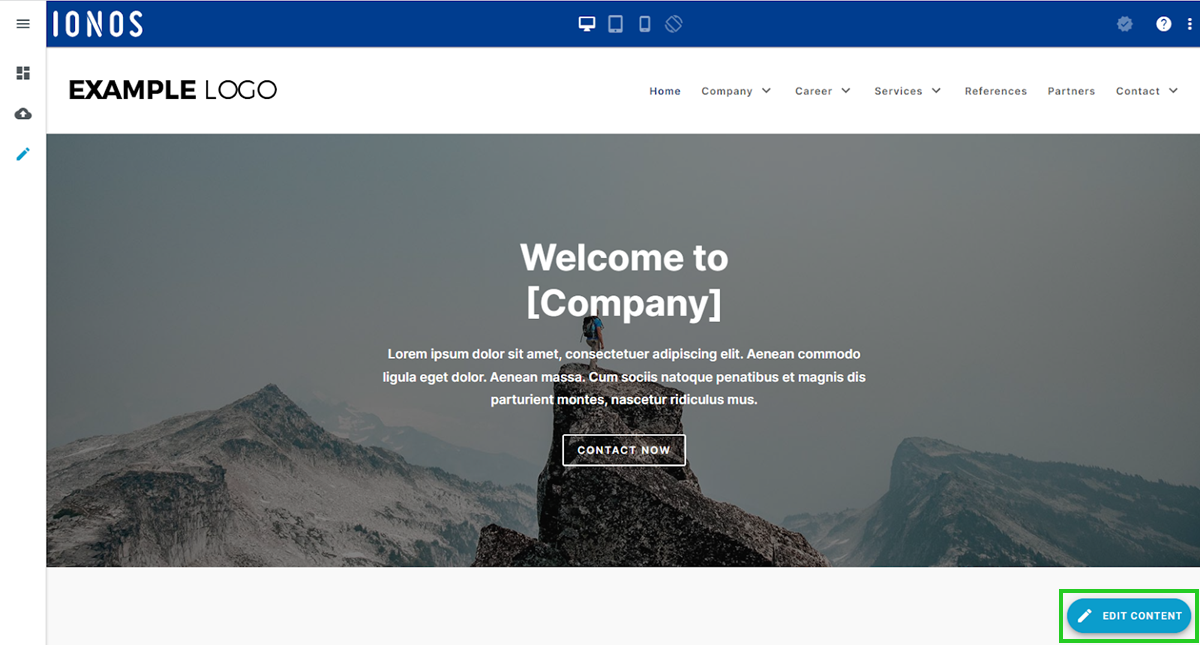
Select the pencil icon tab in the navigation bar on the left. Your website will be displayed in the details window.
Click the Edit Content button at the bottom-right corner of the screen to activate editing mode for the displayed page.

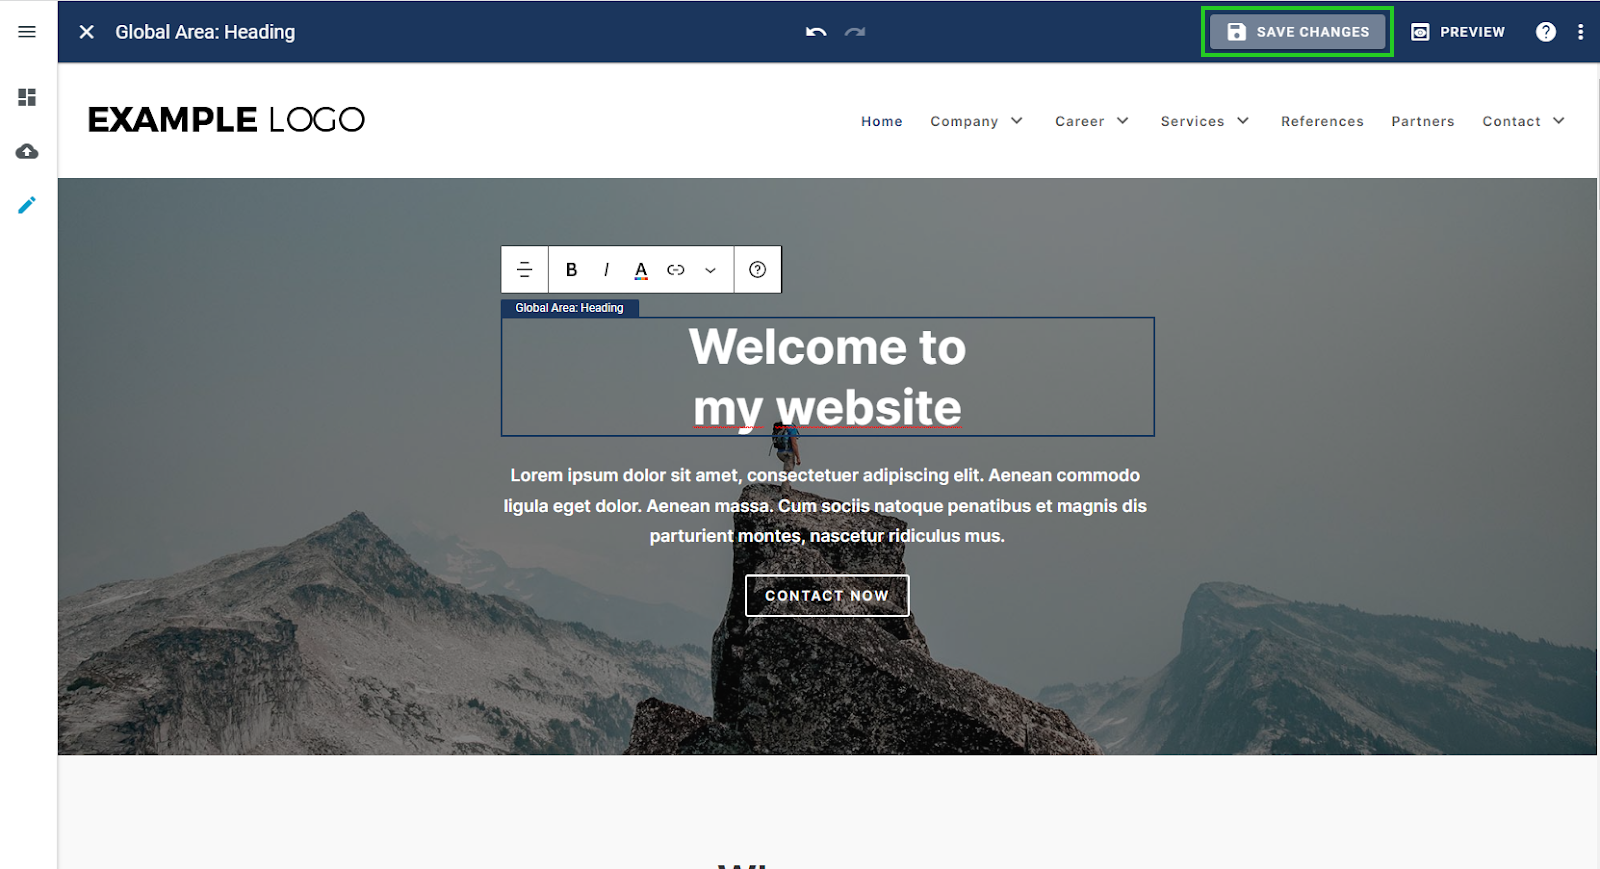
Click on the desired text field and change the content.
Note
To undo changes, click the left-pointing arrow icon at the top of the light blue menu bar.
Finalize your changes on the page using the Save changes button.

Click Preview to check the appearance of the page on different devices. This step is mandatory to finalize your changes.
Enable your changes with the Publish button. Only then will your changes be visible to your website's visitors.
Problems with using the Text Editor
The following scenarios may prevent the use of the text editor:
Function not enabled: The text editor feature must be unlocked by the Website Design team, which is done during the acceptance meeting. If this has not been done, please contact us.
Website is being edited: While the Website Design team is working on your website, you cannot make changes manually.