Installing the Cyber Protection Agent (Mac)
Please use the “Print” function at the bottom of the page to create a PDF.
For the Cloud Backup and MyDefender features
This article describes how to install the Cyber Protection Agent on a Mac.
To create backups of computers running macOS, you need to install Acronis Cyber Protection Agent on these devices.
To download and install Cyber Protection Agent, follow the steps below:
Prerequisite
You have activated a backup package in the Cloud Panel.
Log in to your IONOS account using the device on which you want to install the Cyber Protection Agent.
If you have both MyDefender and a server contract, click on the Server & Cloud tile. Select the desired MyDefender contract. The Backup Console opens and the Add Device window appears.
If you only have MyDefender but no server, simply click on the MyDefender tile. The Backup Console opens and the Add Device window appears.
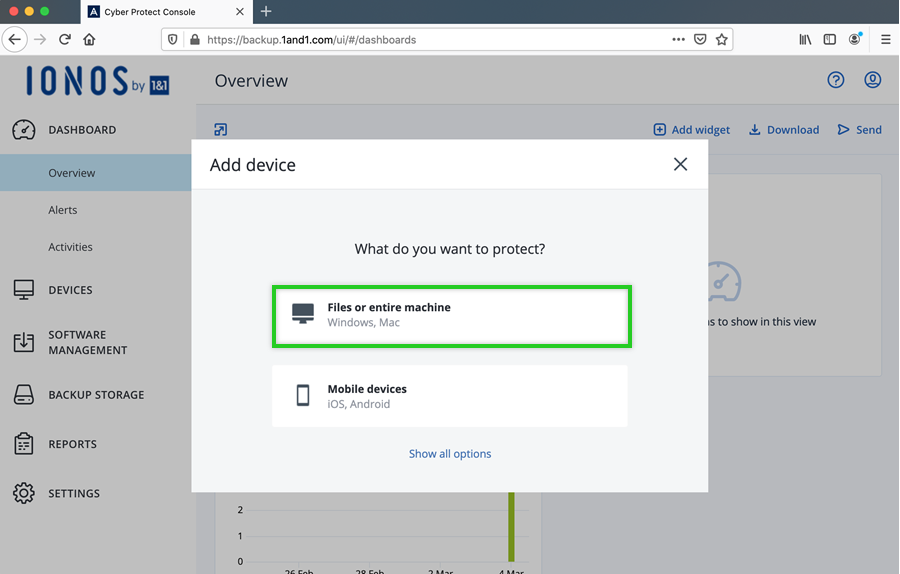
To add a computer running the macOS operating system, click Files or Entire Machine.
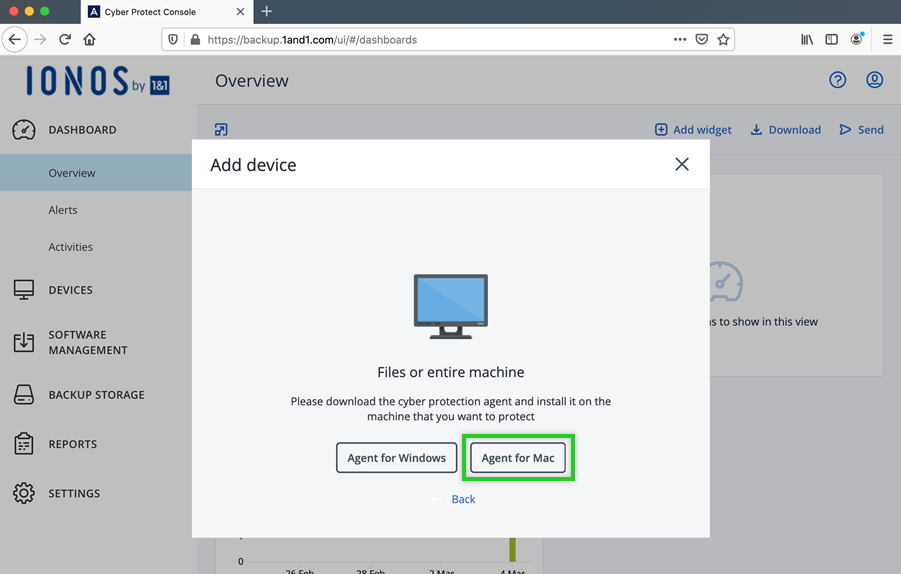
Then, click Agent for Mac.
The Open Cyber_Protection_Agent_for_MAC_x6 window opens.
In the Open Cyber_Protection_Agent_for_MAC_x6 window, click OK.
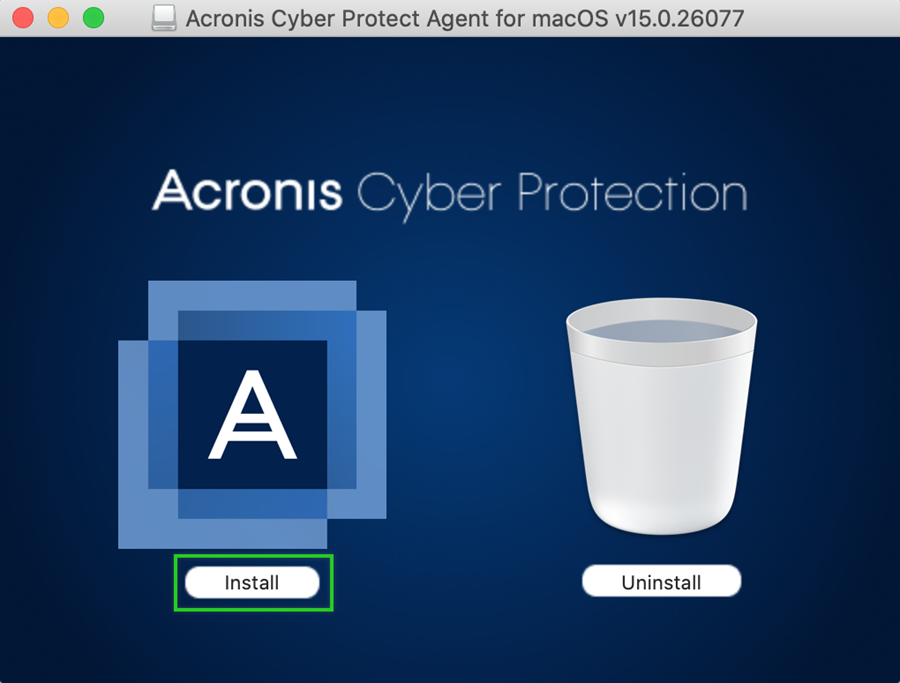
The Cyber Protect Agent installation file will now be downloaded, and the Acronis Cyber Protect Agent for macOS window will open. This process may take between a moment to a few minutes depending on your Internet connection.
Double-click Install.
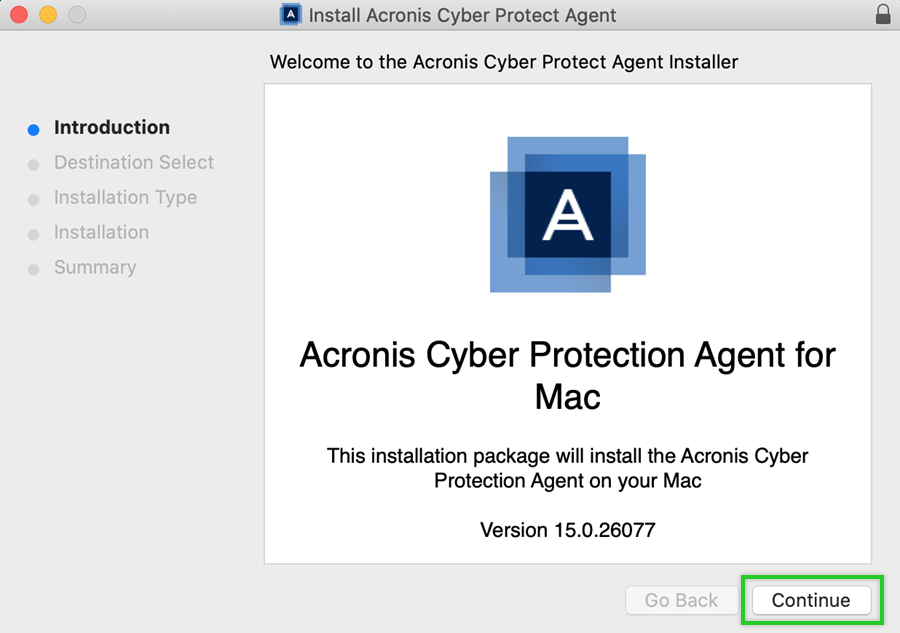
The Install Acronis Cyber Protection window opens.
Click Continue.
Click Install.
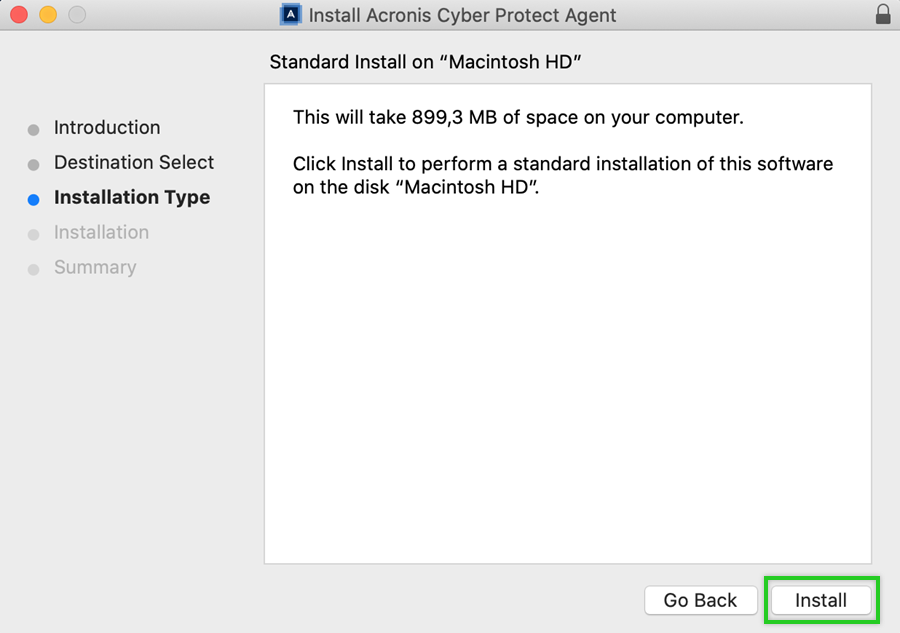
Enter the username and password of the administrator account and click Install Software.
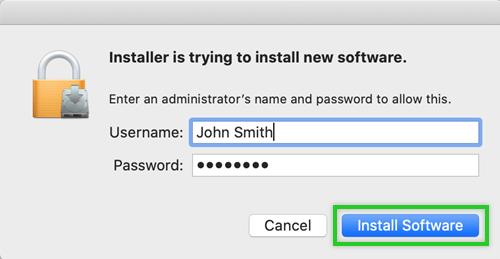
The software is installed. Then the Acronis Cyber Protect Agent window opens.
Click Register the machine.
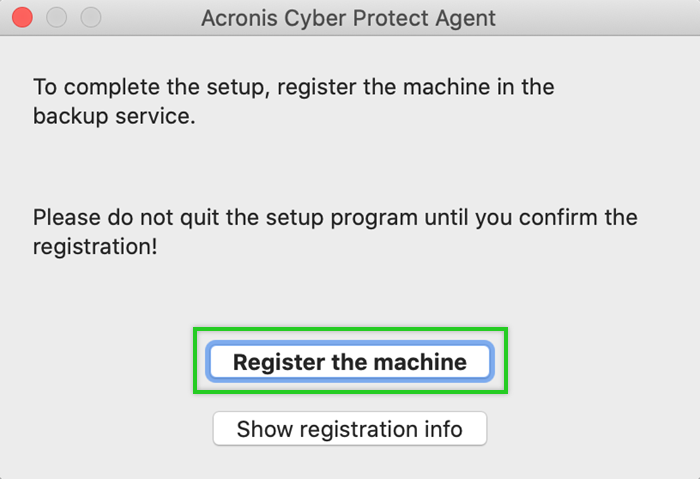
The backup console opens.
Click on CONFIRM REGISTRATION.
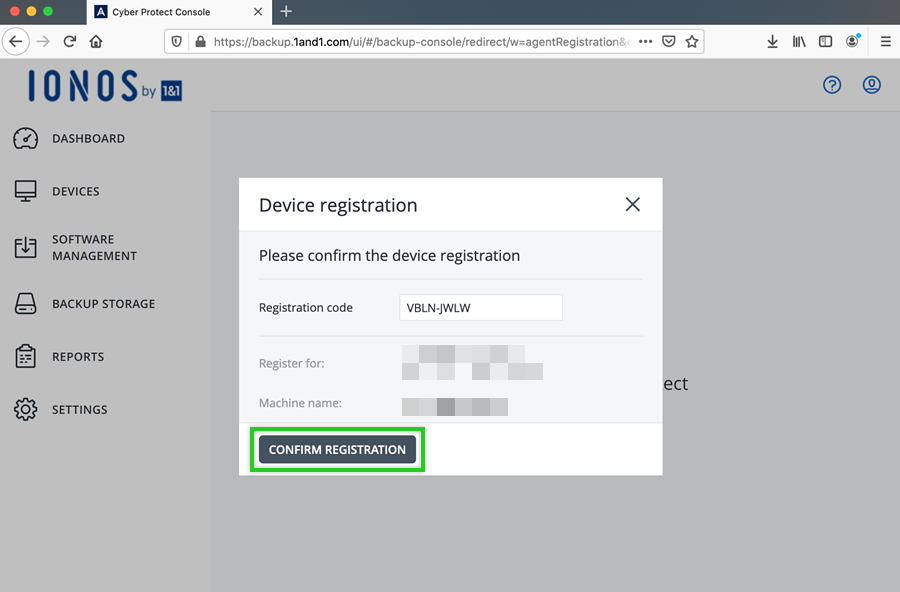
Click OK.
Optional: Depending on your Mac's security settings, the message below may open in a new window. If you see this message, click Open Security & Privacy and follow additional steps 14 - 19. If you do not see this message, you can skip steps 14 - 19.
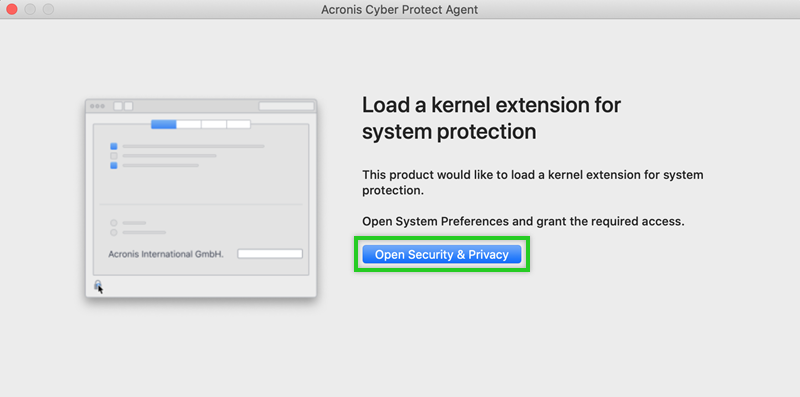
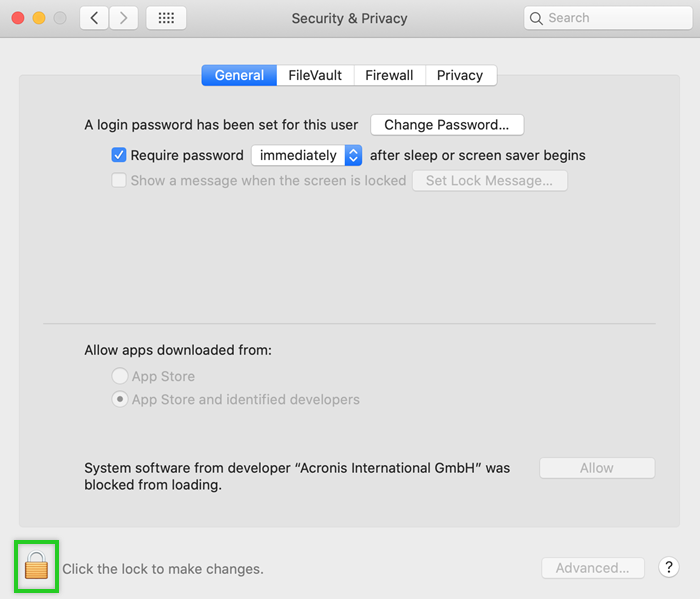
Click the lock icon in the Security & Privacy window.
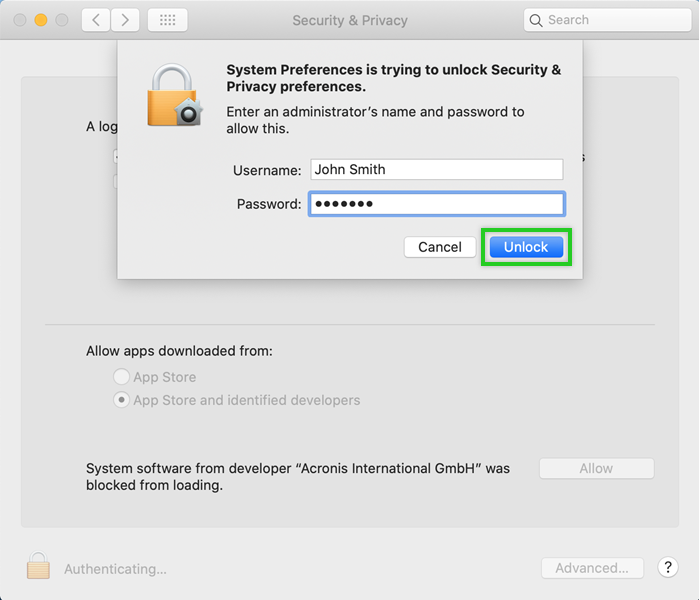
Enter the password of the administrator account.
Click Unlock.
In the Security & Privacy window, click on the Privacy tab. If the window is not open, click System Preferences > Security, and then select Privacy.
In the menu on the left, scroll down and select the Full Disk Access menu item.
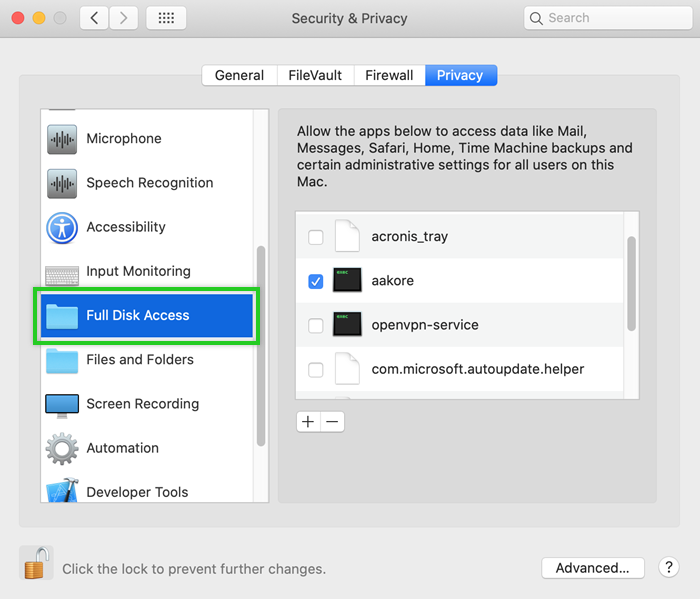
Switch to the Acronis Cyber Protect Agent window, and drag and drop the application icon to the table displayed in the Security & Privacy window to the right of the Full Disk Access menu item. The Cyber Protect service will then be displayed.
Click the lock icon at the bottom-left corner, and close the Security & Privacy window.
Switch to the Install Acronis Cyber Protect Agent window and click Close.
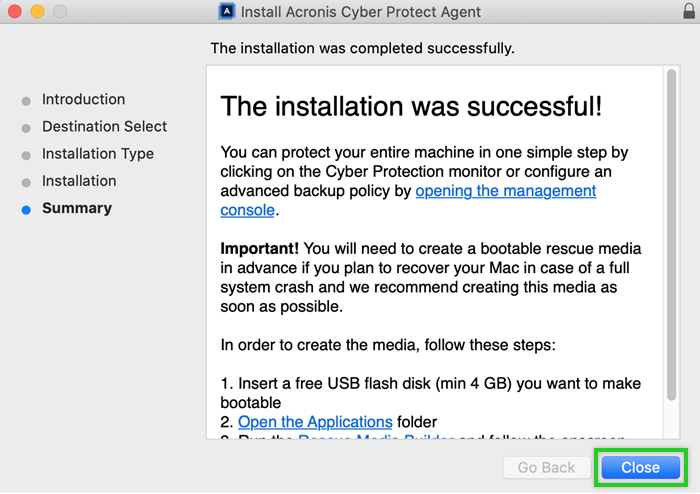
The Acronis Cyber Protection Agent has now been successfully installed.