Cron Job Manager
Please use the “Print” function at the bottom of the page to create a PDF.
For Web Hosting (Packages from 22.03.2017 and later)and Managed Dedicated Server (Packages from 22.03.2017 and later)
This article describes the management of cronjobs within your IONOS account.
What is a Cronjob?
A cronjob is a task that is automatically executed on a recurring basis at a predefined time or time interval. The term comes from the process "cron", which is used on Unix-based operating systems such as Linux and macOS to schedule and execute these periodic tasks.
Typical applications of cron jobs in hosting are, for example, the regular backup of a database, the deletion of temporary files to free up storage space or the regular call of maintenance scripts, such as wp-cron.php for WordPress websites.
Special Features of the Cronjobs That You Set up in the IONOS Account
If you set up a cronjob in your IONOS account, this is executed as a web service. This limits the possible applications to time-controlled calls of domains (URLs). A typical application is calling a maintenance script to maintain a website, e.g. for WordPress websites.
The following also applies:
- Up to 500 cronjobs can be created per hosting contract via the cronjob administration.
- Each cronjob can last a maximum of 60 seconds per call.
- To protect the integrity of our platform and in line with the fair use policy, cronjobs are cancelled after 60 seconds unless they are completed earlier.
Calling up the Cronjob Administration
- Log in to your IONOS account account.
- In the main navigation at the top left, click on Menu and then on Hosting. If you have several hosting contracts, select the desired contract.
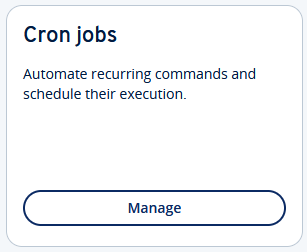
The Hosting page will be displayed. - Click on Manage in the Cronjobs tile. If a cronjob does not yet exist, you are automatically redirected to the Create cronjob page and can start creating it immediately. Further information can be found in the section "Create cronjob".

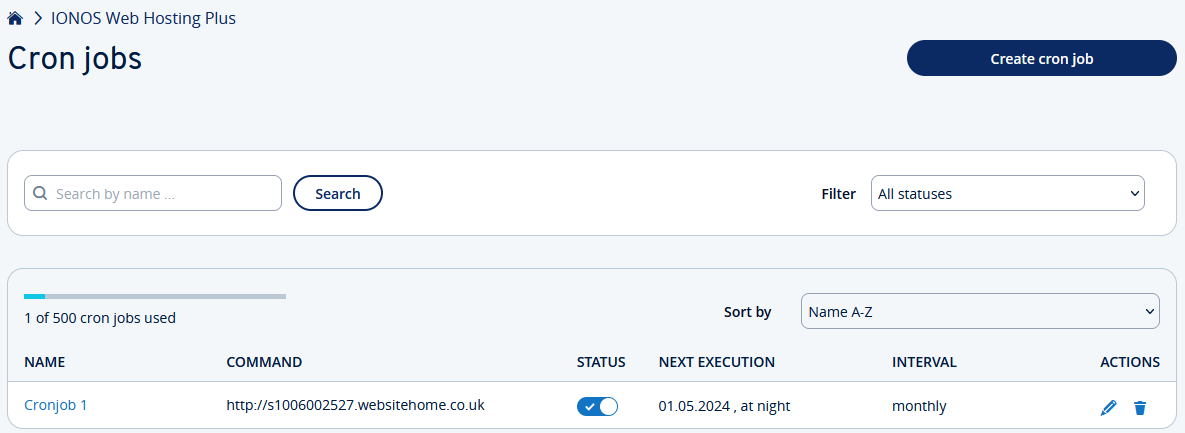
As soon as you have created a cronjob, the Cronjobs page will be displayed. Here you can create, edit, activate/deactivate and deletecronjobs.

Create Cronjob
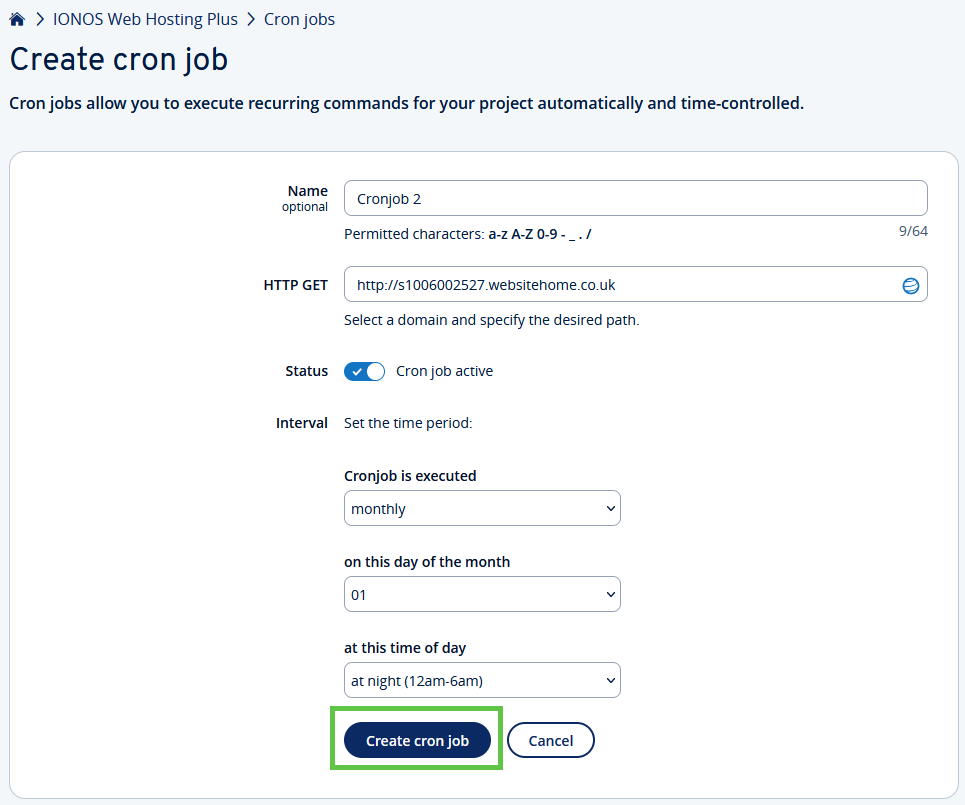
- Click on Create cronjob.
- In the Name field, enter the name under which you would like to manage the cronjob.
- In the HTTP GET field, enter the URL to the script file that is to be called up. If you click on the world symbol at the end of the field, you will receive a selection of the domains that are included in your contract.
Example URL: https://example.com/wp-cron.php - Optional: Use the Status switch to specify whether the cronjob should be activated immediately or not. The default setting is Cronjob active. You can change the status at any time.
- In the Interval area, specify the time at which the cronjob should be executed. You can choose whether the cronjob should be executed monthly, weekly or daily. Depending on your selection, further options are displayed for a more precise definition.
- When you are finished, click on Create cronjob.

The cronjob will be created. You can edit cronjobs at any time.
Edit cronjob
- In the overview, click on the name of the cronjob that you want to edit. Alternatively, click on the pencil icon at the end of the line of the cronjob.

- Adjust the desired settings.
- When you are finished, click on Save.
Activate or Deactivate Cronjob
You can switch existing cronjobs on and off at any time by using the switch in the Status column. A newly activated cronjob is executed at the next possible time.

Delete Cronjob
To delete a cronjob, click on the recycle bin symbol next to the cronjob in the overview and confirm the deletion.

Create Cronjob for WordPress (wp-cron.php)
If you run a WordPress website, you can create a cronjob to call the wp-cron.php script at user-defined intervals. This script is used by WordPress to maintain your website. For example, to automatically update themes or plugins.
<meta>Enter the URL according to the following scheme when creating the cron job: https://ihre-domain.tld/wp-cron.php
Example: https://example.com/wp-cron.php
Create Cronjobs With Extended Functions (password protection, e-mail report ... )
If you want to create a cronjob that goes beyond the functionality of the IONOS account, you can create a server-side cronjob on your webspace.
Server-side cronjobs run on the hosting platform and independently of the cronjobs that you create in the IONOS account. However, basic knowledge of the Linux shell is recommended.
Server-side cronjobs also enable, among other things
- the call of password-protected pages/scripts.
- The specification of an e-mail address for receiving messages and errors that occur during the execution of cronjobs.
- Execution of scripts at operating system level instead of via the web server.
Content
- What is a Cronjob?
- Special Features of the Cronjobs That You Set up in the IONOS Account
- Calling up the Cronjob Administration
- Create Cronjob
- Edit cronjob
- Activate or Deactivate Cronjob
- Delete Cronjob
- Create Cronjob for WordPress (wp-cron.php)
- Create Cronjobs With Extended Functions (password protection, e-mail report ... )
- To top