How to import Bookmarks in Safari
Browser choices are often based on personal taste – however, the default web clients pre-installed on a device have a good chance of winning users over. Safari is a default web client, the pre-installed standard browser for the many users of iPhones, MacBooks, and other Apple products.
Like many competing products, Apple’s browser also lets you import bookmarks from other clients or other installations. Theoretically, that functionality gives you access to all of your favorites on Safari – no matter which application or device you saved them on. In the following sections, we tell you what you need to do to import bookmarks in Safari.
Safari: Quick guide to importing bookmarks
There are two different ways to import bookmarks in Safari. If the browser currently containing your favorites is also installed on the system, it is easy to synchronize them with Apple’s program. Among other options, you can also set Safari to import all bookmarks. Alternatively, you can add favorites you have backed up in an HTML bookmark file. The guide below briefly summarizes the import process for both options:
- Open Safari.
- In the menu bar at the top, click the “File” menu.
- Select “Import From” and click either the browser of your choice for synchronization or “Bookmarks HTML file”.
- If you choose synchronization, select the “Bookmarks” checkbox in the following dialog and then click “Import”.
- If you choose to import from a bookmarks file, navigate to the file location in the following window, left-click to select and then click “Import”.
You can generate the above-mentioned bookmarks HTML file by exporting the favorites stored in a browser. To learn how to do that in Apple’s browser, read our article on exporting bookmarks in Safari.
Step-by-step guide: How to import bookmarks into Safari
Reasons for wanting to import bookmarks into Safari can vary: For example, you may have used another browser until now and want to switch to Apple’s program now or want to use Safari on another device now. Finally, you may have had to re-install the application and want to restore your bookmarks (if you backed them up beforehand).
These reasons are important for the import process, as they mean you can either use the synchronization option or that you require a HTML document. The following step-by-step tutorial highlights the individual phases of the Safari bookmark import process in more detail than the above quick guide.
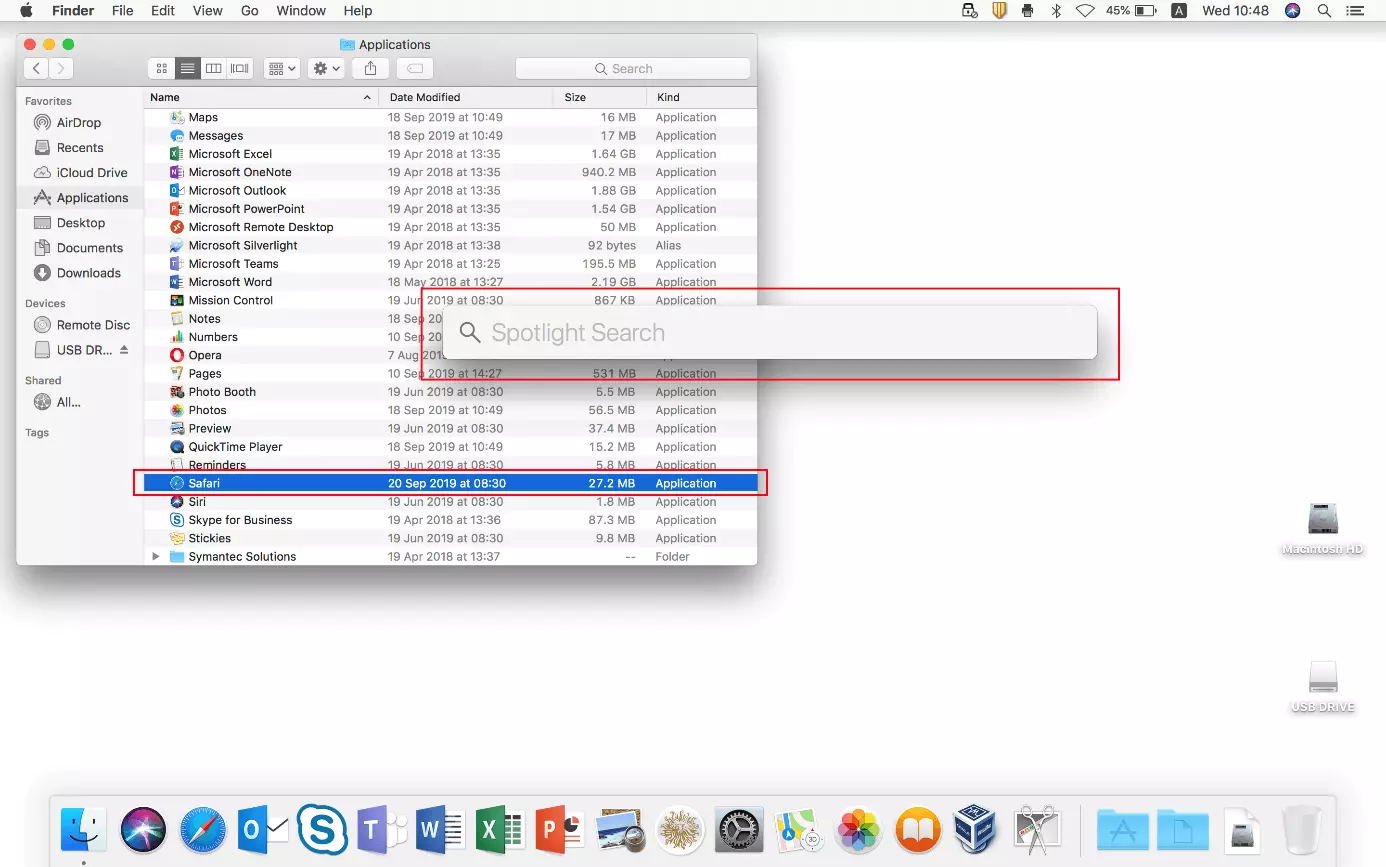
First, open the browser by clicking the Safari icon in the Dock or launch the app from the Finder or the Spotlight search:
If you have installed a different browser that supports importing Safari bookmarks via synchronization, it will be shown here as an alternative to the “Bookmarks HTML File” option (in the above screenshot: Firefox). If you want to use this option, click the browser name and select the items to be included in the import in the following dialog box – in addition to bookmarks, you can also choose the browser history and saved passwords. Finally, click the “Import” button:
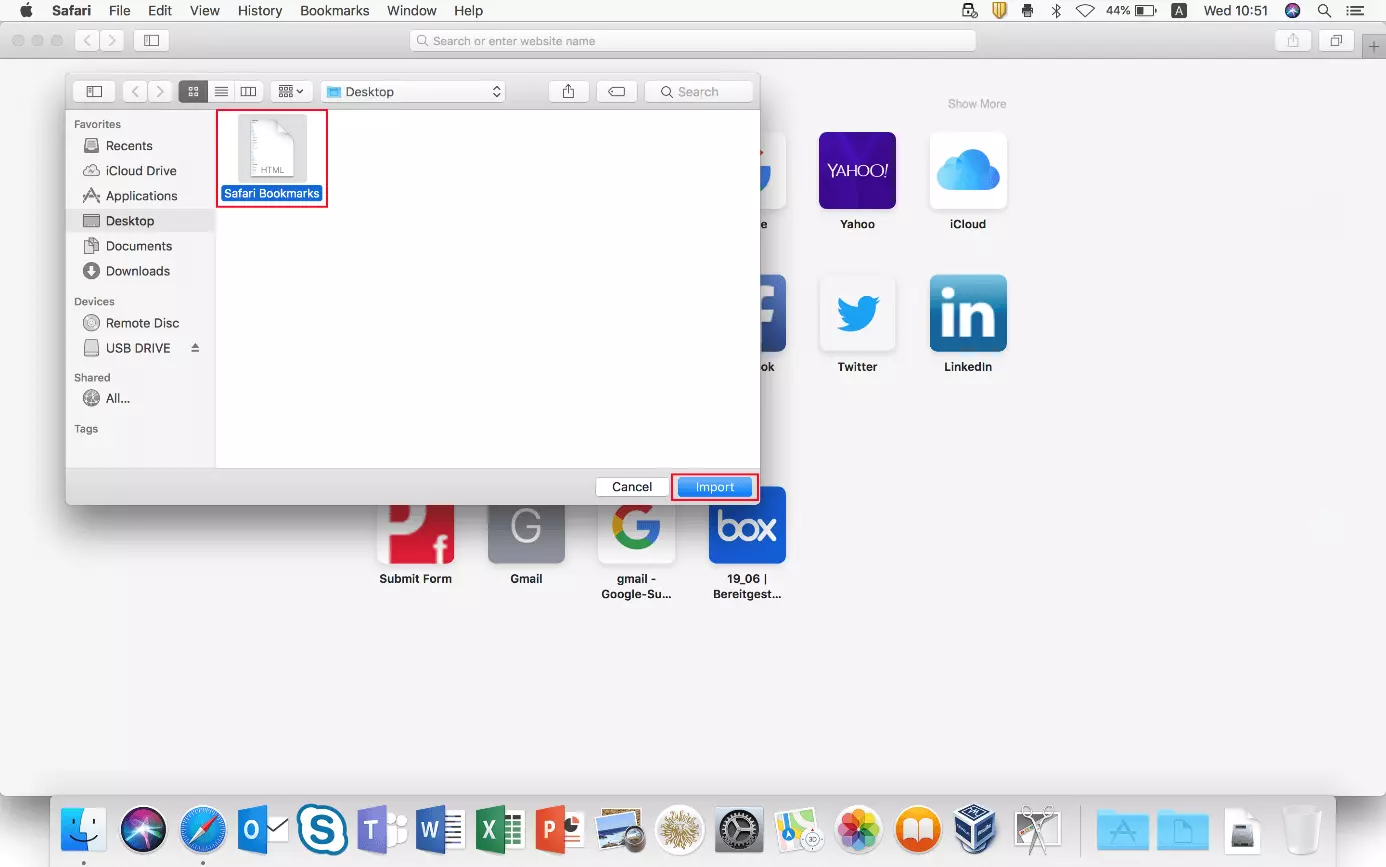
If you need to import from a bookmarks file because the source browser is installed on another device and is not shown as a result, or because you re-installed Safari, first click “Bookmarks HTML File” and then navigate to the storage location of your Favorites document. Click the file and then the left-click the “Import” button to import the bookmarks in the file in Safari:
How to import bookmarks into Safari on iOS devices
If you use the Apple browser on an iPhone or iPad, the import process is different. However, you can import bookmarks into Safari on these devices by backing them up to your iCloud account in advance and activating synchronization between the online storage and Safari. To do that, you just have to take the following steps:
- Open “Settings” by tapping the button of the same name.
- Tap on your Apple account (“Apple ID, iCloud, iTunes & App Store”).
- Select “iCloud”.
- Move the “Safari” slider to the right.


