Microsoft Edge: How to uninstall the web browser
Removing Microsoft Edge from your PC is not that easy. However, there are several ways to do it. You can uninstall Edge from the Start menu which will remove it from the Taskbar. The standard Windows uninstall option or Windows PowerShell are other methods to uninstall Microsoft Edge. You can prevent Edge from being reinstalled through a Windows update manually or by using a Blocker Toolkit. We will show you how to set this up.
Different options to remove Microsoft Edge
Several browsers such as Firefox or Opera GX can be installed by the user. Microsoft Edge, on the other hand, is the default web browser that comes pre-installed with Windows. Uninstalling Microsoft Edge is more difficult than you might expect. However, there are several ways to remove the browser from your computer. But before you get started, keep in mind that it is generally not recommended to uninstall Edge as this app is deeply integrated into the system.
If you prefer to stay on the safe side, it is recommended to just change the default browser and not uninstall Edge.
How to uninstall Edge from Start menu and remove it from the Taskbar
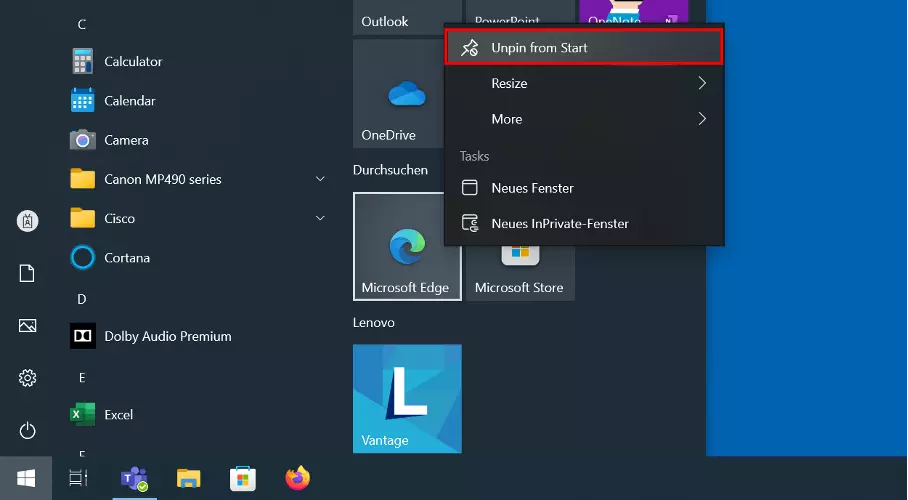
There is a simple way to uninstall Edge from the Start menu and remove it from the taskbar. All you need to do is right-click the Edge icon and select “Unpin from Taskbar”. If you click on the Windows icon in the bottom left corner, you can right-click on the Edge tile to select it. Then click “Unpin from Start”.
Uninstall Microsoft Edge: Step-by-step guide
The Edge browser has become a core component of Windows, as it is deeply integrated into Microsoft’s operating system. An uninstall option is usually not offered. Therefore, you might encounter system compatibility issues if you remove Microsoft’s web browser.
Successfully removing Microsoft Edge may depend on which version is installed on your computer. The two version are known as Chromium and Legacy. There are several options to complete the uninstallation, which we will present to you below.
Don’t forget to export Edge bookmarks before you uninstall Microsoft Edge to avoid losing them.
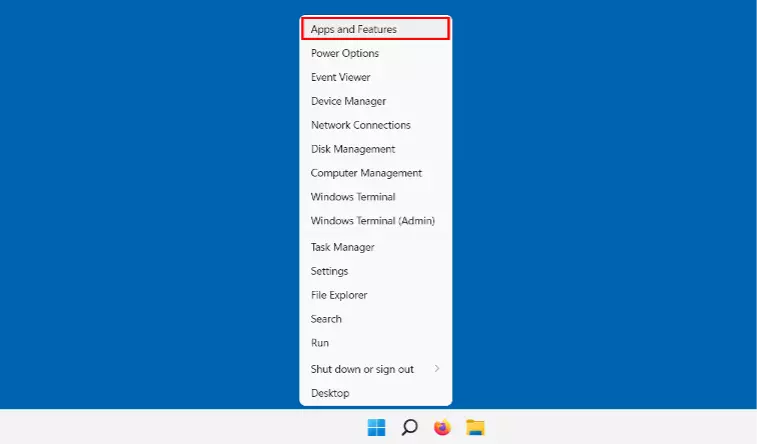
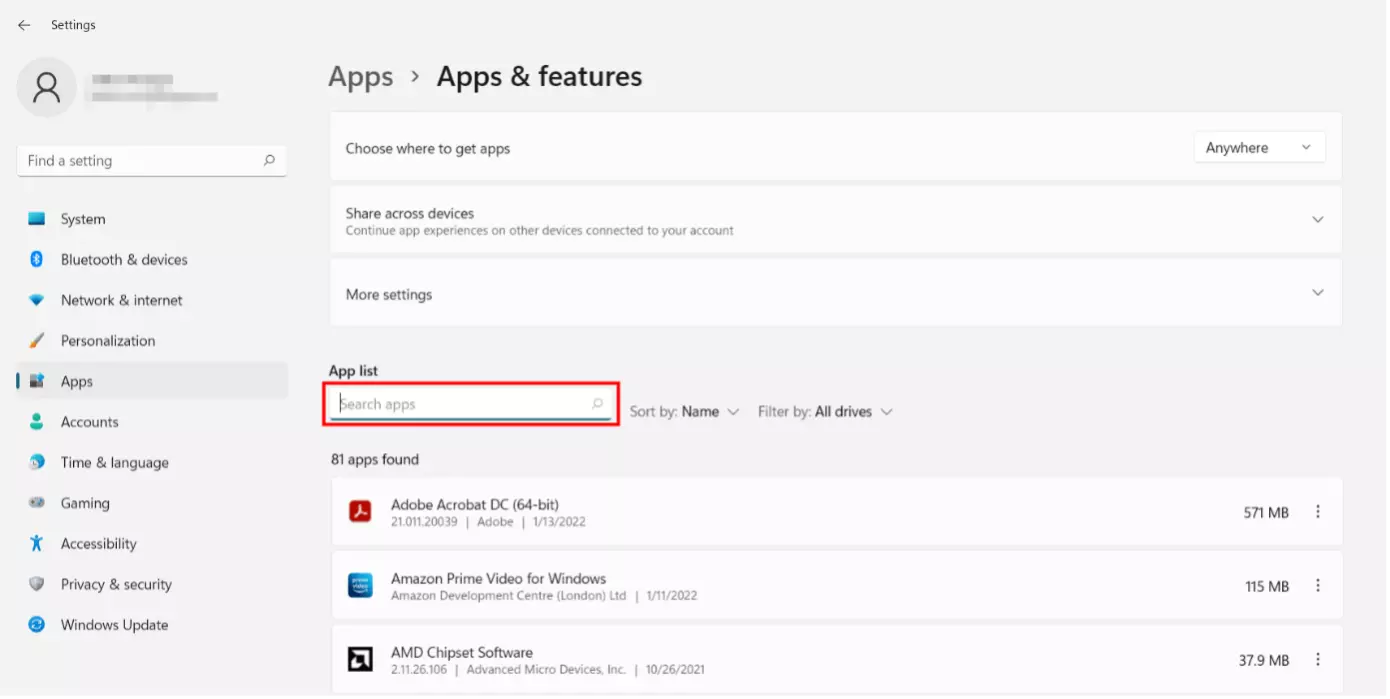
Remove Microsoft Edge: About the list of installed programs
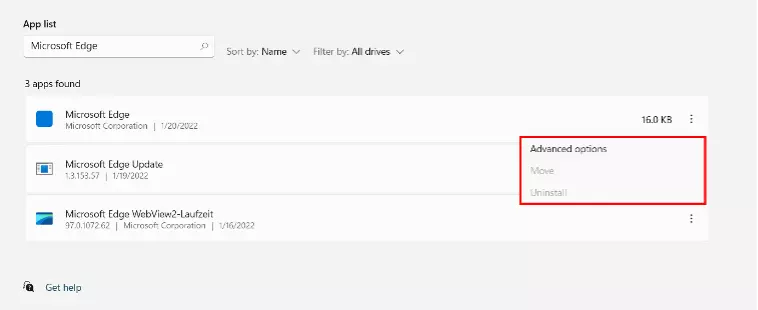
Step 3: You can proceed with the Windows uninstallation if the “Uninstall” option appears. However, if the “Uninstall” button is grayed out, it means that you do not have the Chromium version of Edge. In this case, this option is not available to permanently remove Microsoft Edge on your device with this method.
However, there is another way to permanently uninstall Microsoft Edge from your computer.
Remove Microsoft Edge: With Windows PowerShell
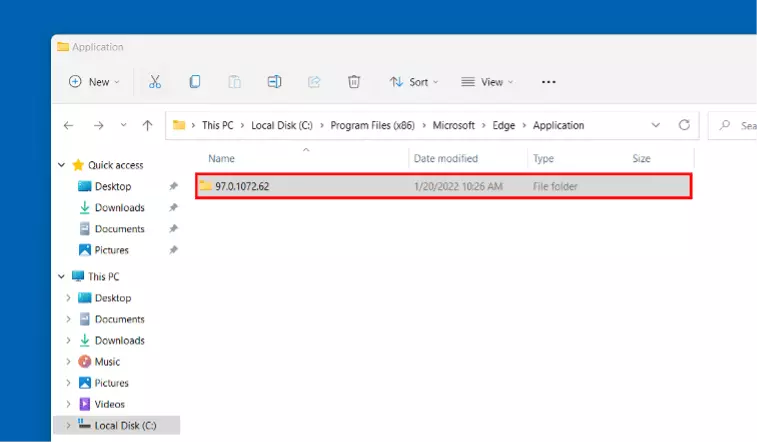
Run a Windows PowerShell command from the Edge installation folder to permanently uninstall Microsoft Edge.
The following method only works after the May 2021 Windows Cumulative Update KB5003173.
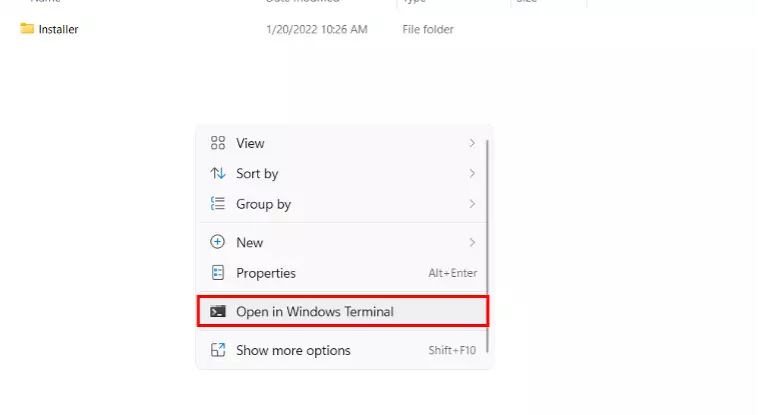
Step 3: The PowerShell window will open. Enter the following command:
The User Account Control will request confirmation. Click the “Yes” button to complete this action. The Microsoft Edge browser will now be uninstalled.
How to uninstall Microsoft Edge permanently
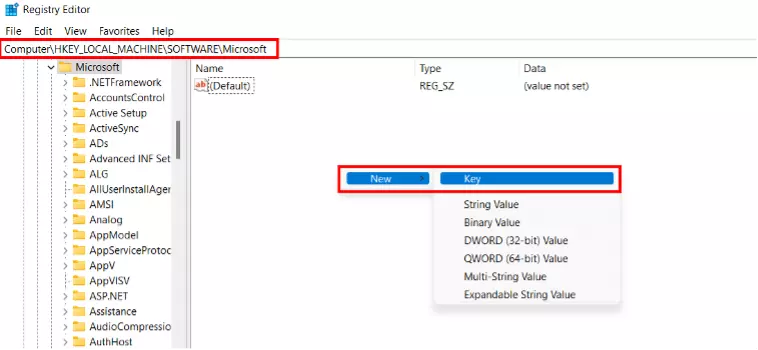
Microsoft may continue to reinstall Edge to your computer through Windows’ updates. Follow the steps below to prevent Windows from reinstalling Edge on your computer during the next update. You can also use Microsoft Edge Chromium Blocker Toolkit, which you can find on the web. It sets a Registry Key with a new value. You can also do this without downloading anything with the following instructions.
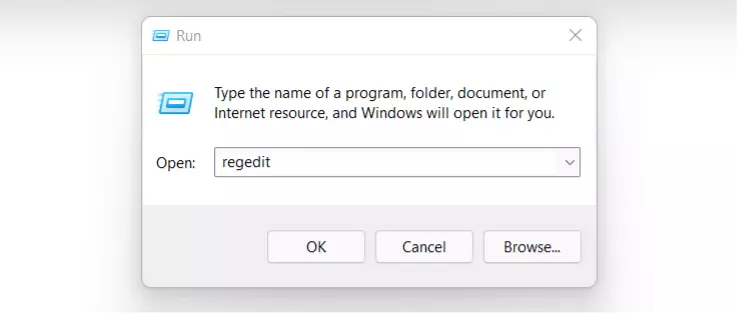
Step 1: Firstly, open the Registry Editor. Pressing [Windows] + [R] to open the “Run” window. Enter the command “regedit.exe” and press [Enter].
Caution! Changes to the Windows Registry Editor should only be made by experienced users. Errors in changing the Registry Editor can have consequences for your system and possibly damage it!
Step 4: The DWORD has the value “0” by default. You can change this by double-clicking on the value name and entering the value “1” in the editing window. Then confirm with “OK”.
This prevents automatic preparation and reinstallation of Microsoft Edge on your computer.
If you later decide to use the browser again, you can simply download Edge from the Microsoft website and install it manually.


