How to set up VPN in Windows 10
In just a few simple steps you can set up a virtual private network (VPN) in Windows 10. By setting up a VPN connection, you can access a business or home network in encrypted form. A VPN connection is secure and anonymous and protects data from unapproved access.
- Simple registration
- Premium TLDs at great prices
- 24/7 personal consultant included
- Free privacy protection for eligible domains
Quick tutorial: set up VPN under Windows 10
- Launch “Settings” in [Windows] + [I].
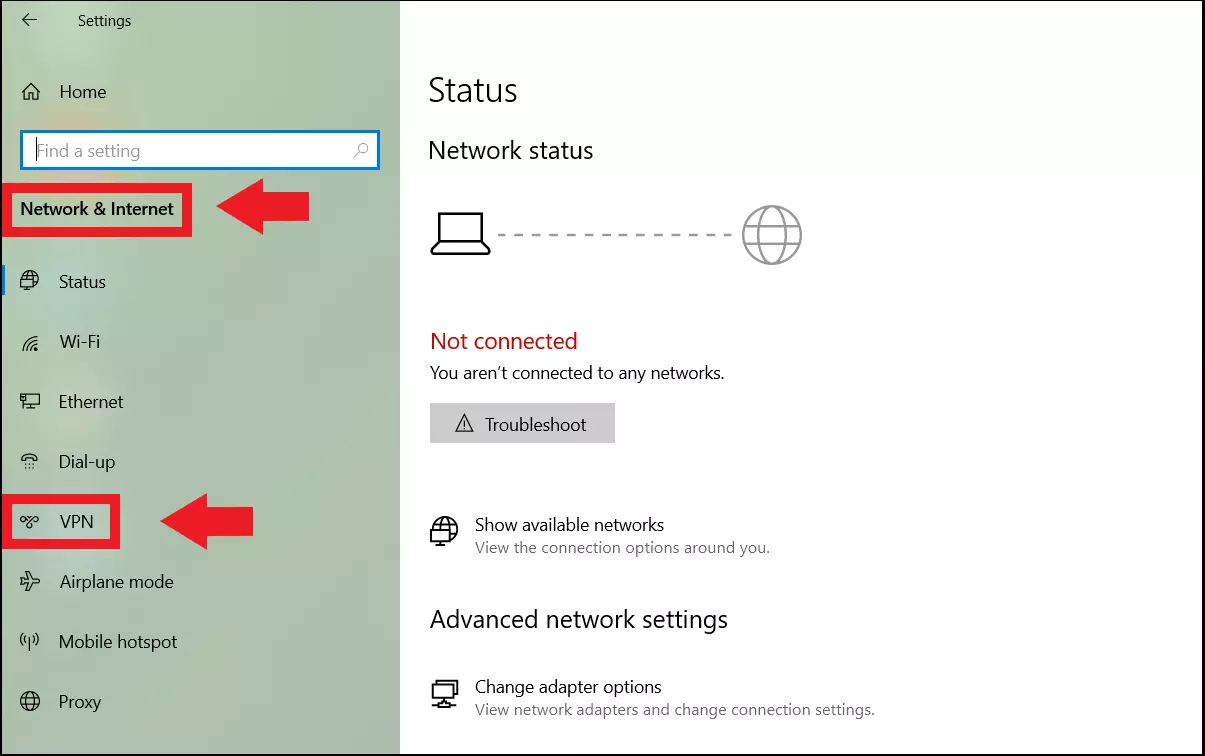
- Go to “Network & Internet”.
- Click on “VPN” to the left.
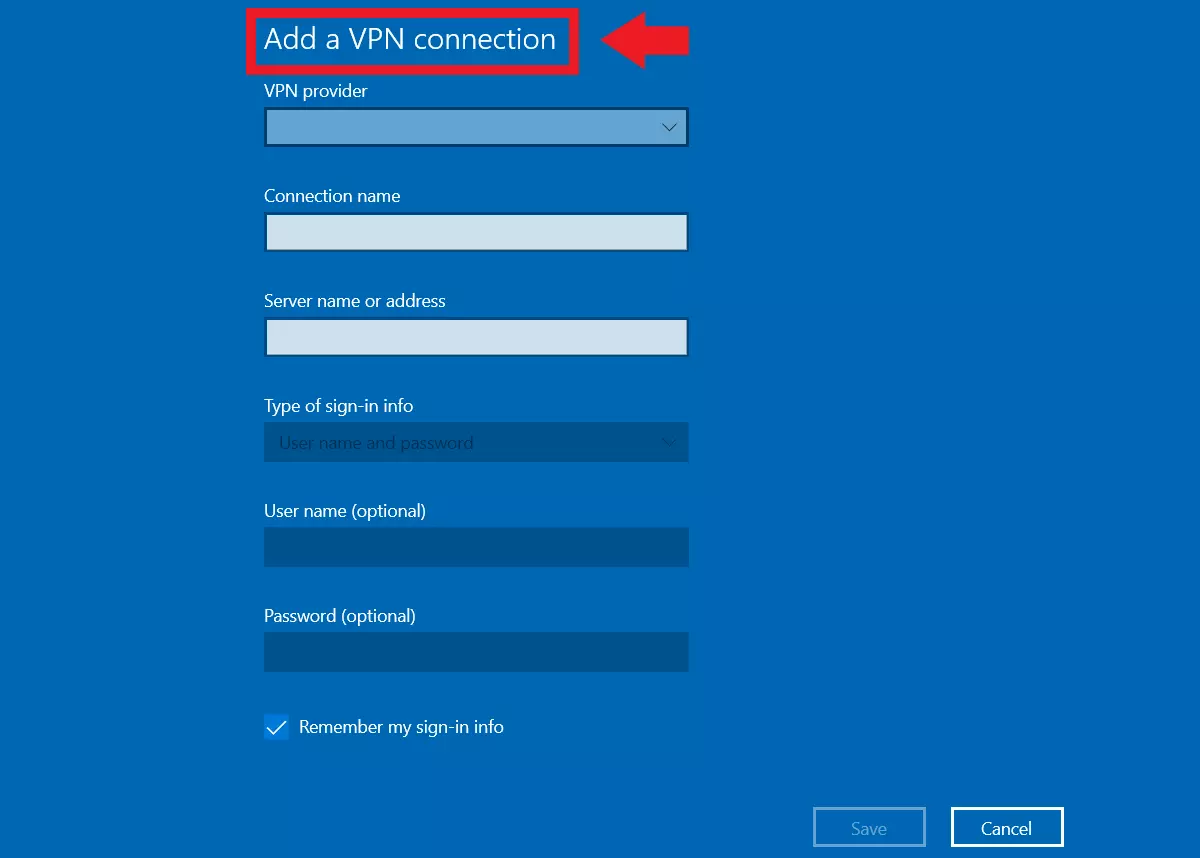
- Select “Add VPN connection”.
- Enter the VPN name, connection details (server or IP), and where necessary your login information in the VPN menu.
- Click on “Save”.
What does VPN mean for Windows 10?
VPN stands for “Virtual Private Network” and refers to a self-contained virtual network established via a physical network connection but is logically separate. In concrete terms, VPN means that you hide your IP and your real-time encrypted data via a protected tunnel and access your company or home network via another network (e.g. public Internet in a hotel or café).
If you set up a VPN connection in Windows 10, you must first distinguish between the Windows 10 VPN and a third-party VPN. You can set up a VPN in Windows 10 using a known network and use your company or home network as a VPN without being on-site. In this case, the IP address of your VPN network will be visible. A third-party VPN, on the other hand, is used to secure an anonymous connection that encrypts your data, makes you invisible to attackers, obfuscates the IP, and bypasses geolocation blocking. VPN services are usually external providers like NordVPN, CyberGhost, TunnelBear or ExpressVPN.
Setting up a VPN in Windows 10: step by step
Follow these steps to set up a VPN connection in Windows 10.
Step 1: Launch “Settings” using the Windows shortcut [Windows] + [I].
Step 2: In Settings, select “Network & Internet”.
Step 3: Click on “VPN” from the left-hand menu.
Step 4: From the VPN menu, click the plus icon to the left of “Add a VPN connection”.
Step 5: In the VPN menu enter the corresponding data for the VPN name, the necessary connection data (server name or IP address of the work or home network) and, if required, the login details such as username or password.
Step 6: Close the set up of a VPN in Windows 10 by clicking “Save”.
If you tend to use a VPN regularly, you may not be able to connect to the VPN from time to time. To fix VPN issues pay attention to common reasons such as missing computer updates, disabled VPN when roaming or timed connections and ports blocked by virus scanners or firewalls.
Advantages of a VPN connection via Windows 10
The main advantage of a VPN connection in Windows 10 is privacy. When you’re on the road but require access to your business or home network, simply dial into the network via an Internet connection as a VPN client. Unlike external VPN services, your IP remains traceable, but you can access familiar computers or the company network from a distance.
At the same time, you can use your computer as a VPN server and remotely dial into a computer or give other users permission to do so. You can also turn your home router into a VPN server and use it while on the road.


