Terraria: How to create and your own server
In May 2011, a team of four developers using the name Re-Logic released the first version of the sandbox game Terraria for Windows users on Steam. Ten years later, the game is also available for Linux and Mac, PlayStation, XboX, iOS, Android, and Nintendo devices. If you want to explore the randomly generated game world with other players, it’s best to create your own Terraria server. Find out how this works in this guide and why rented hardware is the best solution.
Thanks to free starting credit, you can test the IONOS cloud server for 1 month free of charge (or until the credit is used up) and experience the perfect combination of performance and security!
Terraria server: Hosting on your own PC or with a provider?
If you want to play Terraria online with other users, you have two options. You can use the “Host & Play” feature in the Terraria client to host your own online game on your device. Other players can then join the world either with or without a password. If you quit the game, however, the server will automatically end the session. If you want to prevent this, you have to go for option number two and run Terraria’s dedicated server software. As long as this application is running, you and other players can connect to the Terraria server via the “Join via IP” item in the game client.
Theoretically, you can run a dedicated server software on your home PC as well. However, for continuously operating the Terraria server, this device would have to run around the clock, which results in high electricity costs. The maintenance of the hardware would be your responsibility, too. In addition, a stable and powerful Internet connection is essential to provide all players with the smoothest possible gaming experience. The simpler and more convenient alternative is to put Terraria server hosting in the hands of a provider who will take care of all the elementary points, such as the availability, maintenance, and performance of the Terraria server.
What are the system requirements for a Terraria server?
The hardware requirements for a Terraria server are - unsurprisingly due to the 2D look - relatively minimal. The RAM is important, though. The developers give a starting value of 512 MB for a small game world with a few players and no modifications. For larger worlds, you should have at least 1 GB or 2 GB (10 players or more) ready. If you plan to host a Terraria server for more than 50 players, however, 4 GB or more is recommended. In addition, there are the main memory requirements of the operating system - for Windows Server 2016, for example, this would be 512 MB or 2 GB of RAM (without or with graphical user interface, respectively).
CPU and hard drive space don’t really play a role in Terraria server hosting. A processor with 2 GHz should give a single server instance the necessary computing power. As far as disk space is concerned, it is sufficient to have a few gigabytes available in order to have enough space for user data in the long run. In addition, there would also be the resource requirements of the operating system in this case - so for the Windows system mentioned, which we also use in the following tutorial, an additional 32 GB of hard disk space and a 1.4 GHz processor (64-bit) would have to be planned.
The world of Terraria doesn’t strain the Internet connection as much as comparable 3D multiplayer games - nevertheless, connections in private households are often not as good as rented ones. The available upstream in particular may causes unwanted lags: Classic DSL 16,000 plans, for example, often only offer between 1 and 2 Mbit/s upload speed!
Terraria server hosting with IONOS: What are the options?
Renting resources for your own Terraria server means that you are not only much more flexible - for example, should you no longer need the server or want to shut it down temporarily, but you also save money if you don’t have to buy and maintain the hardware for your own server yourself and pay the incurred electricity bill!
The right plan for you for your server hardware varies from provider to provider. At IONOS, for example, you can choose between the following three solutions:
- vServer (Virtual Private Server, in short VPS)
- Cloud Server
- Dedicated Server
For Terraria server hosting, the first two options are recommended, both of which are based on virtualized hardware resources. The difference is that with a vServer, you rent a fixed hardware setup for a fixed monthly price, while with a Cloud Server you can ramp up or down the computing power at any time and only pay for what you actually use. A dedicated server gives you access to dedicated hardware that is reserved especially for you. For a Terraria server you don’t need this level of server, but if you are also planning other more computer-intensive game servers and want to host, for example, a Minecraft server or a Rust server, you’ll be perfectly equipped with a dedicated server.
IONOS guarantees an external broadband connection of the server with up to 400 Mbit/s - regardless of the chosen server model.
We have summarized three possible scenarios for your own Terraria server including suitable plans for vServer and dedicated server at IONOS for you:
| Recommended vServer | Recommended Dedicated Server | ||
| Small game world, 2-5 players, no modifications | Virtual Server Cloud L (VPS L) | Dedicated Server L-16 HDD | |
| Large game world, 50+ players, modifications | Virtual Server Cloud RAM M (VPS M RAM) | Dedicated Server AR6-32 HDD | |
| Large game world, 100-255 players, modifications | Virtual Server Cloud RAM L (VPS L RAM) | Dedicated Server AR6-32 HDD |
Start your Terraria server adventure today - with a fully scalable cloud server from IONOS. And if required, you can optionally register your own domain in addition easily and conveniently!
Creating a Terraria server: Step-by-Step tutorial (Windows Server)
Have you found the right solution for your Terraria server hosting? Then you can get started! In the following instructions we will show you how to set up a Terraria server based on Windows Server 2016 as an IONOS customer (vServer, Cloud Server, Dedicated Server).
Step 1: Establish remote connection to the server
The first step is to connect to the server. As an IONOS customer, you can conveniently set up the remote connection required for this via the Cloud Panel. To do this, log in with your individual information via the Login page and open the “Server & Cloud” category.
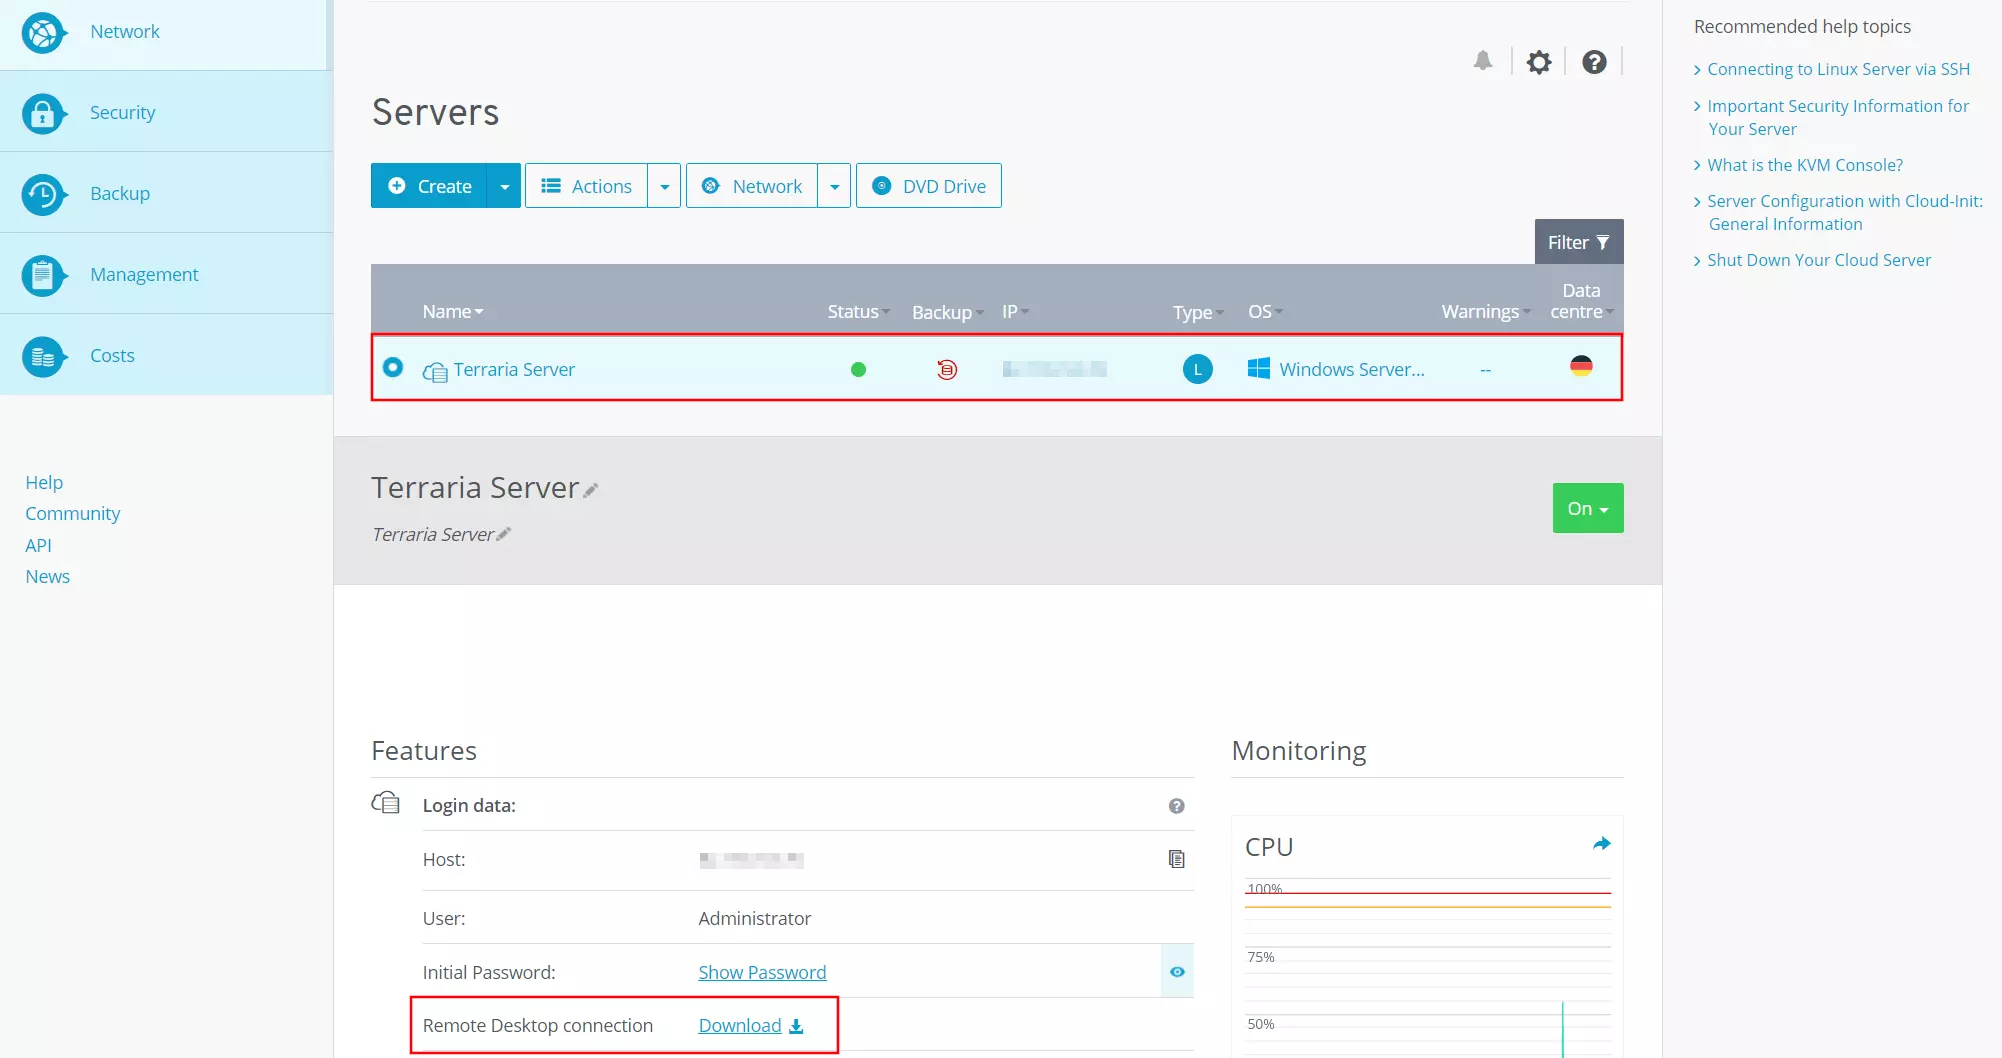
Select the server on which you would like to install the Terraria server software and click on the download link under the “Access data” heading at the “Remote Desktop connection” entry:
Confirm opening the file using the standard Remote Desktop Connection application by pressing OK. Alternatively, you can save the .rdp file locally and then double-click to launch it. To establish the connection to the Terraria server, you will now be prompted to enter your credentials. Provided you have not yet defined your own settings for the account, you will find the username and initial password in the credentials in the Cloud Panel.
The first time you connect to your Terraria server, the operating system will display a security warning. The reason for this is that the server’s security certificate is not yet trusted.
Step 2: Install Terraria server via Steam-Client
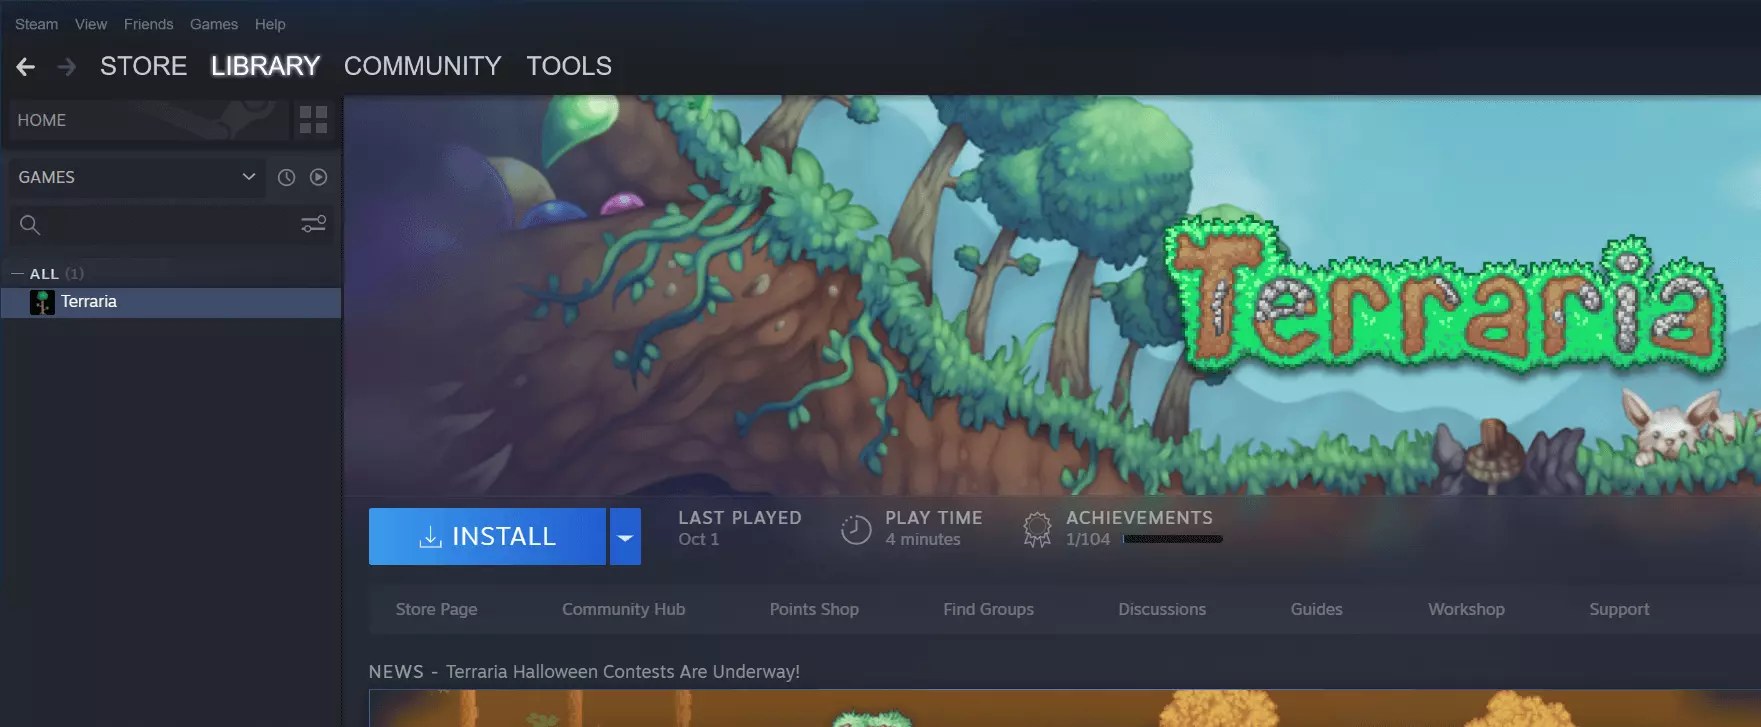
The server application for Terraria installs automatically when you install the game. We got the 2D game via Steam, where you can conveniently download the game and server from the library by clicking on the Terraria entry after purchase and starting the download via the button.
Step 3: Install Microsoft XNA Framework
If you have not already installed it on your server, the next step is to download and install the latest version of the Microsoft XNA framework. The framework contains the necessary runtime components to run a Terraria server. You can get the files for the installation directly from the Microsoft website.
Step 4: Configuration of the own Terraria server
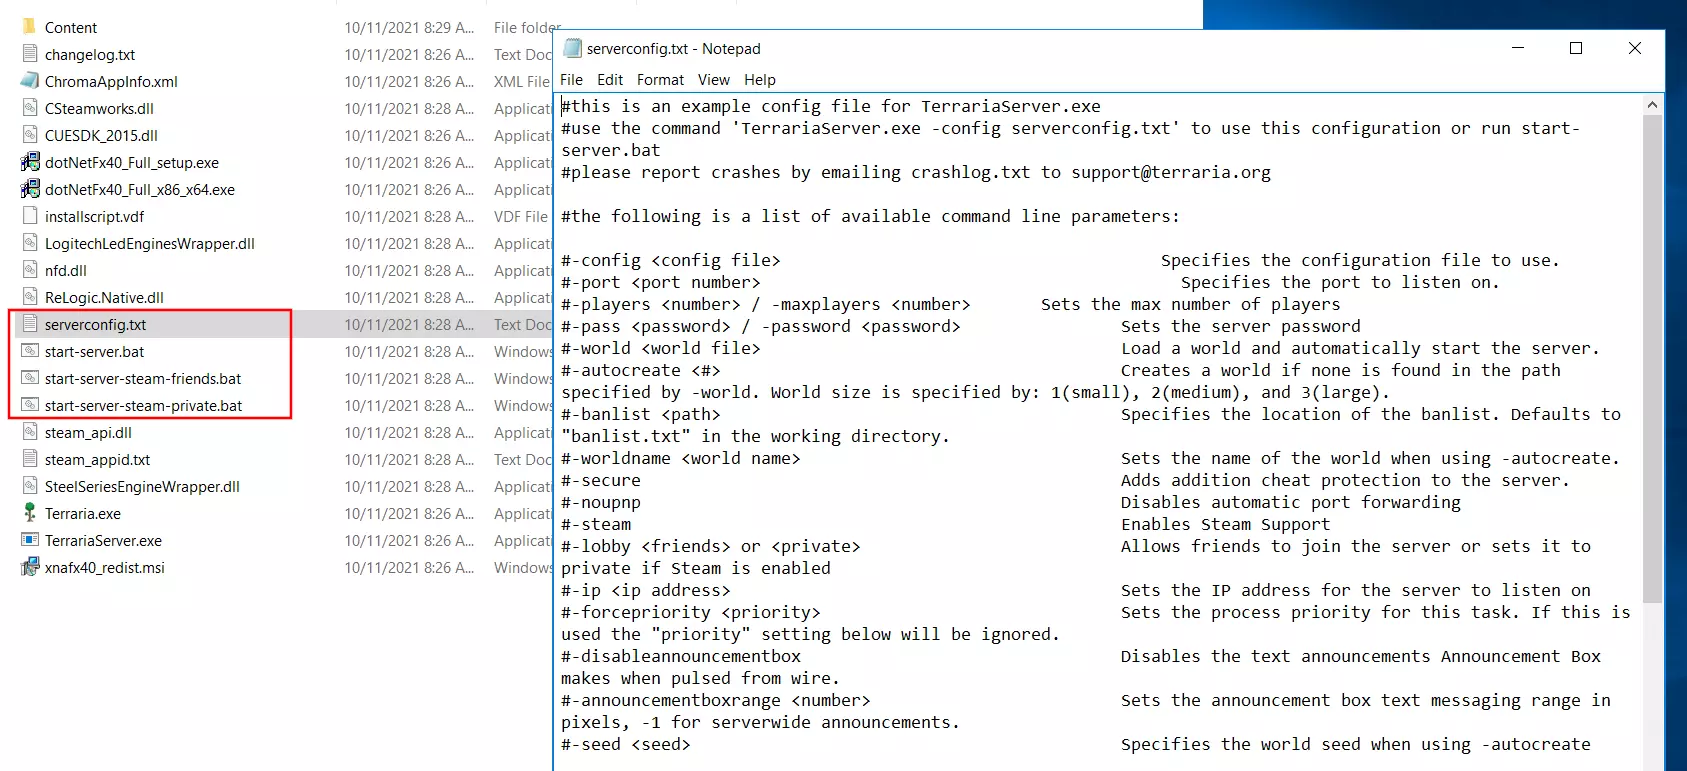
After installation - the default directory is C:\Program Files (x86)\Steam\apps\common\Terraria - the following four files are relevant for the management and later start of the Terraria server:
- TerrariaServer.exe: Main file for Terraria server; can be run standalone
- serverconfig.txt: configuration file where you can define all important parameters of your own Terraria server
- start-server.bat: Batch file, which can be used to start the server based on serverconfig.txt; contains a loopback to restart the server automatically after a crash
- start-server-steam-friends.bat: BAT file to start a server based on the “host & play” function via console; allows interaction with Steam friends
Even before the first start you can define the basic setup of your Terraria server in the serverconfig.txt. You can open the text file with any editor - the possible settings include the name and password of the server, the desired maximum number of players, the difficulty level or the server language. You can find a detailed list in the section “Server config file” in the official Terraria Wiki.
Try out your VPS for 30 days. If you're not satisfied, you get your money back.
Step 5: Enable TCP/UDP-Port 7777
To allow users to access your server, you also need to enable TCP and UDP port 7777. The Terraria server application uses both network ports for communication purposes. So unlock both ports in the firewall before starting the server.
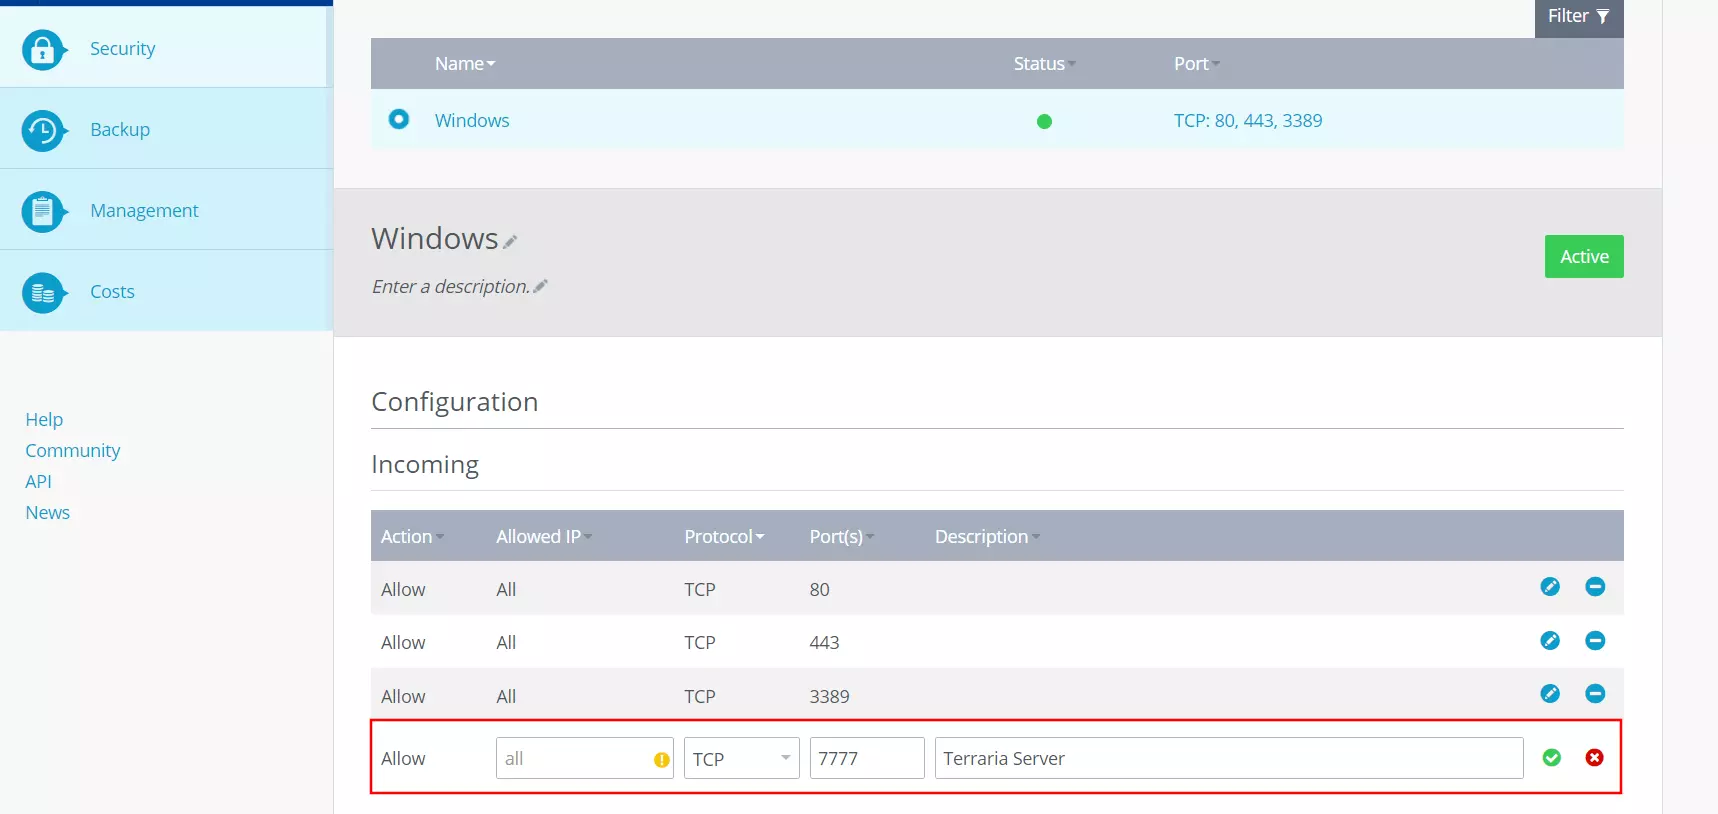
IONOS customers can conveniently enable the two ports from the Cloud Panel: Go to the “Server & Cloud” menu again and select your Terraria server hosting setup. In the left side menu, then press “Network” and “Firewall Policies” one after the other. Select the server and enter the ports under “Incoming” with the following entry:
- Allowed IP: all (just leave the field blank for this).
- Protocol: TCP/UDP
- Port(s): 7777
- Description: individual description of the port release
Click on “Add rule” to start the port sharing process, which may take a few minutes.
Step 6: Start Terraria server
As soon as the ports are enabled you can start your Terraria server (In the firewall policies in the Cloud Panel you can see whether the release process is still in progress or already completed under “Status”). The simplest solution for this is to use the batch file named start-server.bat mentioned earlier. So navigate to the Terraria directory and start the batch file and thus also the server by double-clicking on it.
If you have not yet entered important information, such as the difficulty level or the name of the game world, in the configuration file, the command line will now ask you for this information. Then the creation of the server starts, which can take a few minutes depending on the size and seed. If the process was successful, the command prompt will display a success message.
Step 7: Connect to the server
If you or your friends want to connect to the new Terraria server, the following steps are required:
- Start Terraria.
- Click on “Multiplayer”.
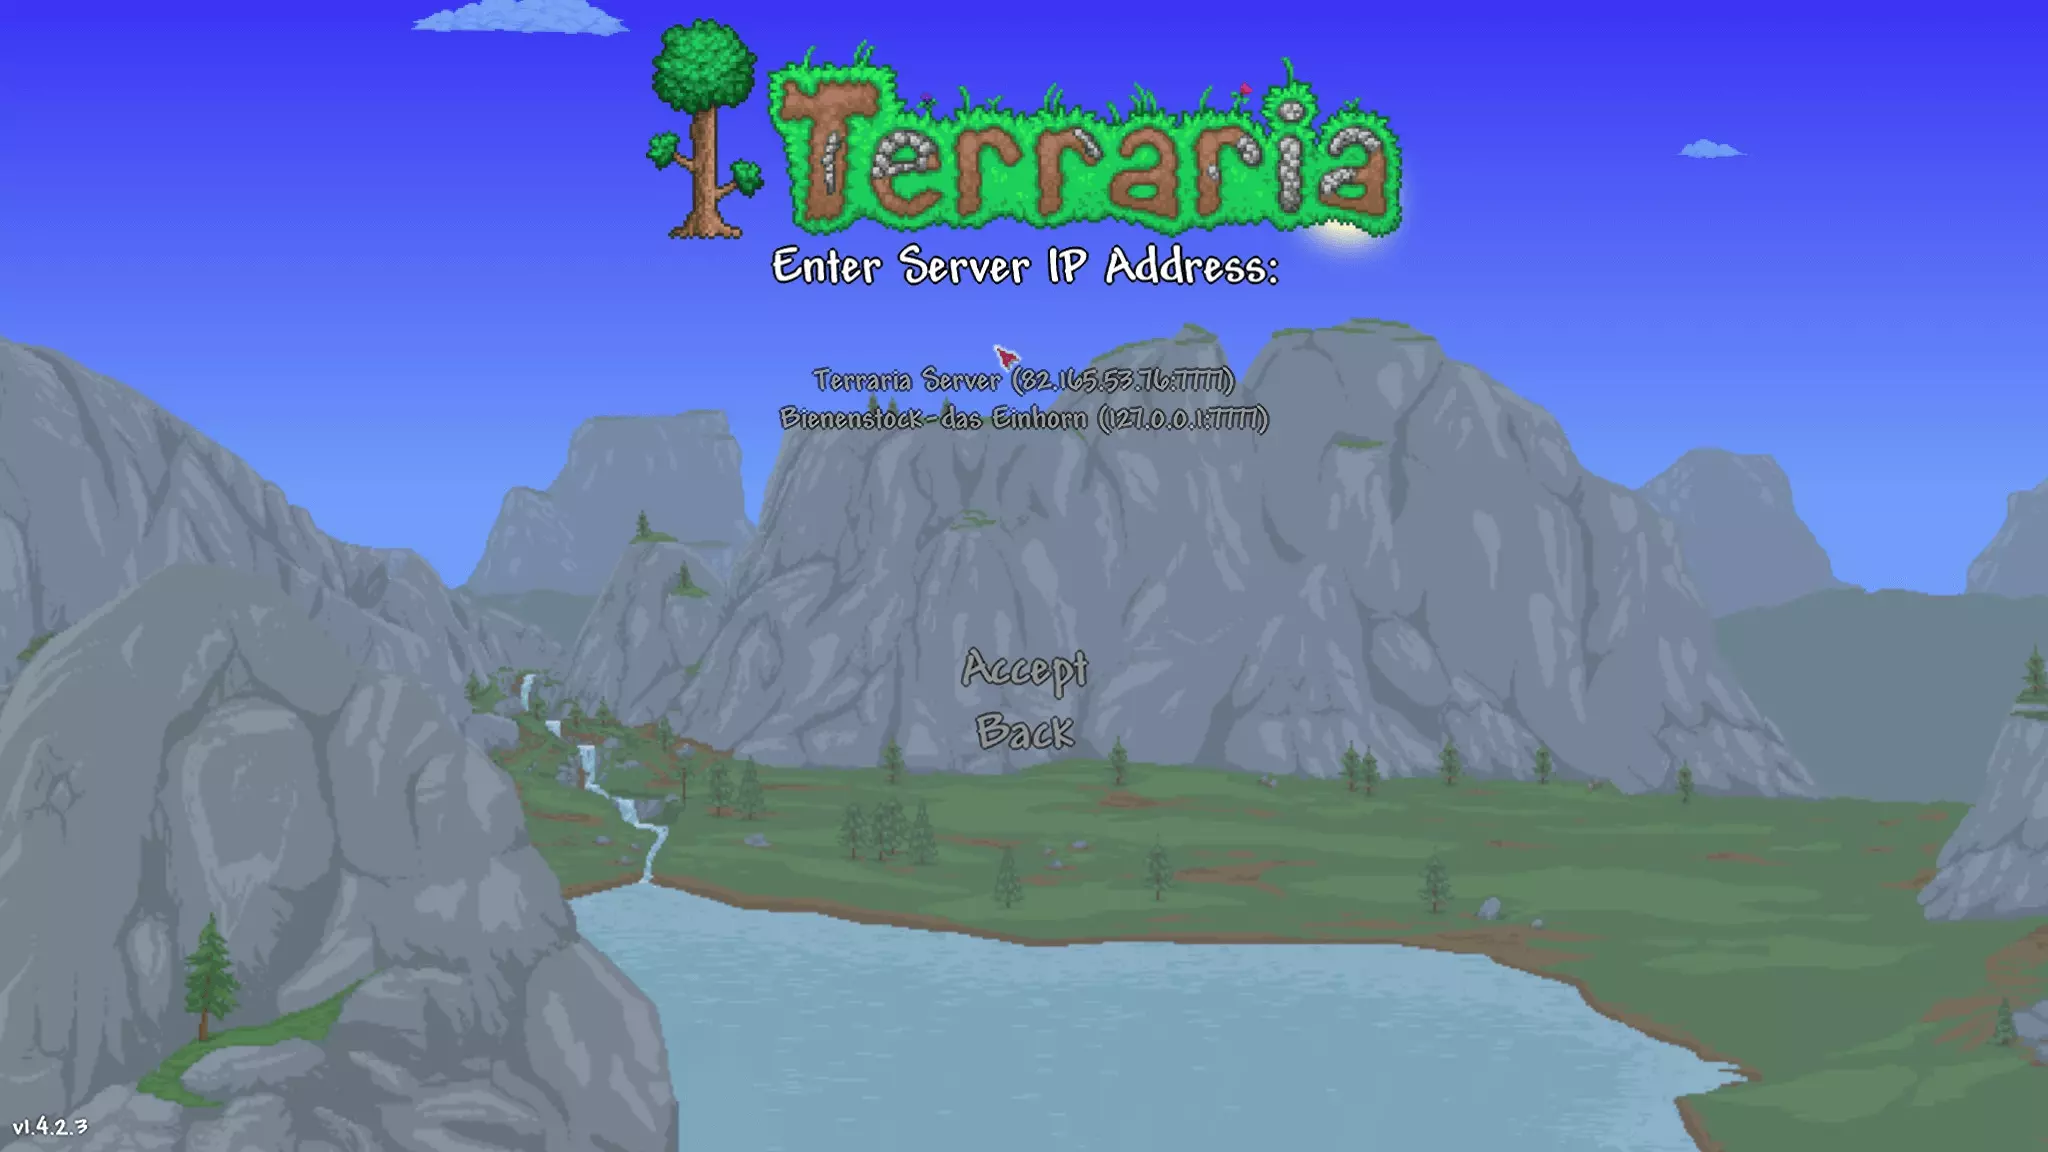
- Select the option “Join via IP” and an avatar.
- Type the IP address of your server (with :7777 appended for the port).
- Press “Accept”.
- Enter the server password, if you have one assigned.
Make a statement with your own .gg domain and let the games begin. Register your own .gg domain now with IONOS.


