How to set up a Necesse dedicated server
If you want to enjoy complete freedom when building settlements and mastering dungeons in terms of competition, gaming experience and online time, a Necesse dedicated server is the perfect solution. Here, we reveal the requirements for a dedicated server like this and how to set it up.
What are the hardware requirements for a Necesse server?
If you want to set up a dedicated server for fun multiplayer adventures in Necesse, you can, in principle, use your own computer at home. However, the preferred option is to host with a professional data center provider. Here you get access to high-performance hardware with an excellent broadband connection. In addition, you can run the hosted Necesse server around the clock, which would be rather impractical on a home PC.
If you rent external hardware for hosting, you have the advantage of being able to use these resources for other games with a dedicated server at any time!
The specific requirements for RAM and the like depend on various factors such as the number of simultaneously active players, the modifications used or the frequency of raids. Your Necesse server setup should always meet the following minimum requirements:
- CPU: min 2.8 GHz (2 cores)
- RAM: min. 2-3 GB
- Storage space: 15 GB
In addition to these requirements for the game server itself, there are also the requirements for the underlying server operating system. You can choose between Linux, macOS and Windows when installing the Necesse server application. If you opt for the Microsoft system Windows Server 2022, for example, you’ll need an additional 1.4 GHz of computing power, 2 GB of RAM and 36 gigabytes of hard disk space (512 MB and 32 GB without graphical user interface).
Try out your VPS for 30 days. If you're not satisfied, you get your money back.
Options for hosting a Necesse server with IONOS
Due to the large number of available providers and different service plans, choosing the right solution to host a Necesse server is not so easy, especially for beginners. IONOS, for example, provides you with three suitable server types, for which there are different service plans:
- Cloud Server: Cloud servers from IONOS give you access to virtualized hardware from various hosts in the IONOS data center. You can adapt the performance to your needs at any time and pay for the resources you use by the minute.
- VPS (vServer): The vServers or VPS from IONOS also work with virtualized hardware. In this case, however, the resources come from a single host and you book a setup for which you pay a fixed, low price at the end of the month (regardless of actual usage).
- Dedicated Server: Dedicated servers from IONOS are the most cost-intensive option. However, in this case you also get access to fixed hardware that’s reserved just for you and isn’t virtualized.
Whichever IONOS server model you choose, with all three variants you can rely on an external broadband connection with up to 1 Gbit/s!
3 scenarios for your Necesse server (incl. suitable IONOS plans)
In the table below, we’ve listed three typical scenarios for a Necesse dedicated server. To make it easier for you to find the best IONOS option for each scenario, we’ve included the appropriate IONOS plans.
| Necesse server scenario | Suitable IONOS plan with Windows |
|---|---|
| 2-3 people; server permanently online | VPS Windows M |
| 4-8 people; server permanently online | VPS Windows L |
| 9+ people; server permanently online | AR6-32 HDD |
Try out your VPS for 30 days. If you're not satisfied, you get your money back.
How to create a Necesse server for Windows step by step
With the hardware sorted, you can start installing and setting up your Necesse dedicated server straight away. In the following sections, we’ve illustrated the process for you step by step using the example of a server from IONOS (vServer, Cloud Server or Dedicated Server). Windows Server 2022 is used as the server operating system.
Step 1: Connect to the server remotely
An active remote connection is required to access the rented server service. Typically, you set up this remote connection via the customer account with your provider or find the required remote login data there. IONOS can be configured as follows:
- Log in with your individual data in your IONOS customer account.
- Open the product category Server & Cloud and select the rented server.
- Copy the IP address and the login data (“User” and “Initial Password”), which can be found under “Login data”.
- Start the Windows application Remote Desktop Connection and establish a remote connection using the noted data.
- Classify the server certificate as trustworthy if a message from Windows pops up.
In the IONOS Help Center, you can read in detail how to connect to a Windows server via remote desktop!
Step 2: Install SteamCMD
The next step is to install the SteamCMD application on your server. This command line tool will later allow you to connect to the public Steam servers, where you can download the Necesse Dedicated Server application, among others. To install SteamCMD, follow these three steps:
- Click on the following SteamCMD download link to download the installation package for Windows.
- Unpack the ZIP file in a selected directory such as
C:\SteamCMD. - Execute the file
steamcmd.exeto start client installation.
Step 3: Install the “Necesse Dedicated Server” server app
You now have the option of downloading and installing the software for the Necesse server via SteamCMD. To start the client, simply run the steamcmd.exe again in the created directory. Immediately after executing the file, the client will be updated. As soon as it is ready for input, you will see the input line Steam>.
To install the server application, the first step is to log in anonymously to the public Steam servers by executing the following command:
To save the Necesse server files in a suitable directory, create one in the second step, for example C:\necesse-server:
Use the command app_update and the Steam app ID of the Necesse dedicated server application (1169370) to start the download and installation in the last step:
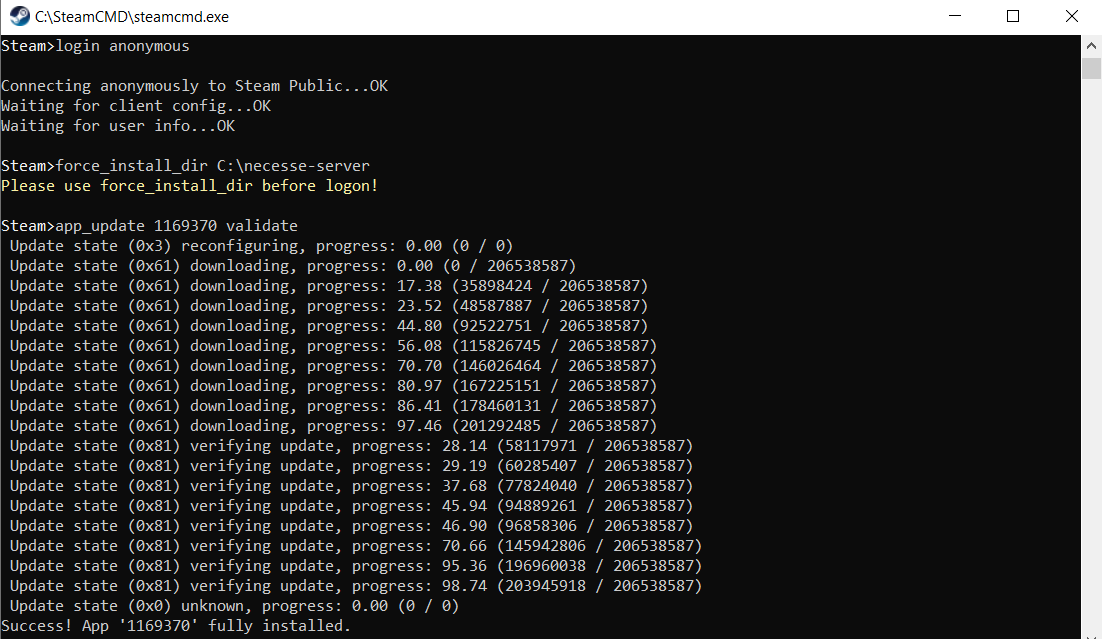
Execute the quit command to exit the client after successful installation.
You can use the app_update command to update your Necesse server at any time later, should the development team release a new version.
Step 4: Open the server port
To make your installed gaming server accessible via the internet, you must also open the Necesse port in the Firewall settings of your server. Unless you have specified a different number in the configuration file, this is the TCP/UDP port 14159.
Log in to your IONOS customer account again and open the port as follows:
- Switch to the Server & Cloud section.
- Select the plan on which you have installed the Necesse dedicated server.
- Click on Network and Firewall policies in the menu on the left-hand side.
- Under Incoming, create two separate rules for the TCP and UDP port 14159.

Step 5: Configure and start the Necesse server
As soon as the program files are located in the created directory, you can start configuring your Necesse dedicated server. To do this, execute either the StartServer.bat file or the StartServer-nogui.bat file. The first starts the graphical wizard for the setup, with the second script you configure your Necesse server via command line entries. Enter the desired parameters for the number of players, server name, etc. - regardless of your choice. The server will then start with the desired settings.
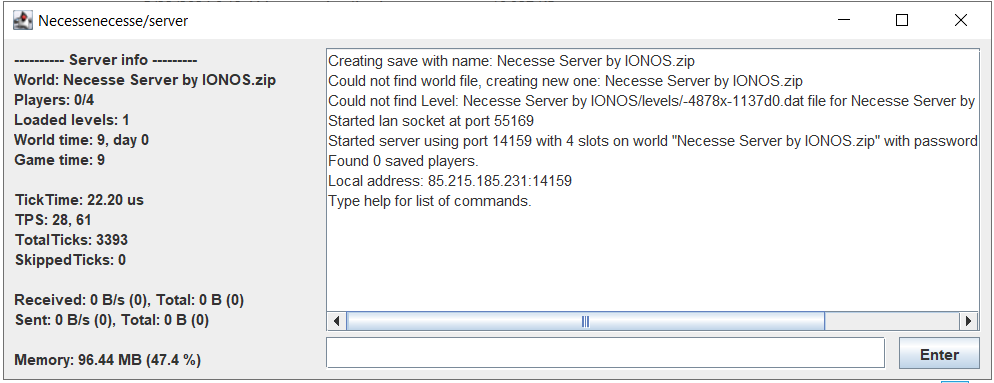
The configuration for your Necesse server is stored in a file named server.cfg. You can find this file in the following directory (replace username with your actual profile name):
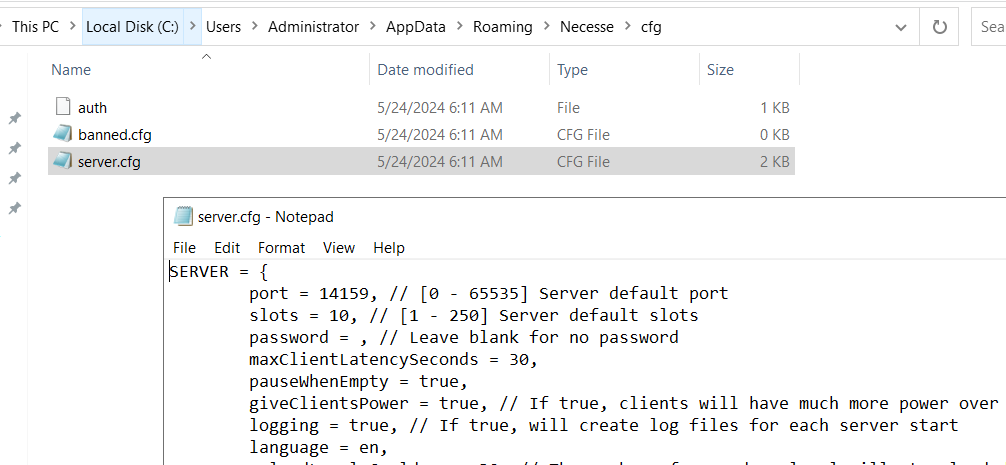
Change the settings for the game world in the file worldSettings.cfg. This file will later be stored in the directory C:\Users\Username\AppData\Roaming\Necesse\saves as soon as the Necesse server is running completely.
Step 6: Connect with the Necesse server
You and your comrades can now connect to the running server at any time by carrying out the following steps:
- Start Necesse in the usual way via the Steam client.
- Click on Multiplayer.
- Select the menu item Direct join.
- Enter the IP address of your server and the previously defined port.
- Finally, press Connect.
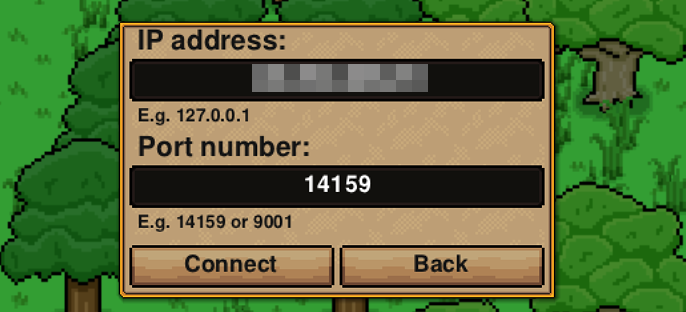
Once the game world has loaded, you’re ready to embark on your online adventure together!
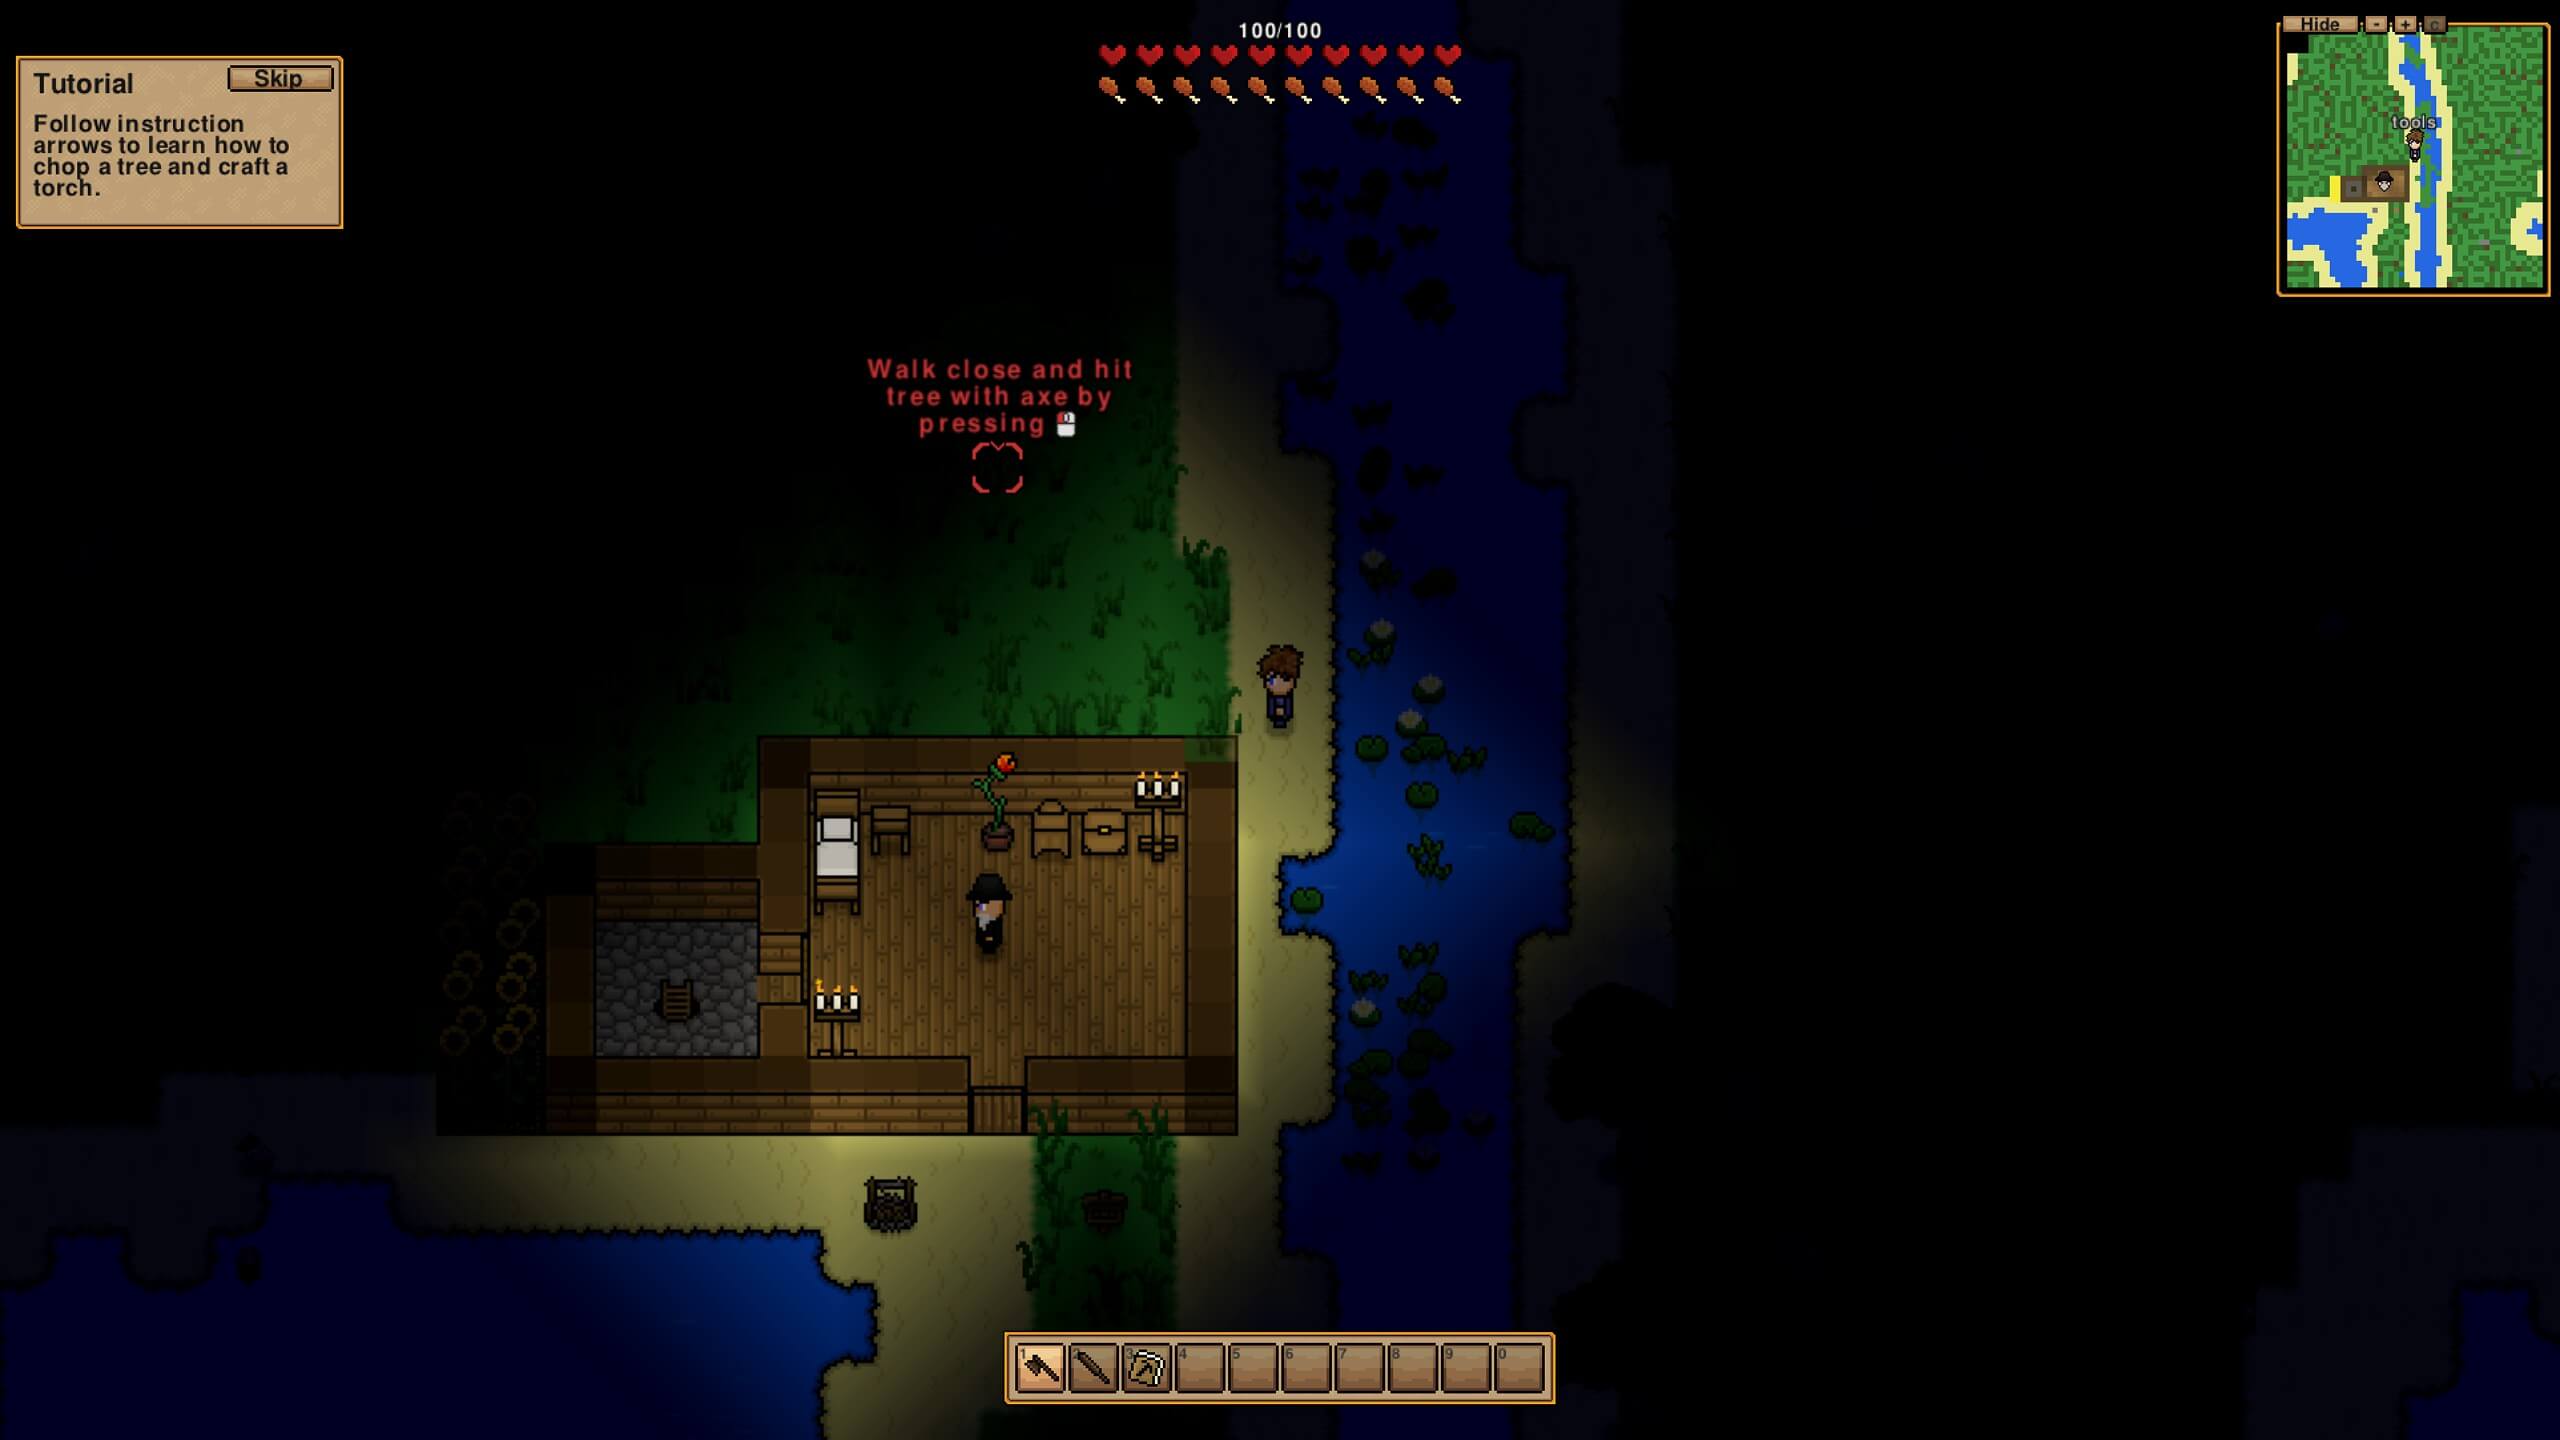
If you want to pass on an individual server address instead of the IP address, all you have to do is register it and link it to your rented server. Thanks to exciting new endings such as the .gg domain, there are so many creative solutions possible!
