Enable and disable Windows 11 hibernate mode
To enable or disable hibernation in Windows 11, you need to display the corresponding menu item first. The corresponding settings can be found in the power options. In some cases, it may be necessary to create a hibernation file via the command prompt. Read on to explore the individual steps.
- Simple registration
- Premium TLDs at great prices
- 24/7 personal consultant included
- Free privacy protection for eligible domains
Enable Windows 11 hibernation mode (quick guide)
The Windows 11 hibernation mode makes it easy to boot-up your device quickly after turning it off. Unlike “Sleep” mode, it does not actually continue to use computer power. To turn “Hibernate” on or off, follow these steps (administrator privileges may be required):
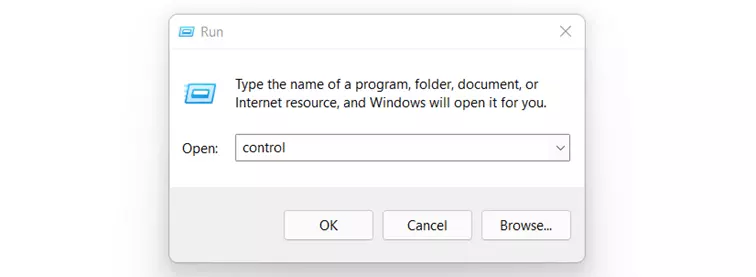
- Access the Control Panel. You can either use the search function in the Start menu or enter the command “control” in the “Run” dialog.
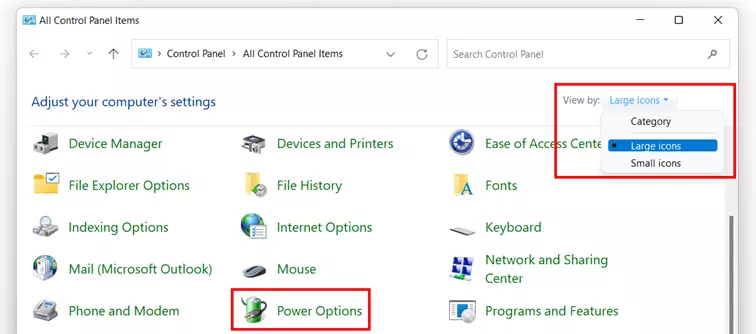
- Select the “Power options”.
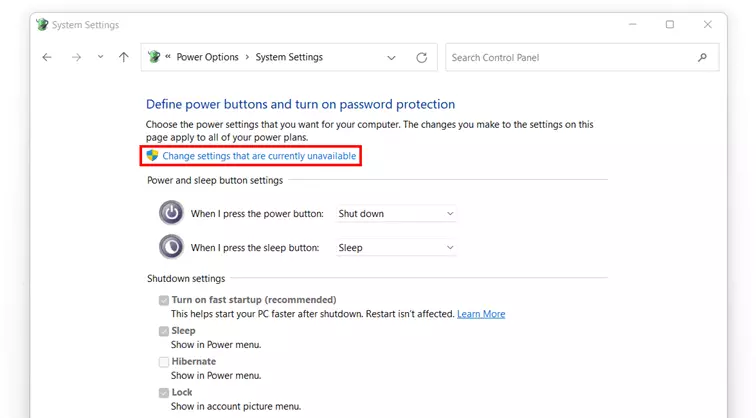
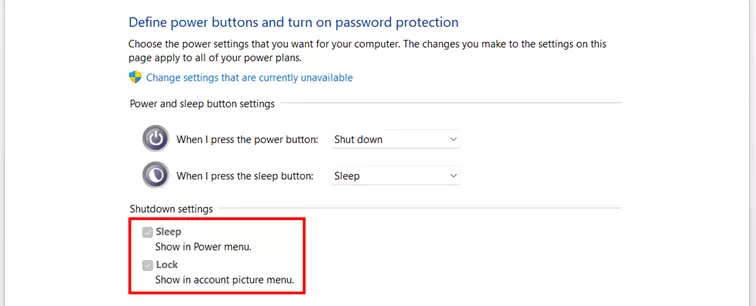
- Click on “Choose what the power buttons do” from the left-hand menu.
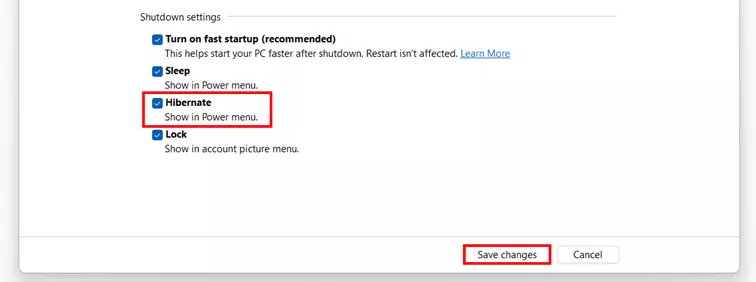
- Tick the “Hibernate” from the Shut-down settings menu. If the settings menu is grayed out, click on “Change settings that are currently unavailable” (requires administrator privileges).
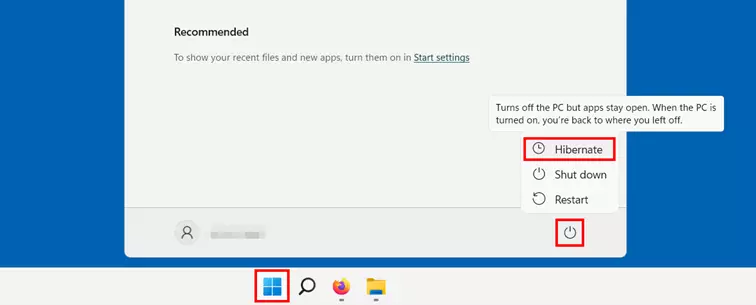
- Launch the Start menu.
- Toggle the on/off switch and select “Hibernate” to enable the mode.
Want to disable hibernation Windows 11? Simple follow steps 1 to 4 and remove the checkmark from “Hibernate” in step 4.
Manage Windows 11 hibernate mode in the power options – here’s how
Just like Windows 10 hibernation mode, you launch Windows 11 hibernation via the corresponding “On/Off” button. By default, Windows 11 hibernate mode is disabled which is why you may not see the option immediately. However, you can activate the energy-saving options quickly and easily by following our step-by-step instructions below.
Step 1: Call system settings
Step 2: Launch Power Options
Step 3: Enable Windows 11 hibernation mode
Step 4: Enable Hibernate
System startup typically wastes a lot of time when working with PCs or laptops. Learn more useful tips and tricks in the following article to speed up Windows 11!
How to create a hibernation file via the command prompt in Windows 11
In this case you can regenerate the Windows 11 hibernation file using the Command Prompt, the command line tool of the system. Administrator privileges are a prerequisite. Read on to find out how to set it up.
Step 1: Start the Command Prompt as administrator
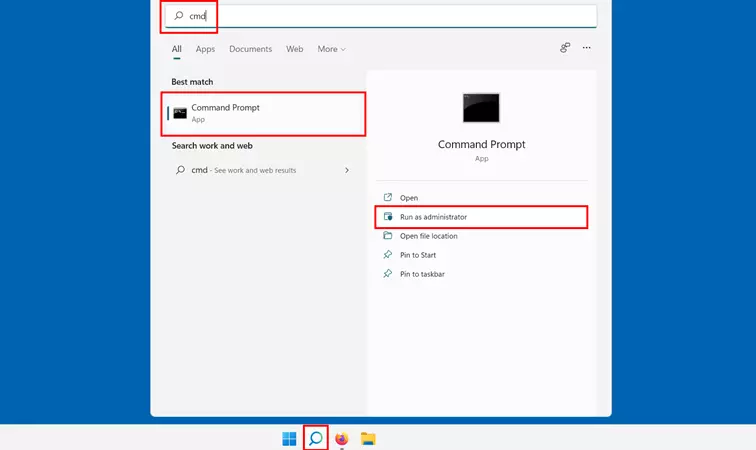
In Windows 11, you can execute the Command Prompt in different ways. To start-up in administrator mode, use the search function.
Click on the small magnifying glass icon in the taskbar and type “cmd”. The Command Prompt will be displayed as a search result – including the “Run as administrator” button that you will need to select.
Step 2: Enable Windows 11 Hibernate mode
In the command line tool, switch on hibernation mode by executing the following command:
Step 3: Create hibernation file
Following activation in standby, you can now generate the hibernation file. The following command is required to this end:
After successfully creating the file, the prompt will present you with a message announcing the size of the file in bytes. Close the tool. As long as you followed the previous steps to enable Windows 11 hibernation mode, you should now find “Hibernate” displayed in the Power Options.
The hibernation file of Windows operating systems is called hiberfil.sys. Read what the file is and how to delete or disable hiberfil.sys in our Digital Guide.
Windows 11: how to disable Hibernate
Want to back up your files to prevent possible data loss? Windows 11 has its own backup function just for this purpose.


