How to use Windows 10 SSH
Windows has offered a native SSH client and integrated SSH tools since the Windows 10 version. With these, you can connect to SSH servers without third-party software and even run your own Windows 10 SSH server.
Quick summary of how to activate Windows 10 SSH
Activate Client:
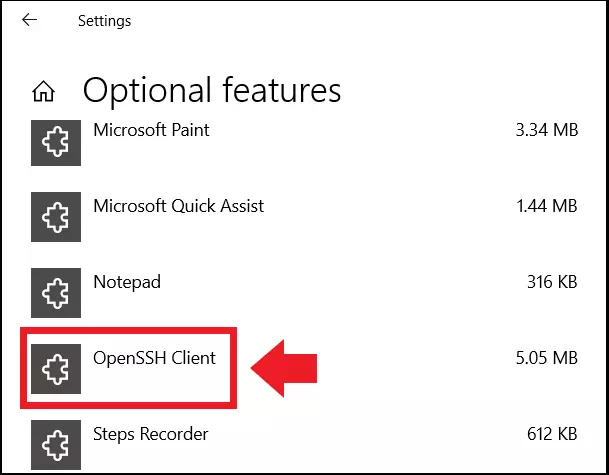
- Open “Settings” > “Apps” > “Apps & Features” > “Optional Features” and check if the OpenSSH client is installed - if necessary, install it via “Add Feature”.
- Open command prompt as administrator, e.g. with Windows search > “cmd.exe” > “run as administrator”.
- Enter CMD command
ssh. - Connect to the desired server with
ssh name@server. - If necessary, consider the port: default is port 22, change port with -pPortnumber behind the server name.
- If necessary, confirm host key fingerprint with Yes and enter password for the first connection.
Set up a Windows 10 SSH server:
- Open “Settings” > “Apps” > “Apps & Features” > “Optional Features.
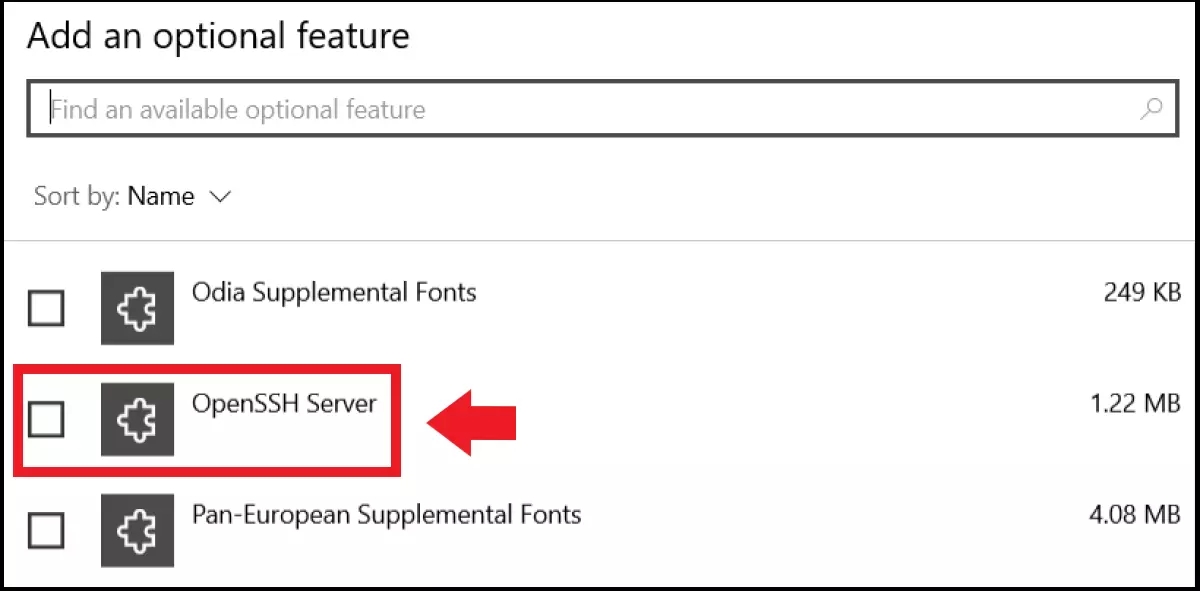
- Select “Add Features” and “OpenSSH Server” and “Install” (admin rights required).
- Set the startup type for “OpenSSH Authentication Agent” and “OpenSSH Server” to “Automatic” in the Windows “Services” app.
- Check firewall rules in the Run dialog with
Get-NetFirewallRule -Name *SSH*. - Connect to the SSH server by entering
ssh <server_name>.
What is Windows 10 SSH (Secure Shell)?
The Secure Shell (SSH) is used to establish a secure network connection between computers or servers. This works thanks to native Windows SSH tools via CMD commands and remote desktop without having to sit at the computer in question in the network. Just like Ubuntu SSH you don’t need any third-party software and is done securely over connections which are encrypted via SCP and SFTP.
This offers many advantages for administrators who use an SSH server-client connection to do tasks remotely. A connection between Linux and Windows computers, remote control of the computer, and transfer of encrypted data are also possible.
The advantage of the SSH protocol is secure remote access, thanks to the following security features:
- Client-server authentication
- Encrypted data transfer
- Data integrity
If you want to use SSH in Windows 11, follow our guide to Windows 11 SSH.
How do you use the Windows 10 SSH client?
These are the requirements for using SSH remote access in Windows:
- At least Windows 2019 or Windows 10 (version 1809)
- At least PowerShell 5.1
- Administrator rights
Follow these steps to use the Windows 10 OpenSSH client:
Step 1: Check via “Settings” > “Apps” > “Apps & Features” > “Optional Features” whether the OpenSSH client is already installed. If not, go to “Add Feature”, enter “OpenSSH Client” and click “Install”.

Step 2: Once the client is installed, open the command prompt as an administrator by typing “cmd.exe” in the Windows search and then selecting “run as administrator”.
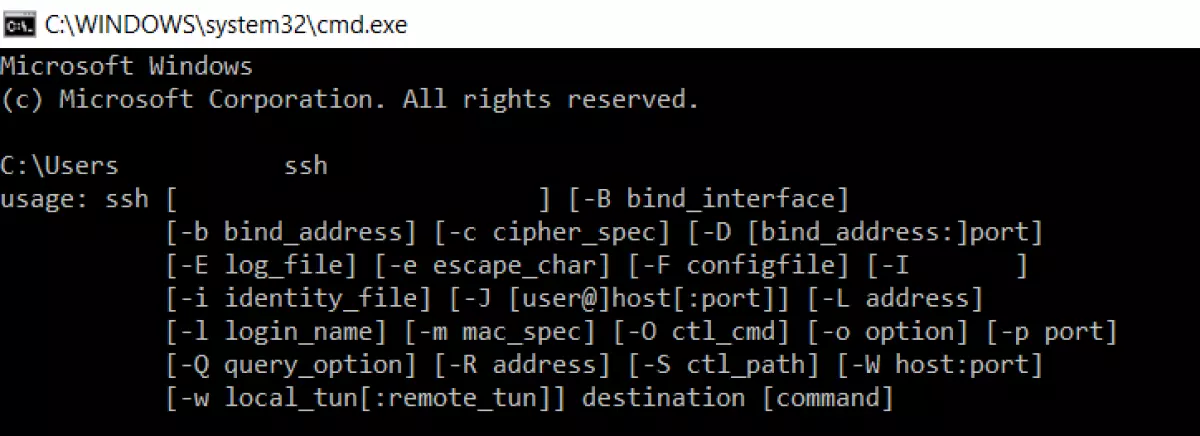
Step 3: To open the native SSH tool in Windows 10, enter the following CMD command:
You’ll see the SSH User Guide with the command syntax and all the current possible parameters offered by the SSH client.

Step 4: If you want to access Raspberry Pi, for example, follow similar steps to macOS and Linux. Connect to the remote server on the required Raspberry device with the following command:
In the address, “Pi” stands for the username on the remote server and “raspberrypi” for the remote server. If it should be an IP address in the network or also an external remote server, use this command syntax:
Step 5: By default, the SSH client uses port 22. If the addressed server uses a different port, for example, port 7200, establish the connection by specifying the port as follows:
Step 6: If connecting to the server for the first time, confirm the host key fingerprint by entering “Yes”. If you have set up a remote server yourself, you do not need to worry about this because the remote server belongs to you. Enter the user password to control the remote computer via SSH and terminal commands.
How do you set up a Windows 10 SSH server?
If you want to set up an SSH server in addition to accessing your computer remotely, follow these steps. You’ll need to install an OpenSSH server. This is usually not pre-installed under Windows but can be quickly added.
Both Linux and Windows are suitable for setting up and operating a private web server. Our comparison “Linux vs. Windows Servers” reveals the advantages of each solution.
Here’s how to do it:
Step 1: Follow the “Settings” > “Apps” > “Apps & Features” > “Optional Features” path.
Step 2: Go to “Add Features” and click “OpenSSH Server” in the list and click “Install”. This step can be performed only with administrator privileges.

Step 3: For the SSH server, Windows installs the OpenSSH Authentication Agent (if not already installed) and OpenSSH Server services. If you want to use SSH regularly, change the startup type of the services to “Automatic”. To do this, enter “Services” in the Windows search and launch the Services app. Right-click on the corresponding services and go to “Properties”. Now change the startup type to “Automatic”.
Step 4: Check whether the SSH firewall rules have been activated. To do this, enter the following command in the “Run” dialog and check the firewall rules:
Step 5: To connect to the Windows 10 SSH server, enter the following command:
If you encounter issues with your connection, you can follow our tips for fixing SSH errors.

