How to backup Windows 10
Every computer owner lives in fear of system crashes and defective hard drives. Irretrievably losing your personal files, photos, vacation videos or work-related data is among the worst-case scenarios for regular computer users. In theory, no one should have to fear complete data loss, since all operating systems typically enable users to create backups of all their important files.
It is also quite easy to create a backup in Windows 10. Backing up is one of the best ways to create comprehensive copies of your files, applications, system settings, etc. If you lose your laptop or your computer becomes inoperable due to a defect, you can restore a previously created Windows 10 backup on another device in no time at all.
In the following, we will provide you with step-by-step instructions on how to create a Windows 10 backup yourself.
How to back up your computer in Windows 10: step-by-step instructions
A full backup in Windows 10 is basically duplicating the entire state of the operating system. All data, settings, and customizations are saved to a backup device as a one-to-one backup. This is why we also refer to these as system images. These are different from restore points in that they encompass the entire system as well as personal files. To perform a Windows 10 backup, you must follow the steps described below.
To use the Windows 10 backup function, you will need administrator rights!
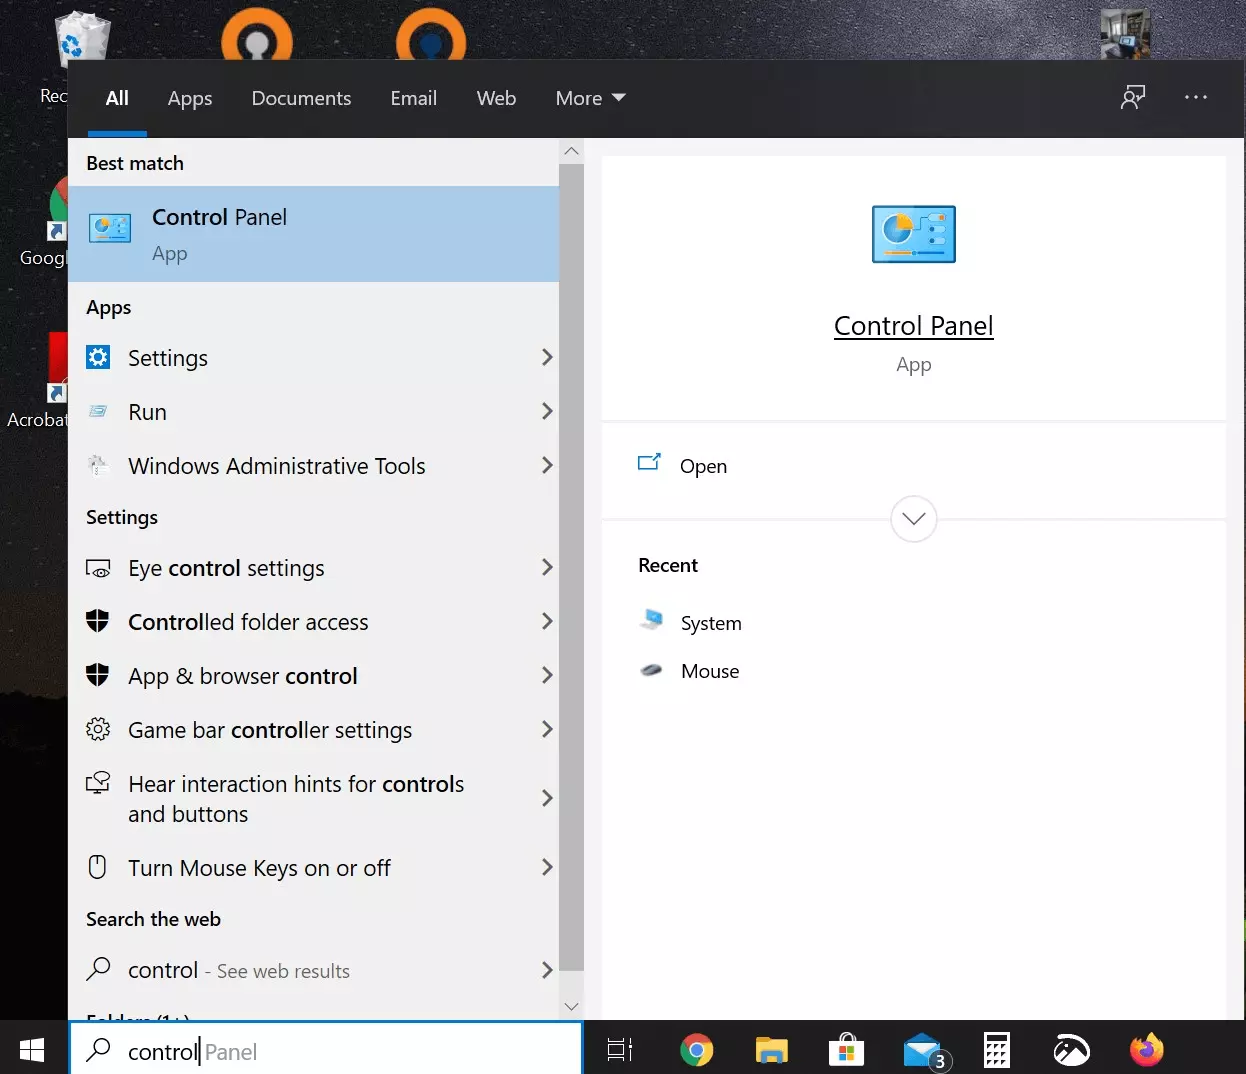
Step 1: Use the search function in the taskbar next to the Windows logo (or look in the Start menu) to find and open the Control Panel. To do so, enter “Control Panel” in the search bar and click on the corresponding suggestion displayed.
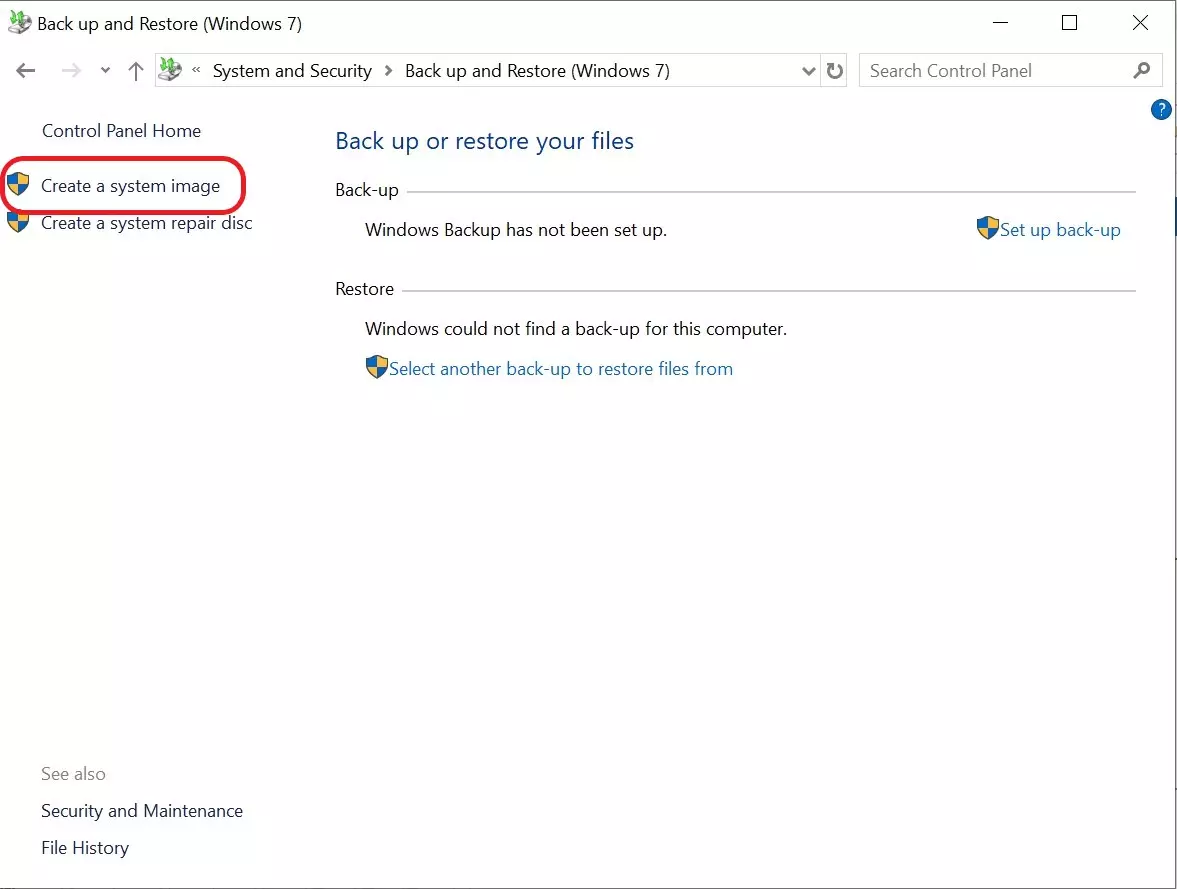
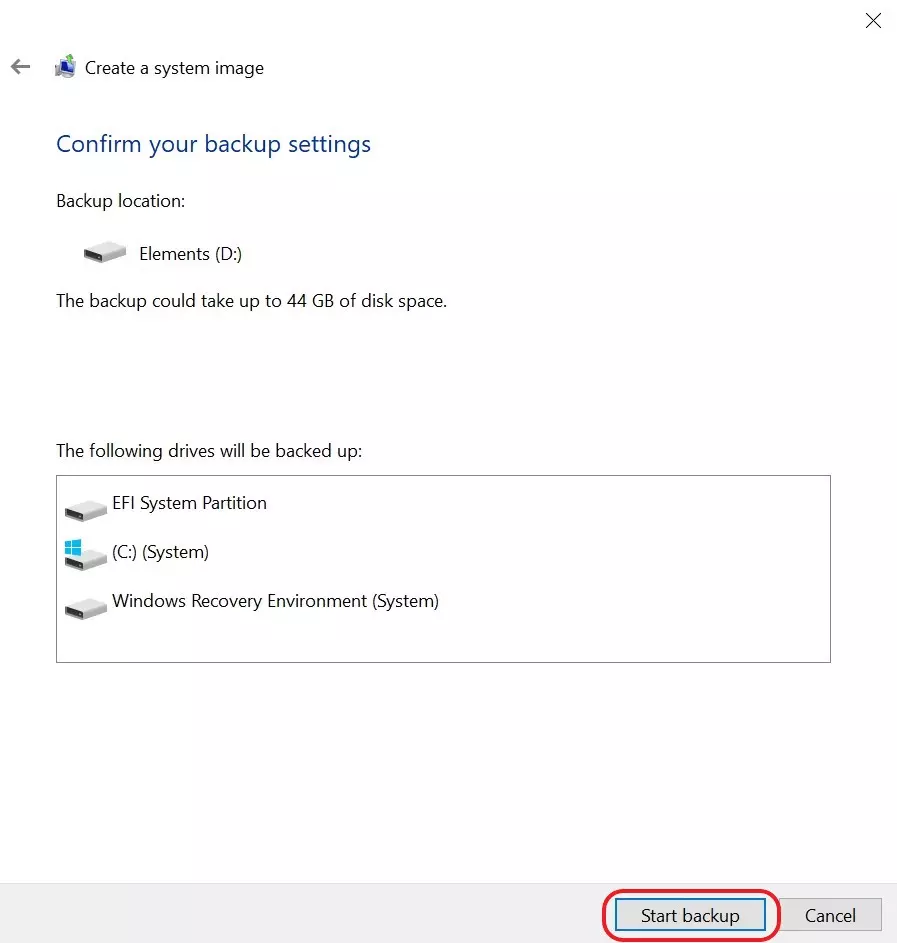
Step 3: In the navigation bar on the left-hand side, select “Create a system image”. Before selecting this option, you should connect the data storage device to which you wish to save your Windows 10 backup. We recommend an external hard drive with adequate storage space. Once you have connected the removable storage device, click “Create a system image”.
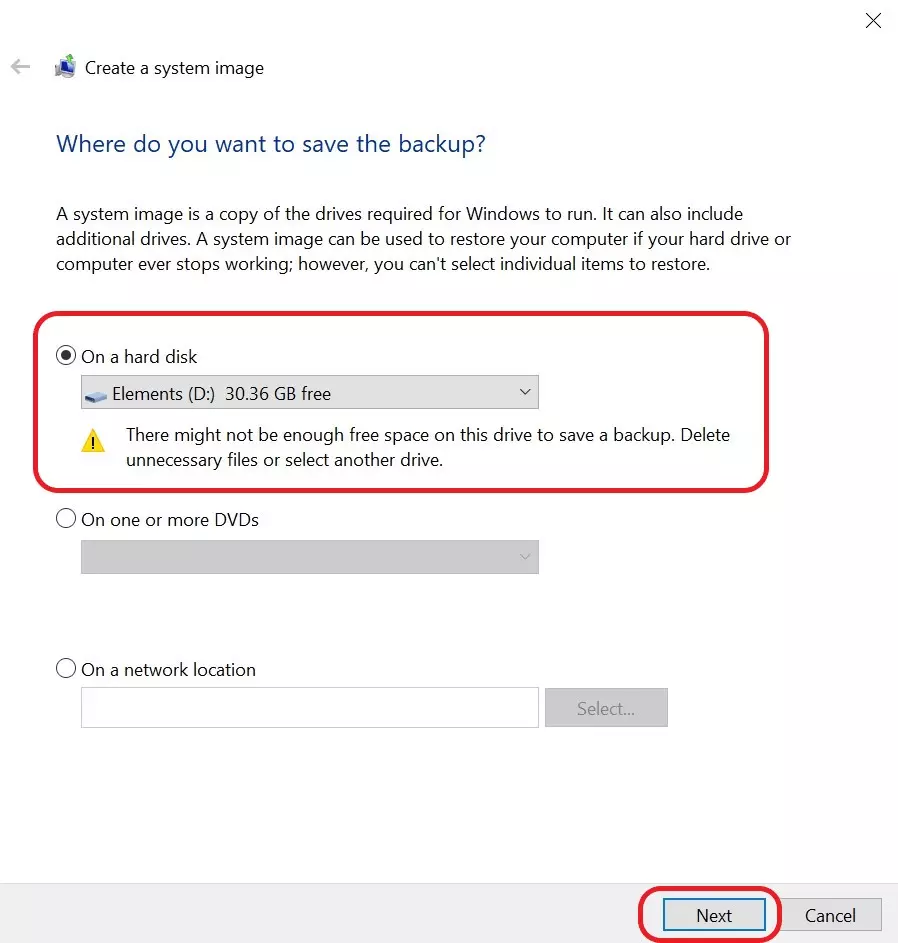
Step 4: Now you can select where you wish to save your Windows 10 backup. Select “On a hard disk” to save the backup to an external hard drive. Alternatively, you can select “On one or more DVDs” or “On a network location” if you wish to save your backup to a CD/DVD or to an external device on the network. Click “Next”.
- Automatic backup & easy recovery
- Intuitive scheduling and management
- AI-based threat protection
Creating small data backups with Windows 10
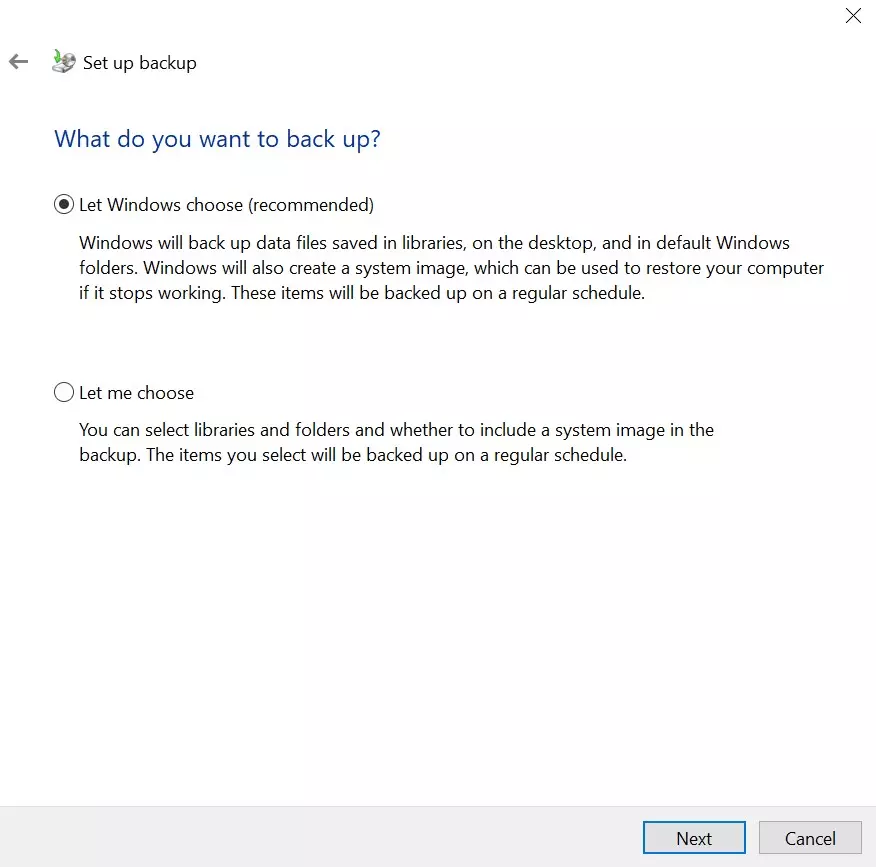
In addition to a full Windows 10 backup, you can also choose to back up only private files. For many users, this type of mini backup is both a time-saving and space-saving alternative to creating a full system image of the operating system. If you do not wish to perform a full Windows 10 backup but would rather just save your important personal data, follow the steps below.
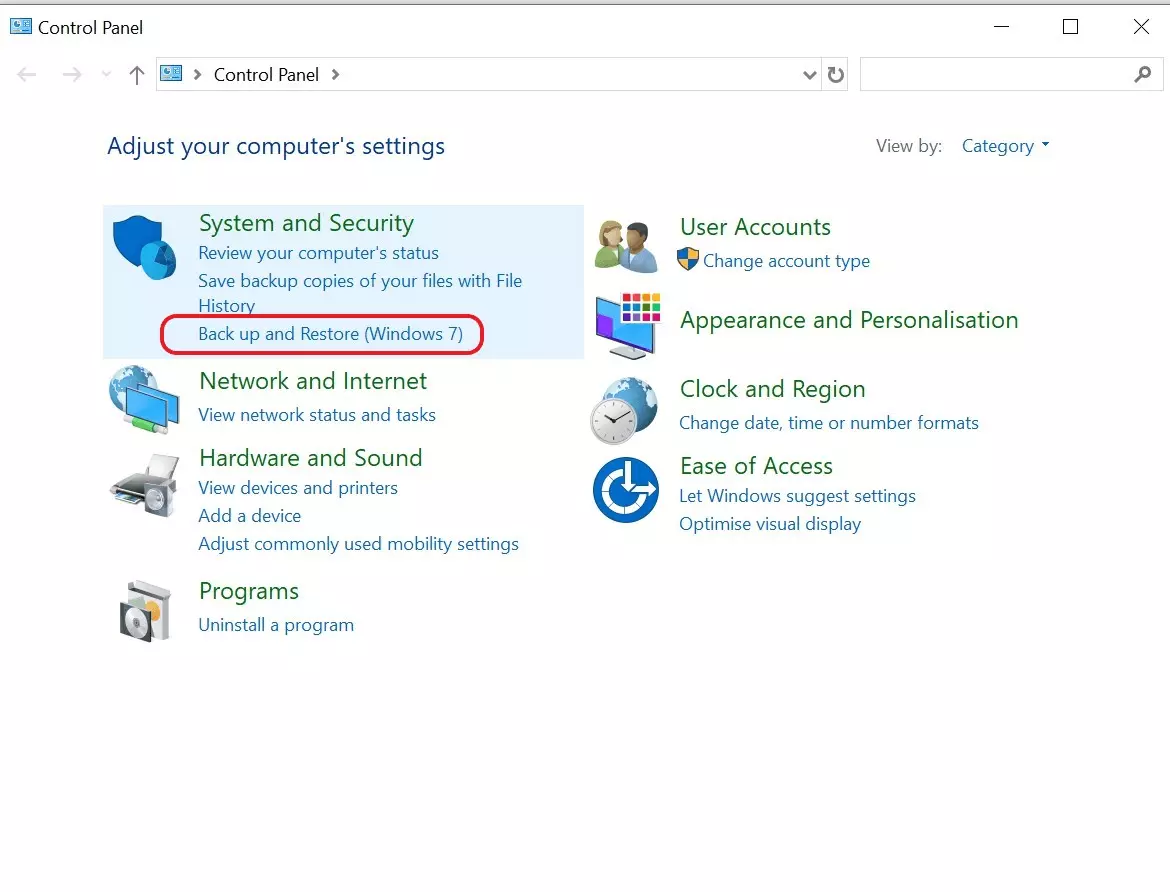
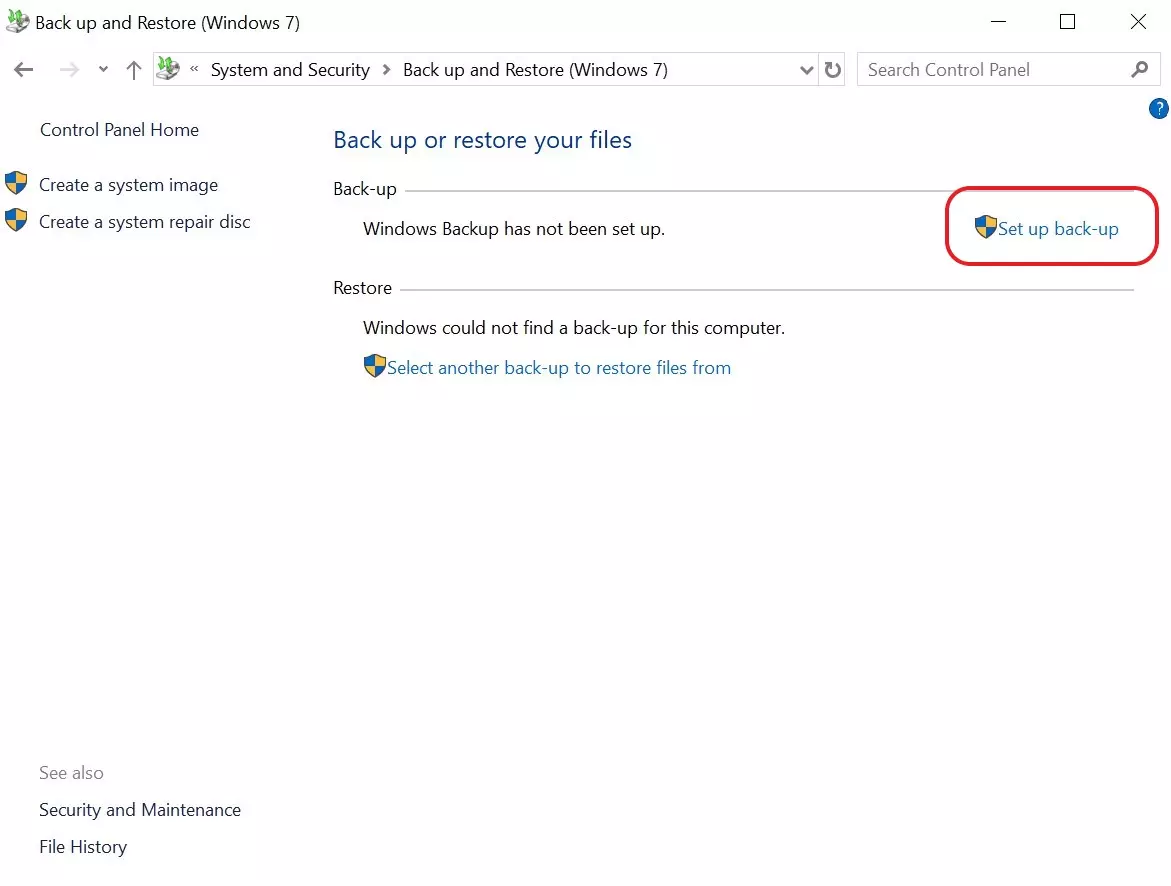
Step 1: Open the “Control Panel”. Under “System and Security”, select “Back up and Restore (Windows 7)”.
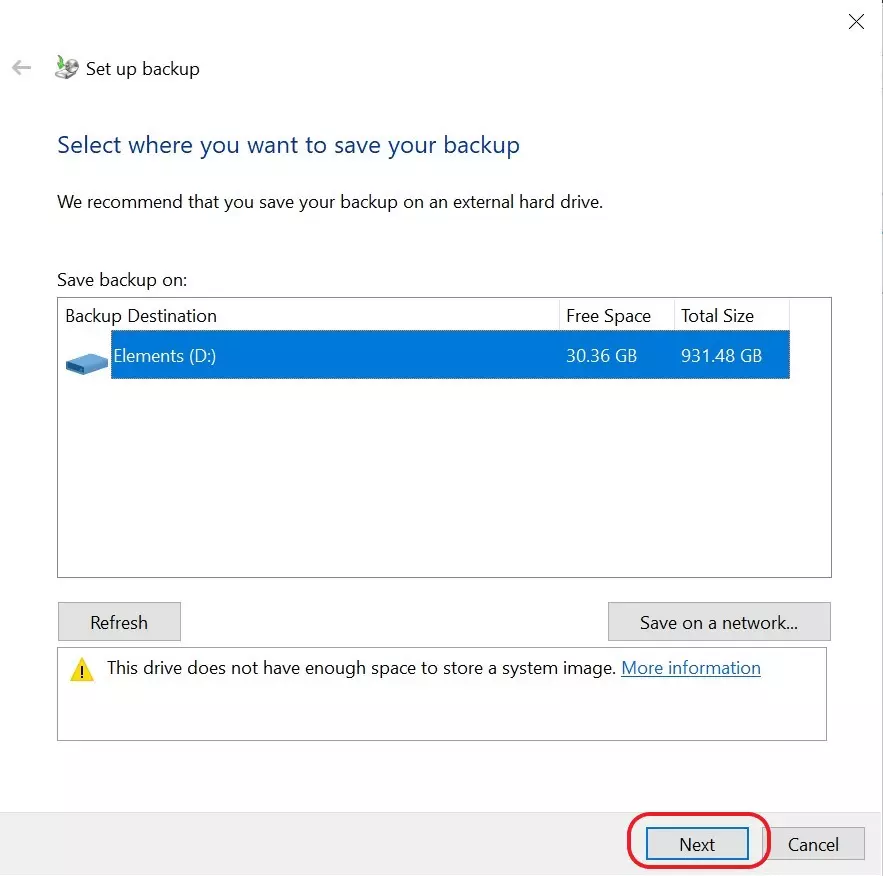
Step 2: In the backup options, click “Set up back-up”. Before backing up your own files, you should connect an external hard drive that has adequate storage space.
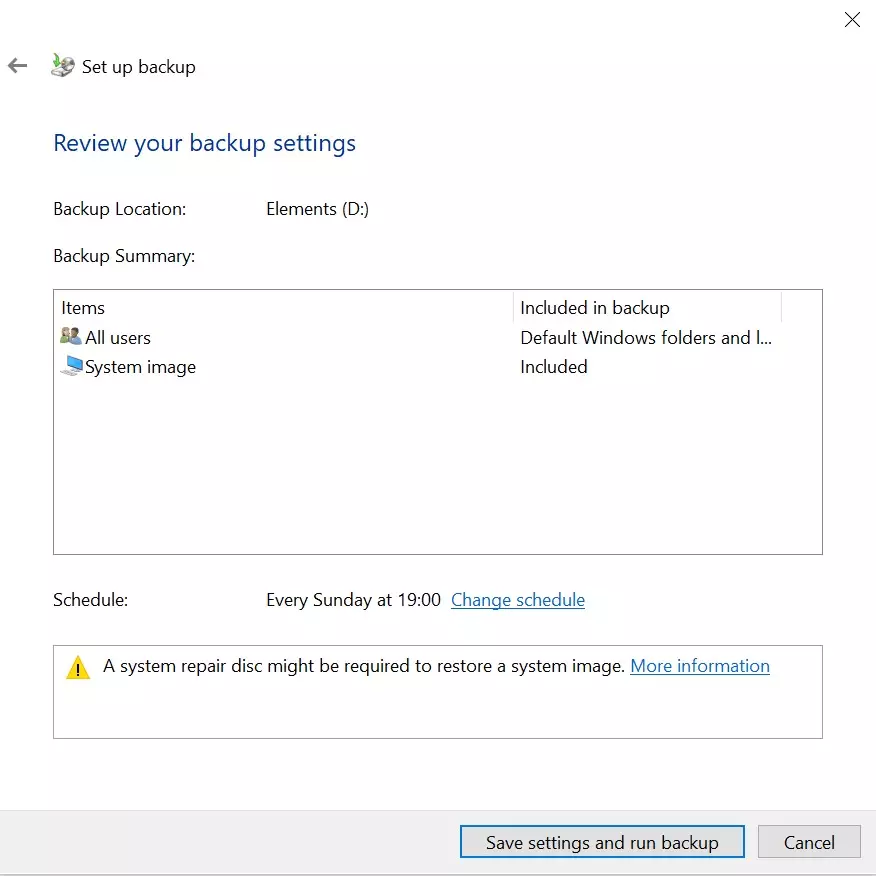
Step 5: Check your selection and then click “Save settings and run backup” to start the backup. These settings will be saved for future use so that the next time you decide to replace the backup, all you will need to do is click “Backup” under “Update and Security”.
Naturally, you can also save backups to the cloud. IONOS offers Cloud Backup and HiDrive cloud storage to provide you with the right cloud solution for your Windows 10 backup.


