How to turn off Windows Defender
Not every user is necessarily a fan of Microsoft’s free antivirus program. Many people who, for years, have counted on the products of other providers to protect their computers from malware and viruses, will likely want to continue to use them on their Windows 10 devices. However, before you go ahead and install any other programs to fend off viruses, Trojan horses and malware, it’s important to disable Windows Defender.
How to turn off Windows Defender step-by-step
If you’d like to use a different antivirus program than Windows Defender, you’ll need to turn off Windows Defender which is automatically activated in Windows 10. But don’t disable Defender unless you have another antivirus program ready to be installed. That’s because without active anti-virus protection, you’re exposed to a massive security risk.
It’s also not advisable to run multiple antivirus programs at the same time. Many security programs are not compatible with one another and block each other’s protective features when used simultaneously. If you want to switch to another provider’s product, turn off all Windows Defender features as follows:
- Open the Windows Security Center via the following pathway:
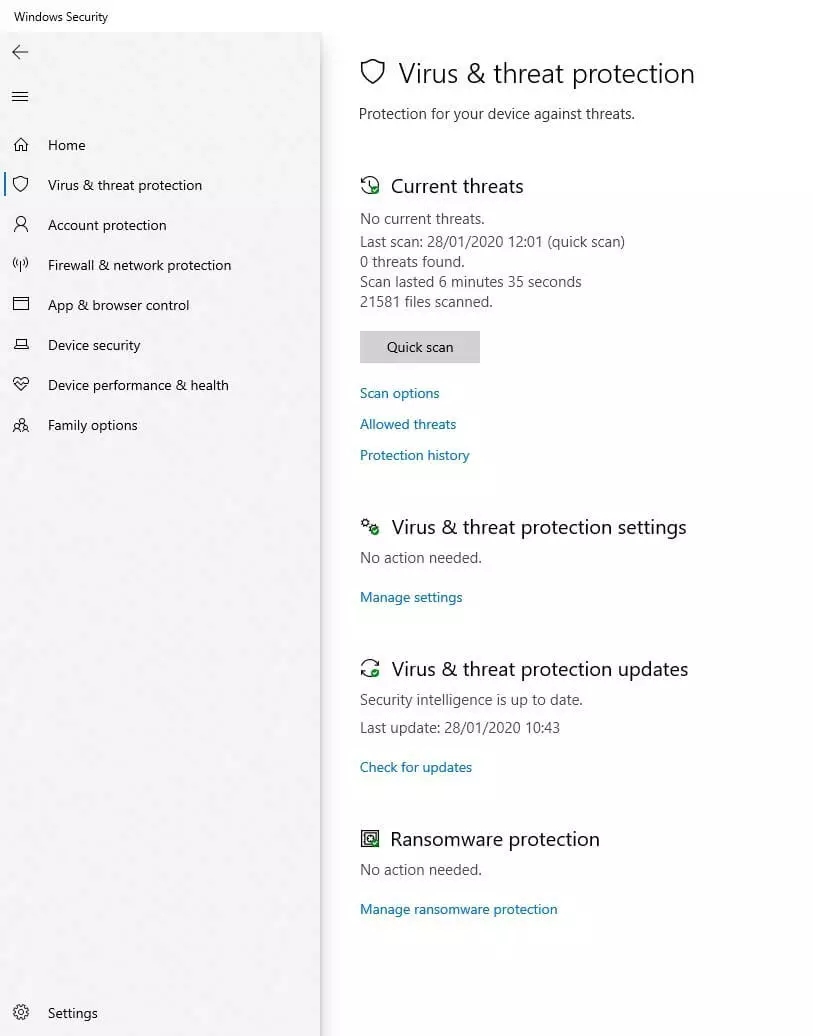
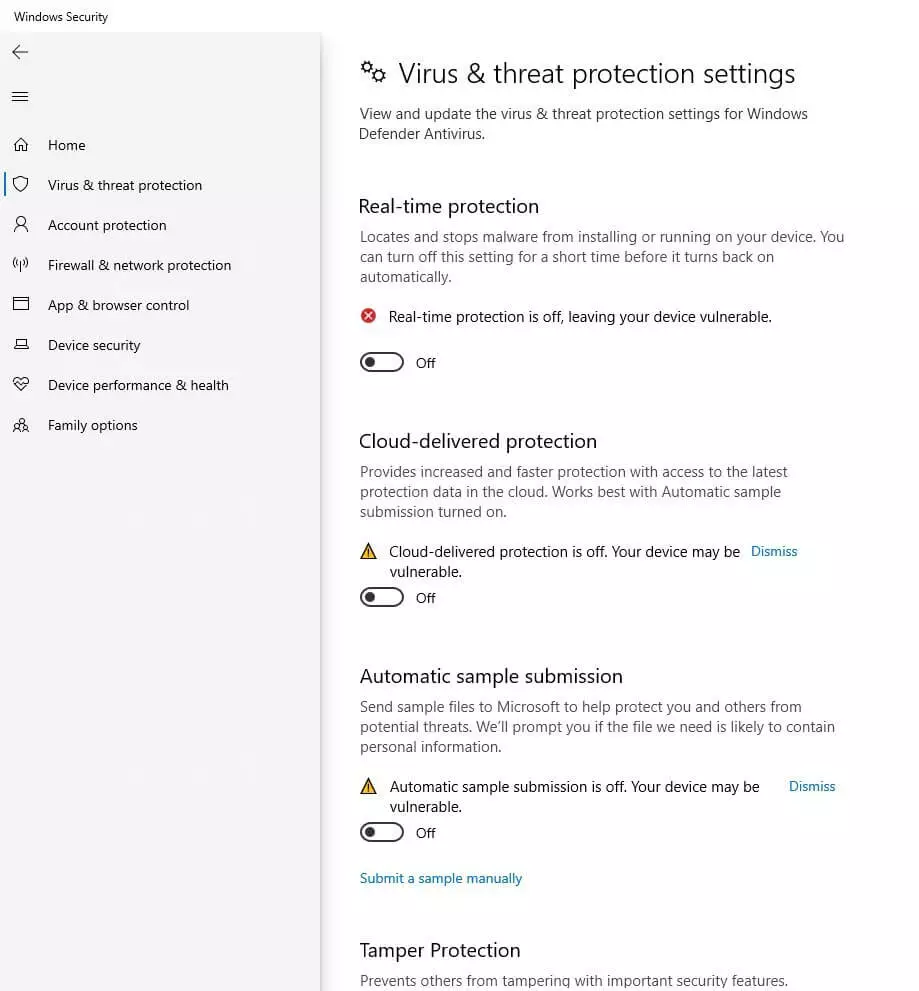
Click on the Windows logo, then on the cog icon, followed by the “Update & Security” section and select “Windows Security” in the left tab. Then open Windows Defender. - In the main “Windows Security” menu, select “Virus & threat protection”. Next, click on “Manage settings” under “Settings for virus & threat protection”.
- Disable each of the sliders for “Real-time protection”, “Cloud-delivered protection”, “Automatic sample submission” and “Tamper Protection” by clicking on them. These security features are now deactivated and your PC is no longer protected.
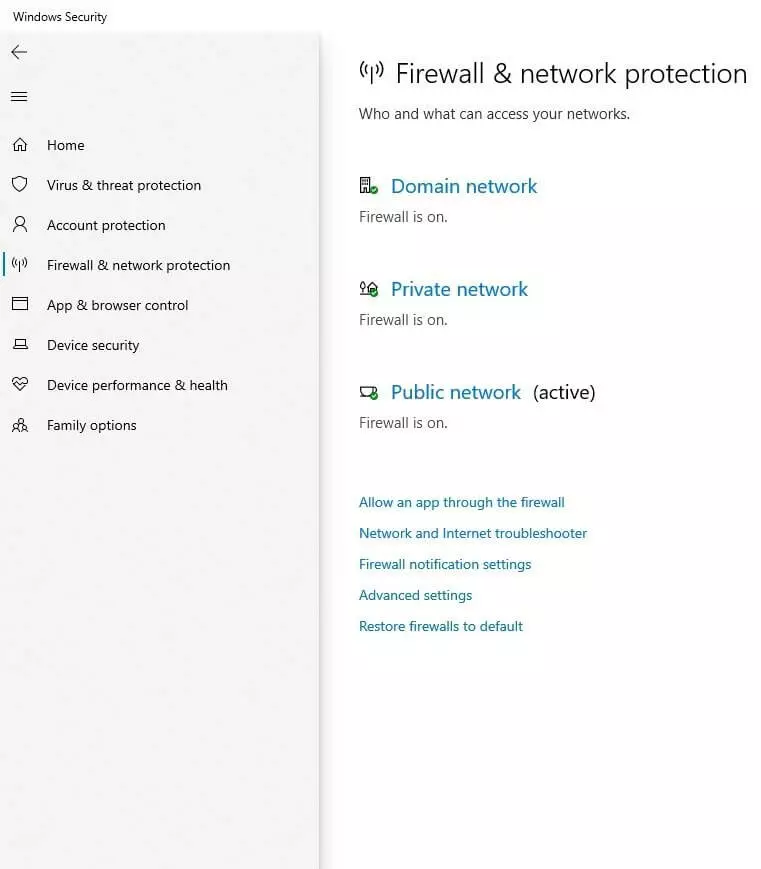
- After you have deactivated the virus and threat protection of Windows Defender, you will also need to disable the Firewall. To do this, select the “Firewall & network protection” menu item on the left side of the security center.
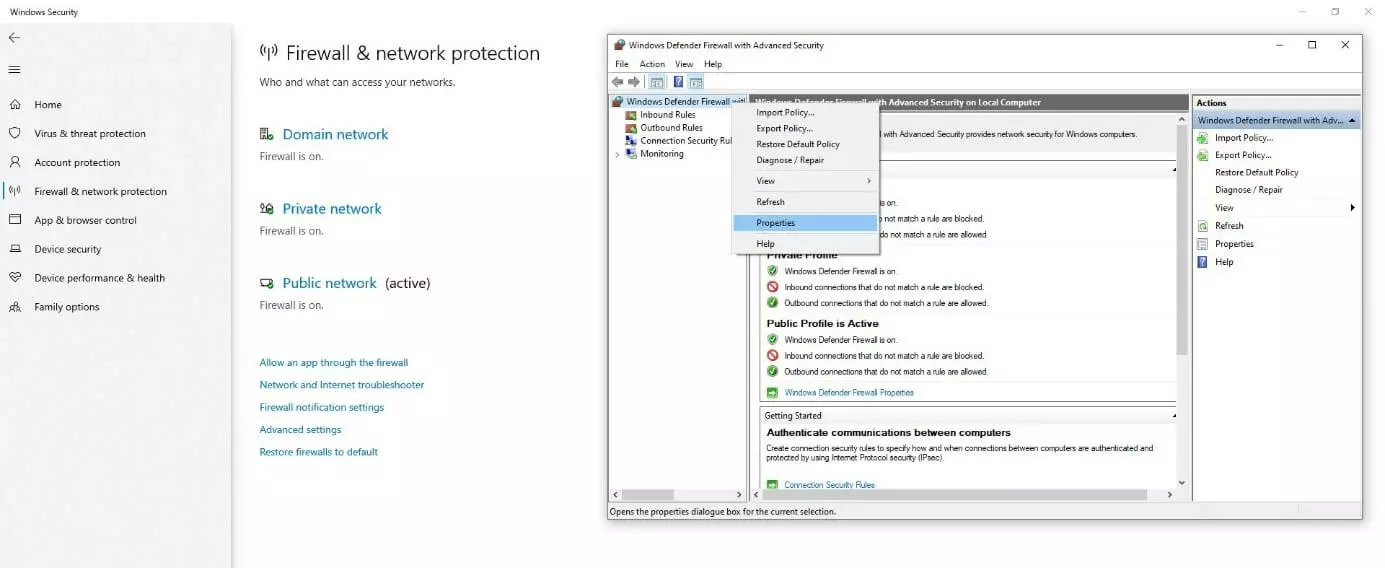
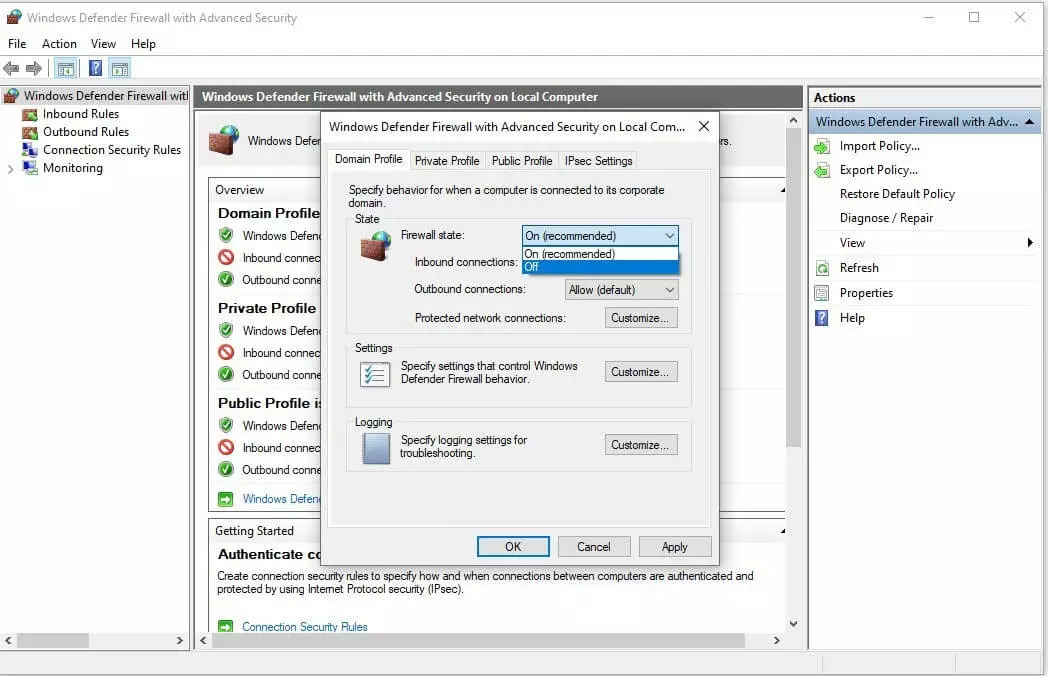
- Click on “Advanced settings”. You will now see the advanced settings of the Windows Defender firewall in a separate window. After right-clicking on the menu item “Windows Defender Firewall” in the left main menu, select “Properties”.
- In the first “Properties” tab – called “Domain Profile” – you will find the firewall status in the upper section. This should still be set to “On (recommended)”. Click on the drop-down menu for the firewall status and select “Off” instead. Next, click on “Apply” in the bottom-right part of the window. The Windows Defender firewall is now disabled. Since your PC is no longer running active protection programs, you should immediately restart it to install and set up your new antivirus program.


