How to set up dual monitors in Windows 10 and 11
Using two screens at the same time means more workspace and free space for parallel program windows and thematically separated apps. We show how to set up dual monitors in Windows.
- 2 GB+ storage
- Sync across all your devices
- Spam filter and ad-free
Quick guide: Set up dual monitors
- Connect the second screen.
- Press [Windows] + [P].
- Select the desired display option, such as “Extend” to use two screens simultaneously.
Set up dual monitors: Prerequisites
If you’ve already worked with two screens, you probably couldn’t ever go back to working with one. It’s too convenient to move windows and programs between desktops at will and still enjoy them in HD resolution in the office, home office, or while gaming. Most PCs and laptops today offer the option of connecting two monitors on the hardware side. This requires at least two HDMI ports or an additional port for DVI or DisplayPort on PCs. For laptops, one HDMI port and an HDMI splitter are sufficient. Other options are ports like USB-C or even Thunderbot-3 for image output.
Step-by-step guide
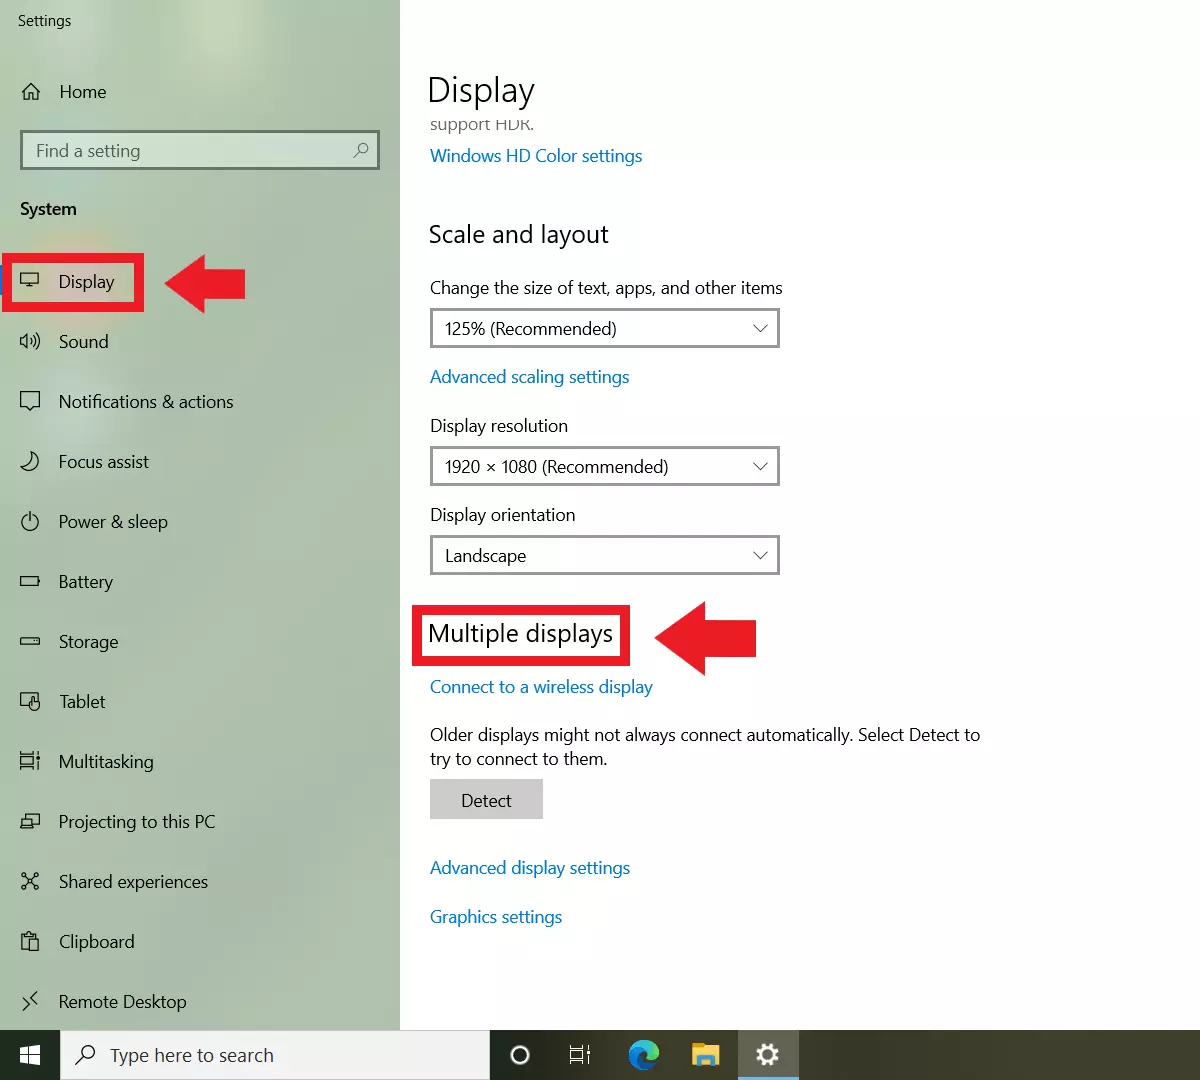
First, connect the second display to your PC or laptop. Make sure the graphics card and cables match the screen. You may even be able to connect your PC to your TV. Windows usually automatically detects additional connected display devices and lists them in the Windows “Multiple Displays” menu along with usage options. To do this, go to “Settings” > “System” > “Display”.
If you don’t have room for an additional screen, you can also split the screen directly on the desktop thanks to Windows 10 split screen - for example, with the Windows key + arrow keys shortcut.
Now the task is to set up dual monitors. The procedure is similar for Windows 10 and Windows 11.
Windows 10: Set up dual monitors
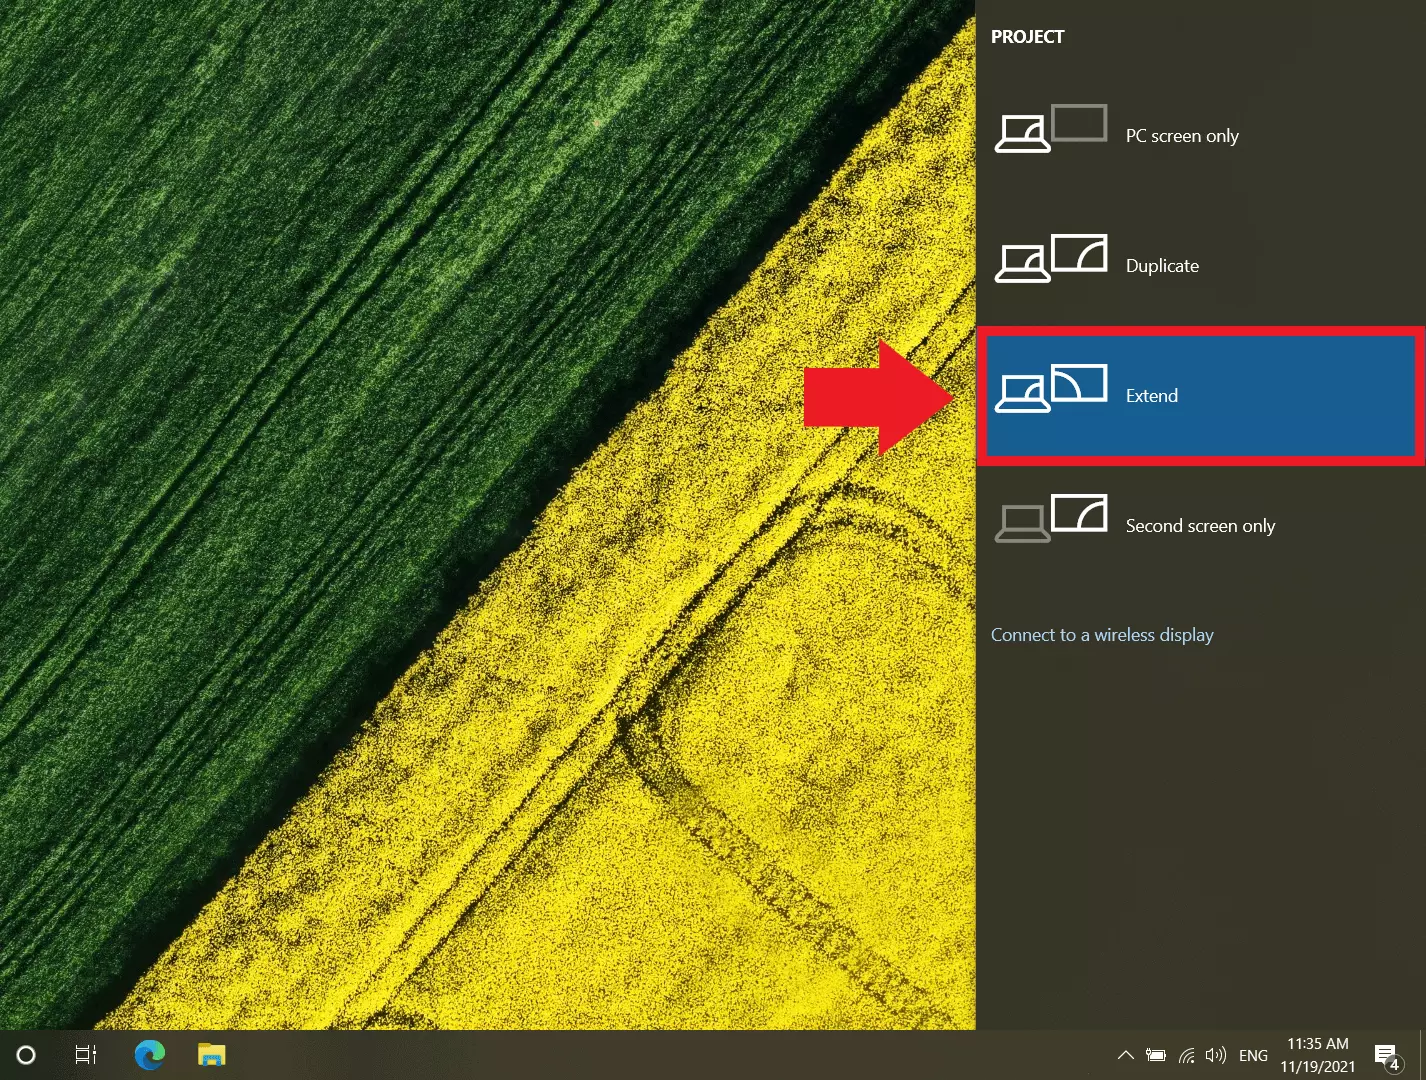
Step 1: Open the Windows display options by pressing the shortcut [Windows] + [P].
Step 2: You will see the various Windows options for using multiple screens. Use “Duplicate” to mirror the contents of the main screen or laptop to the second screen. To use only the second screen, the “Second Screen Only” function is a good choice. This is the right choice if you wanted to use a larger screen over the laptop.
Step 3: If you want to use two screens at the same time, the “Extend” function is helpful. If you select it, Windows will create a blank desktop on the second screen, or a contiguous desktop on two screens. Move the mouse beyond the right or left edge of the screen to reach the second screen. You can easily move program or browser windows between the screens.
Step 4: If you want to make additional adjustments to the screen resolution or scaling, click on an empty spot on the desktop and go to “Display Settings” and “Advanced Display Settings”. Here you can also use “Identify” to adjust the layout of the screens in the Windows system to match the physical layout of the monitors, as well as the transition between desktops.
Windows 11: Set up dual monitors
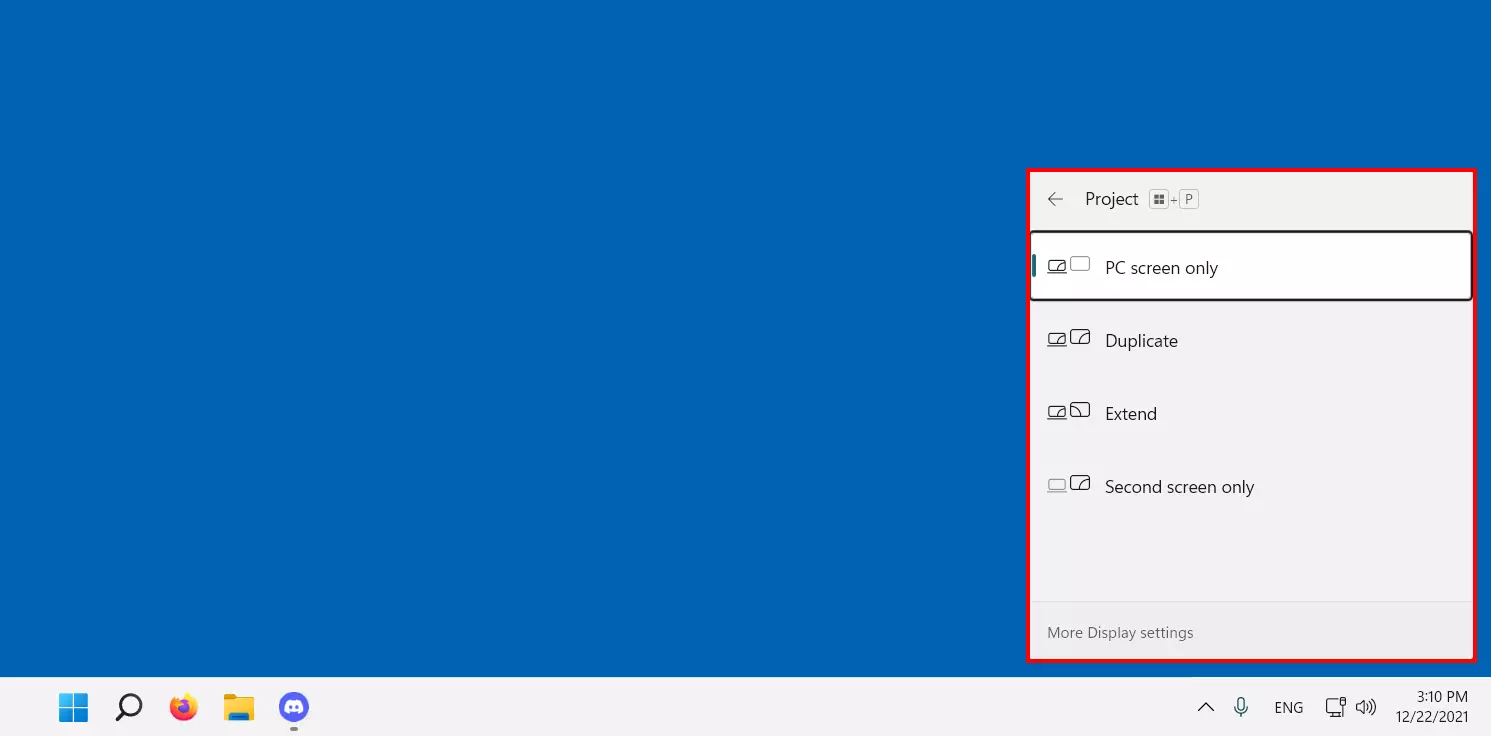
Step 2: Also choose between the options:
- “PC screen only” (display on first screen only).
- “Duplicate” (same display on both screens).
- “Extend” (use both screens)
- “Second screen only” (display on second screen only).
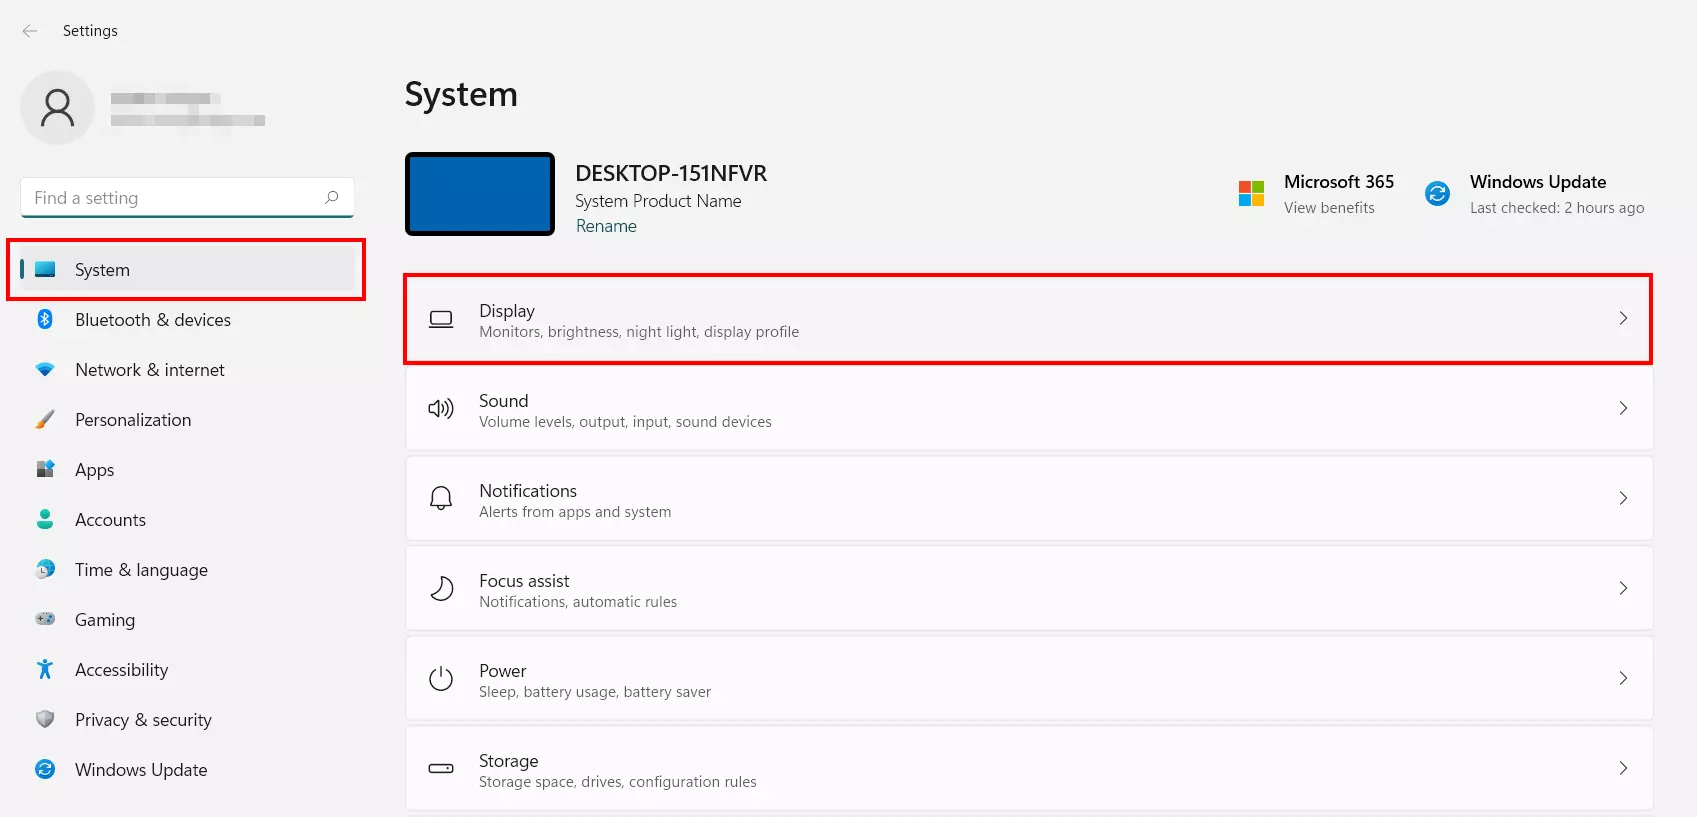
Step 3: To match the arrangement of detected display devices in the Windows system to the physical arrangement, go to “Settings” > “System” > “Display”. Then click on “Identify” to rearrange the display devices numbered “1” and “2” accordingly.
In case of problems with the second screen
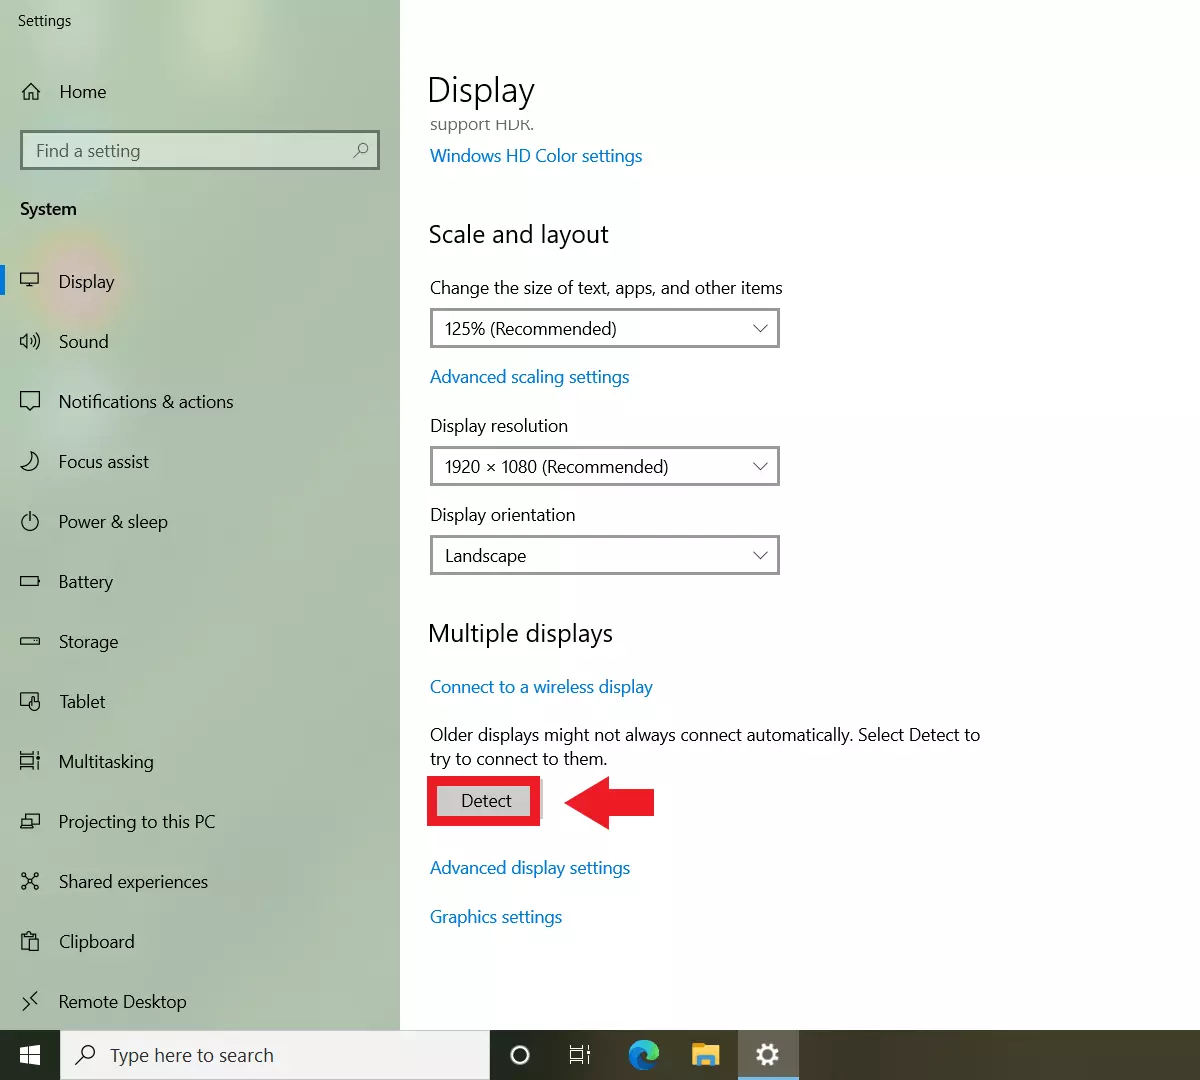
If Windows does not automatically detect another display device even though the screen is connected correctly, go to “Settings” > “System” > “Display” and press the “Detect” button under “Multiple Displays”. If connected correctly, Windows should now display the additional device.


