How to set up a Windows SFTP server
You can set up an SFTP server on Windows using PowerShell or third-party tools with a graphical user interface. We’ll cover both methods and explain the requirements for SFTP.
What do I need for a Windows SFTP server?
Before you set up an FTP server, it’s important to first know the difference between FTP and SFTP. Unlike FTP, which sends data in plain text, the SFTP protocol ensures that data is encrypted when it is being transferred. To establish a secure channel for data transfer, you’ll need Secure Shell (SSH), which is provided by the open-source tool OpenSSH.
To connect to the SFTP server, you need to install an SFTP client. You can, for example, use FileZilla. FileZilla has a drag-and-drop file management system and allows you to transfer up to 4 gigabytes of data. It’s important to make sure your system has enough memory to transfer the amount of data you want to transfer. The following minimum system requirements need to be met:
- Processor (CPU): min. 1.6 GHz (Dual core)
- Memory (RAM): 4 GB
- Disk space: depends on data size
- Operating system: Windows
- Software: OpenSSH, SFTP client
- Internet connection: for data transfer
With secure FTP hosting from IONOS, you’ll have access to quick and secure servers with SFTP or FTPS.
Step-by-step instructions for setting up a Windows SFTP server
To install a Windows SFTP server, you need to download OpenSSH and open the corresponding SSH port so that the SFTP server and client can communicate with each other.
Step 1: Install OpenSSH
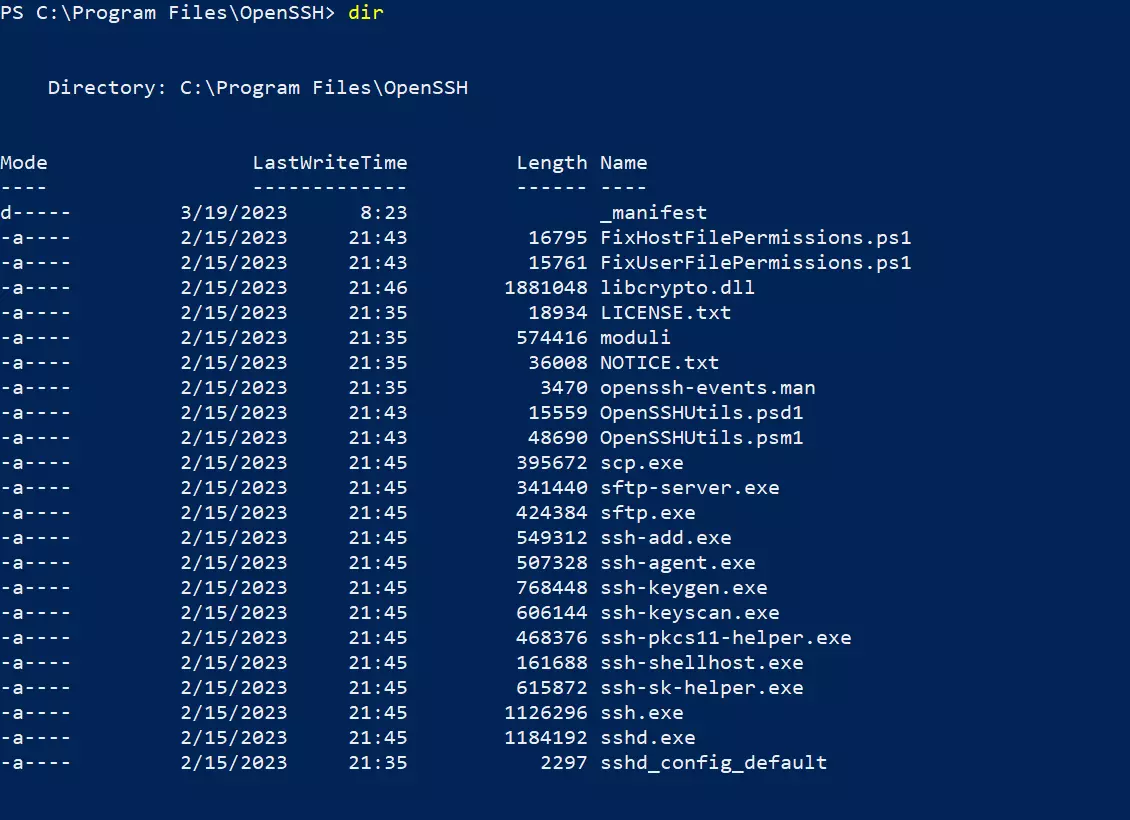
Download the latest version of OpenSSH. This can be done from GitHub. Once you’ve downloaded the latest version, right-click to open PowerShell and select Run as administrator. Then go to the OpenSSH folder:
Use the command dir to list the files in the directory.
Step 2: Activate SSHD and the SSH agent
Both the SSH daemon and the SSH agent can be installed with a command.
Once they have been successfully installed, you can close the PowerShell.
You can manually start the SSH daemon or choose to have it activated with every restart. In Services.msc, you can set it up so that the SSH daemon automatically starts on boot.
Step 3: Open an SSH port
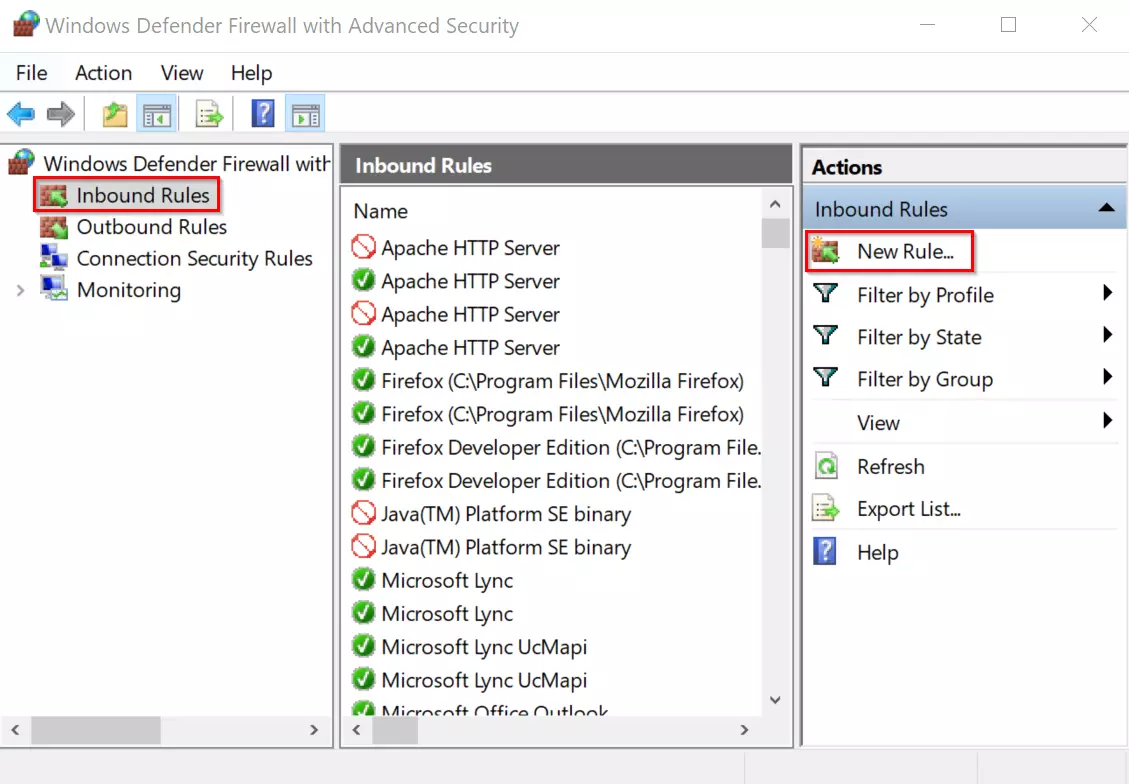
SSH uses port 22 as its standard port. Since Windows doesn’t typically come with SSH preinstalled, this port is normally closed. You can manually open it using Windows Firewall. Open Windows Defender Firewall and select New Rule under Inbound Rules.
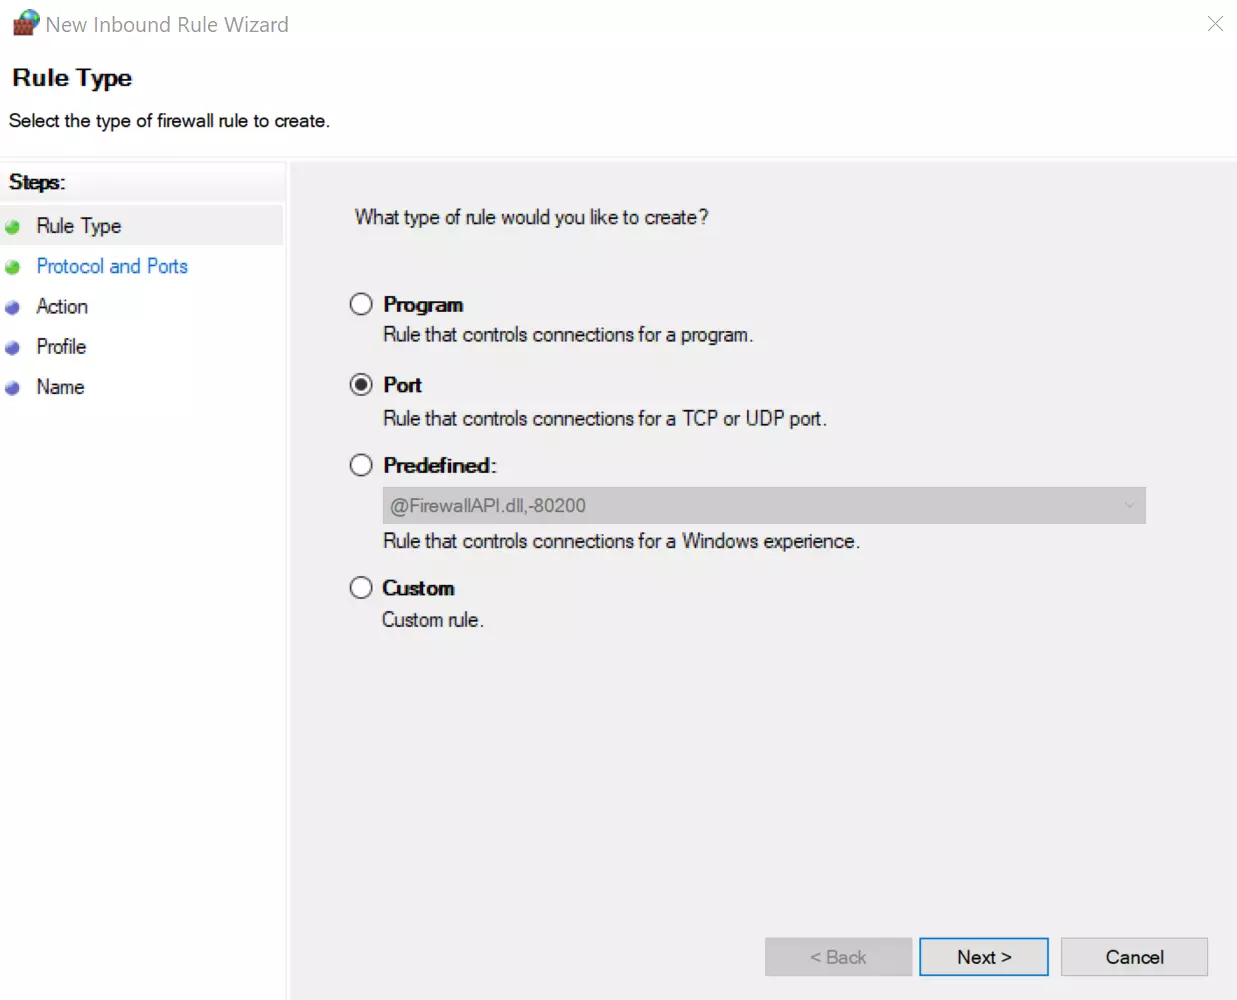
In the next window, select Port and click on Next.
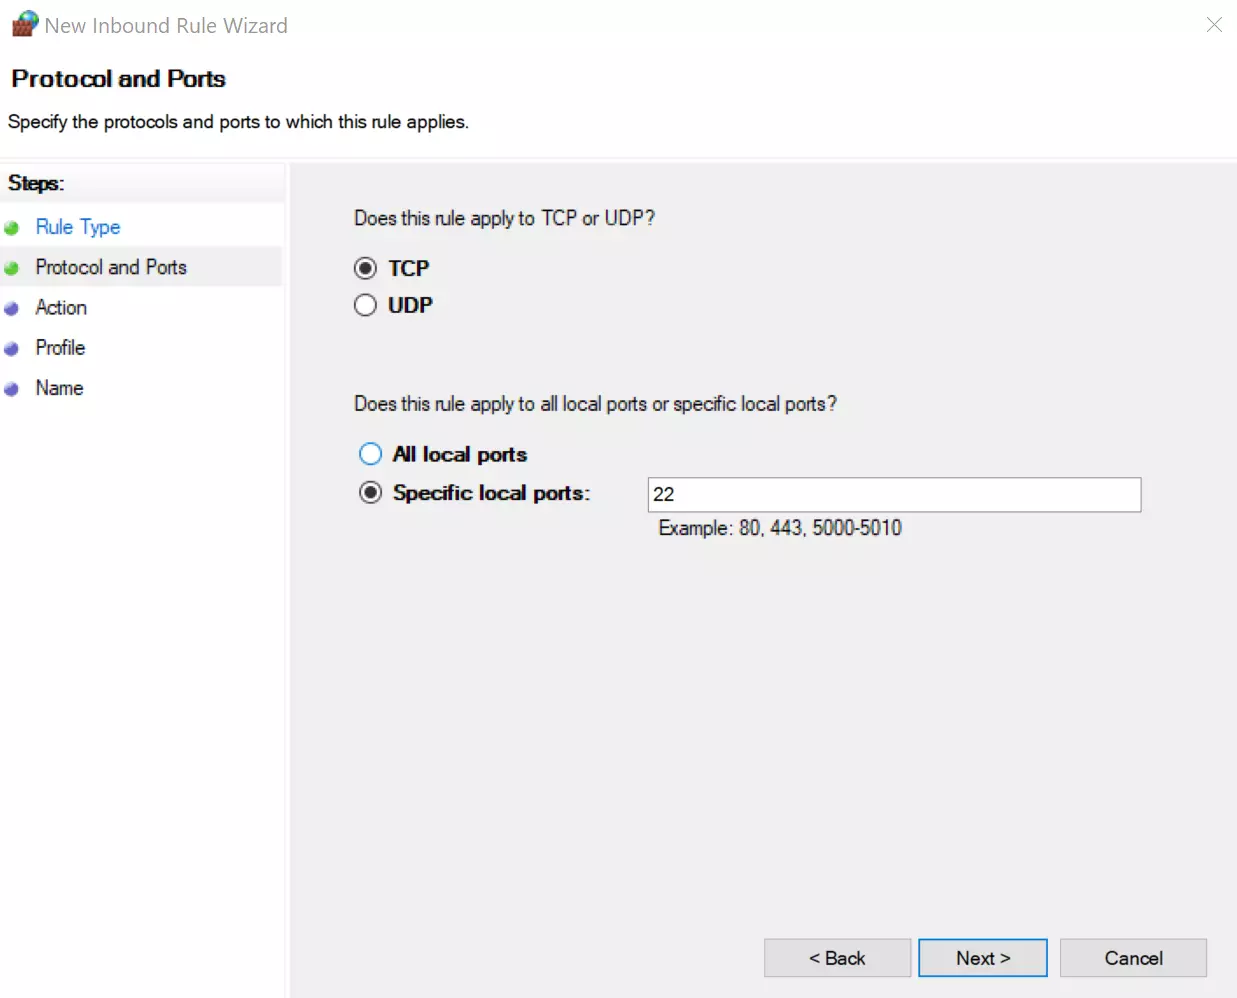
Select the TCP protocol and set “22” as a port.
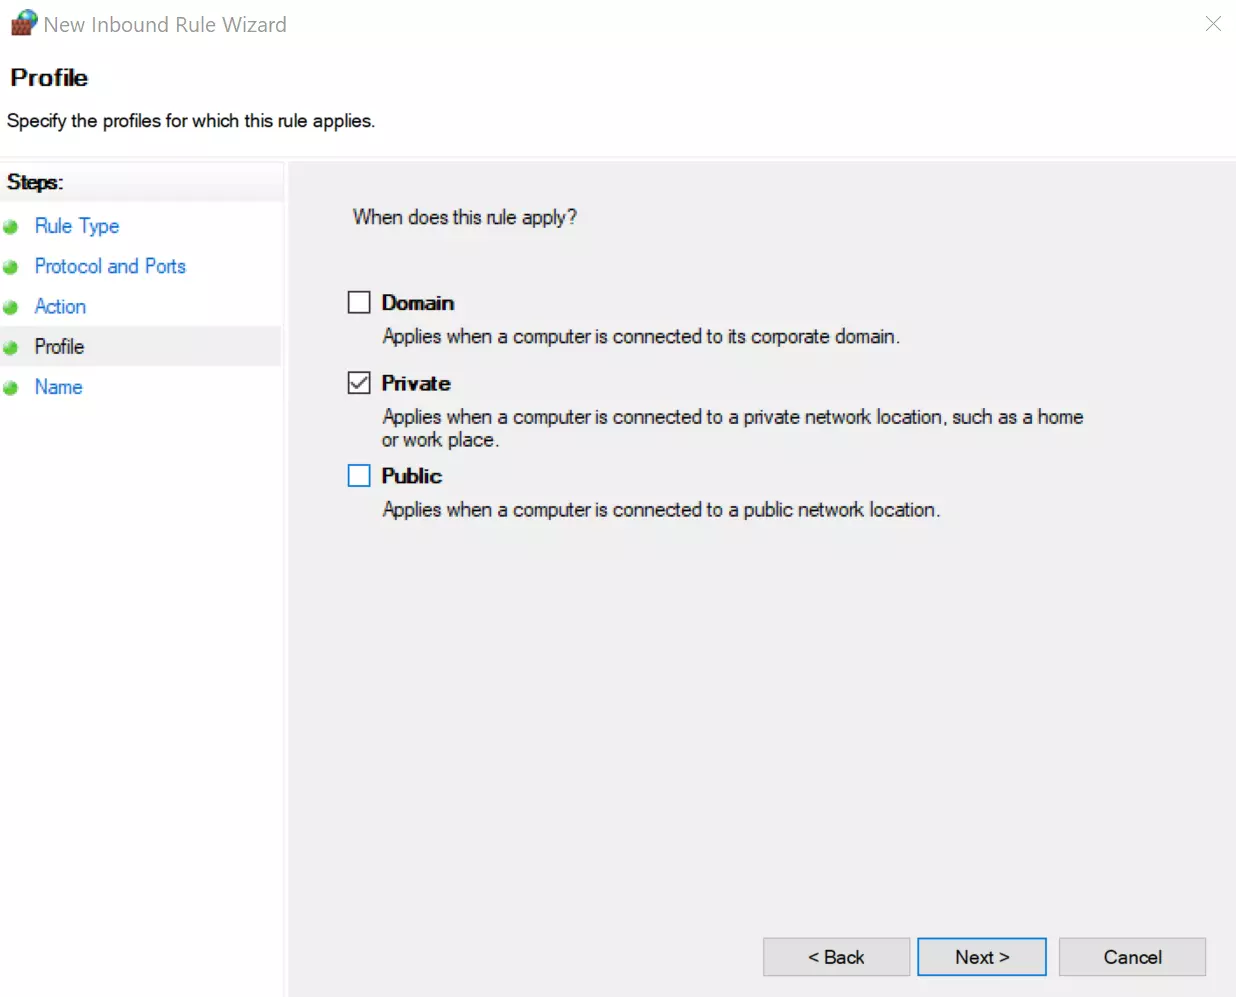
In the next window, keep the connection selected and tick the box next to Private under Profile.
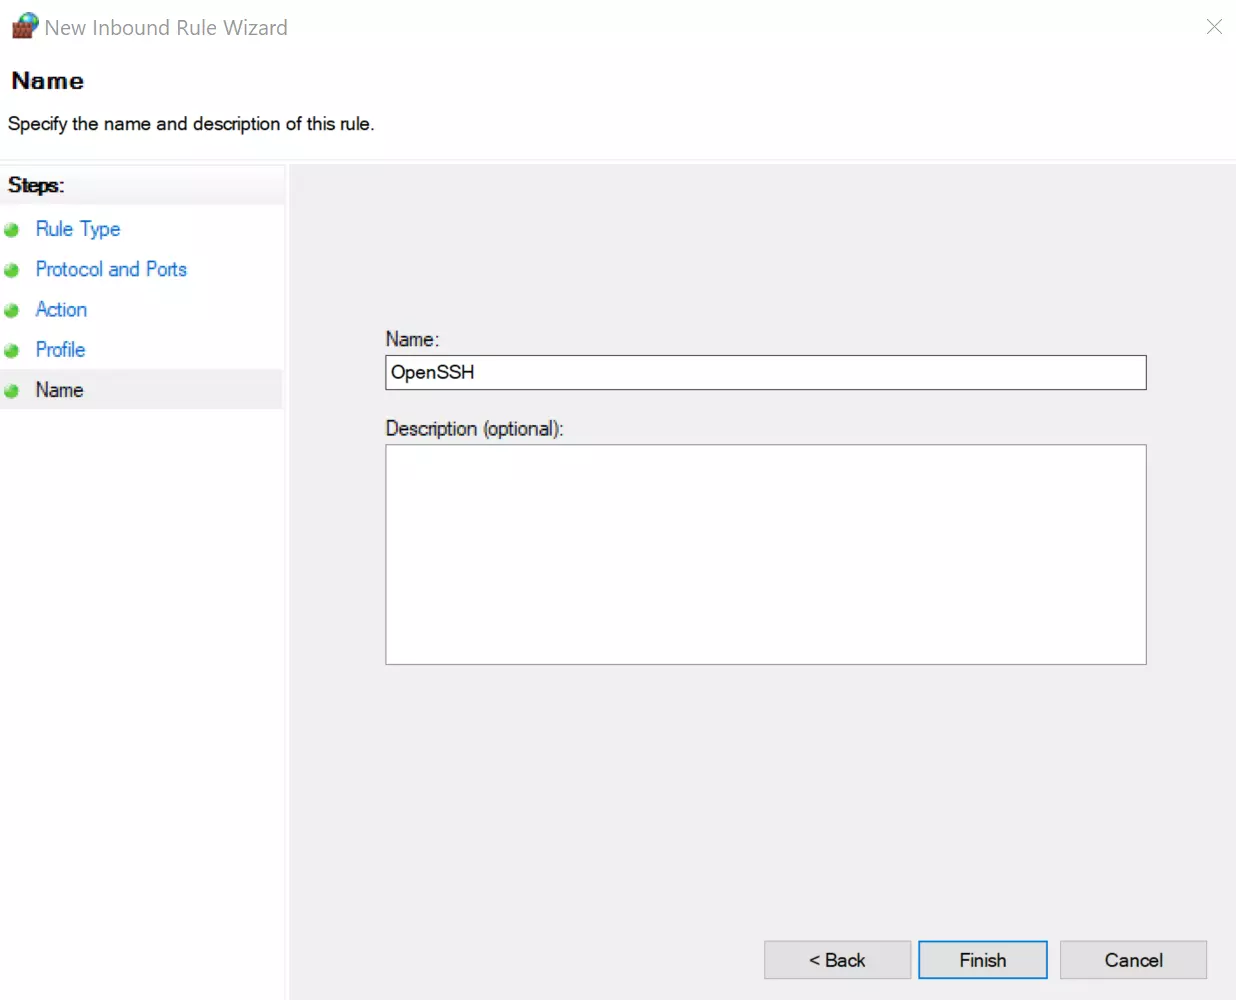
You can also add a name for the new rule. In our example, we’ve used the name “OpenSSH”. You can also add a description. Once you’re done, you can close the port settings by clicking Finish.
Step 4: Create SFTP connection
To connect to the SFTP server, you will need an SFTP client. Our example uses FileZilla, but you can also use WinSCP or Swish. One advantage of Swish is that it’s directly available in Windows Explorer. To configure the SFTP client, you need to enter the following information:
- Connection type (SFTP)
- IP address/Hostname
- Username
- Password
- Port (usually 22)
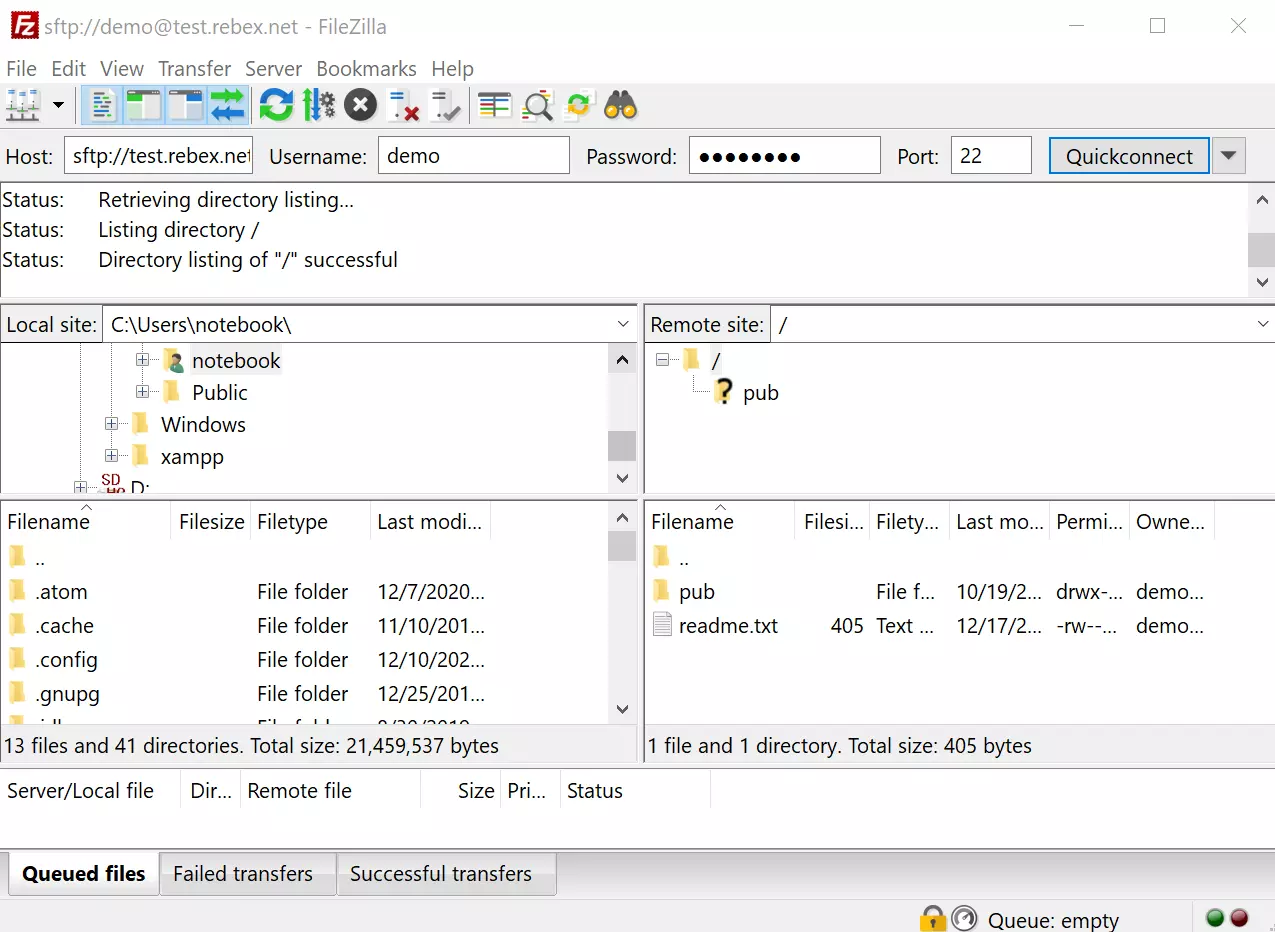
Once you’re done, you can connect to the SFTP server. In our example, this is on the left-hand side of your local computer. On the right, you’ll see the folder structure of the server.
Step 5: Upload files to the Windows SFTP server
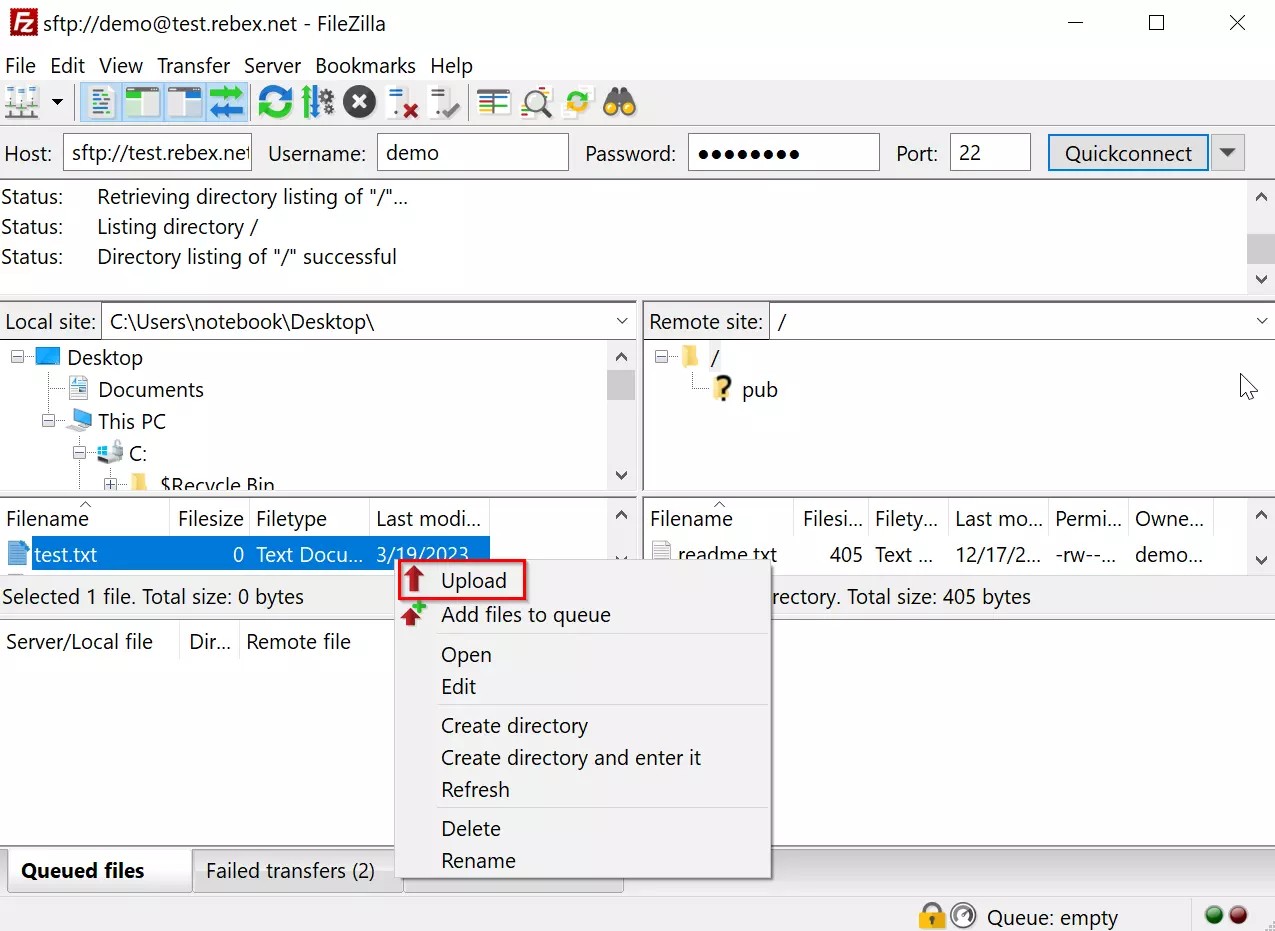
Upload a file to the SFTP server by moving it to the file folder on the right-hand side or by right-clicking and selecting Upload.
Prefer Linux? Read our step-by-step tutorial on how to set up an SFTP server on Ubuntu.

