How to screen record in Windows 10
For a long time, screen recording was only possible by downloading the appropriate software. Since Windows 10, however, screen recording has become an integral part of the operating system. The Xbox Game Bar allows you to record your screen on Windows 10 with just a few clicks. Since this is a gaming function, however, the options are tailored to the Xbox, so that recording the Windows desktop and File Explorer isn’t possible – in principle. Here, we’ll show you how to record your screen in Windows 10. We’ll also explain how to circumvent the restrictions described above.
- Simple registration
- Premium TLDs at great prices
- 24/7 personal consultant included
- Free privacy protection for eligible domains
Screen recorder in Windows: how it works
The integrated screen recorder in Windows is designed for recording video games. However, so-called screencasts can also come in handy for office tasks, for example, when explaining working procedures to colleagues. The integrated Windows tool is suitable for this, because the Xbox Game Bar can be used to record a wide variety of programs. Starting with the Windows desktop or File Explorer, however, a small detour is necessary to circumvent the limitations of screen recording in Windows 10.
Screen recording: Recording a screen refers to capturing a video of the contents displayed on the monitor.
Below, we’ll explain how to record your screen in Windows 10, step by step:
Step 1: Open the Xbox Game Bar
First, open the window that you want to record. Then, hold down the [Windows] + [G] keys at the same time to launch the screen recording tool in Windows 10. Alternatively, you can use the search function in the task bar to find the program. To do this, type in “Xbox Game Bar” and open the application.
If the application asks whether you want to use it for gaming or if it should open the games bar confirm by clicking on “Yes”.
The menu of the Xbox Game Bar will now open. Clicking on certain symbols launches the corresponding windows:
- Via the speaker symbol you can open the “Audio” window
- Via the camera symbol you can open the “Capture” window
- Via the monitor symbol you can open the “Performance” window
- Via the gear wheel symbol you can open the settings
Step 2: Start screen recording
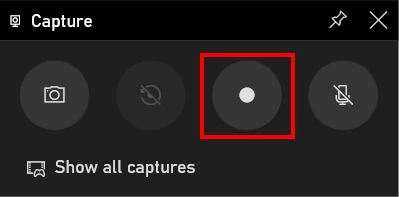
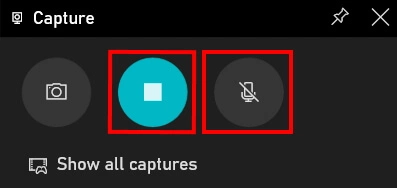
Once you’ve started recording, available options in the capture window will automatically adjust. To stop the recording, click on the square. In addition, you also have the option to turn audio and microphone recordings on and off.
As soon as you start screen recording in Windows, another window will automatically open. Here, you’ll find further options at your disposal, including the option to stop your recording or to turn microphone recording on or off.
Start and stop screen recording in Windows with the key combination [Windows] + [Alt] + [R].
If you’re unable to click on the recording button, it means that you don’t have a suitable window open to record. That’s because the Xbox Game Bar can only be used to record the screen in programs or video games. So, a video recording of your desktop or of the File Explorer isn’t possible. Luckily, there’s a way to avoid this rule. Launch a game or program and then begin your screen recording. During the recording process, simply switch to what you want to record.
Use the key combination [Alt] + [Tab], to switch between screens during your screen recording.
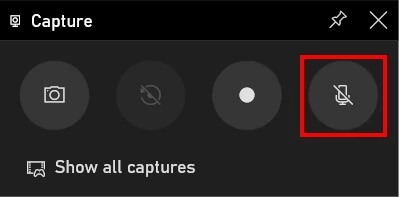
Besides recording your monitor, the Xbox Game Bar also allows you to record your voice. To activate this function, click on the microphone symbol in the “Capture” window. Once activated, the microphone won’t be crossed through anymore and the recording will begin automatically. For webinars or to complement video games, recording your voice can come in handy.
Step 3: Open screen recording
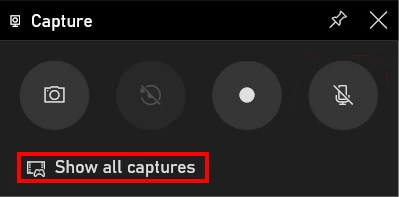
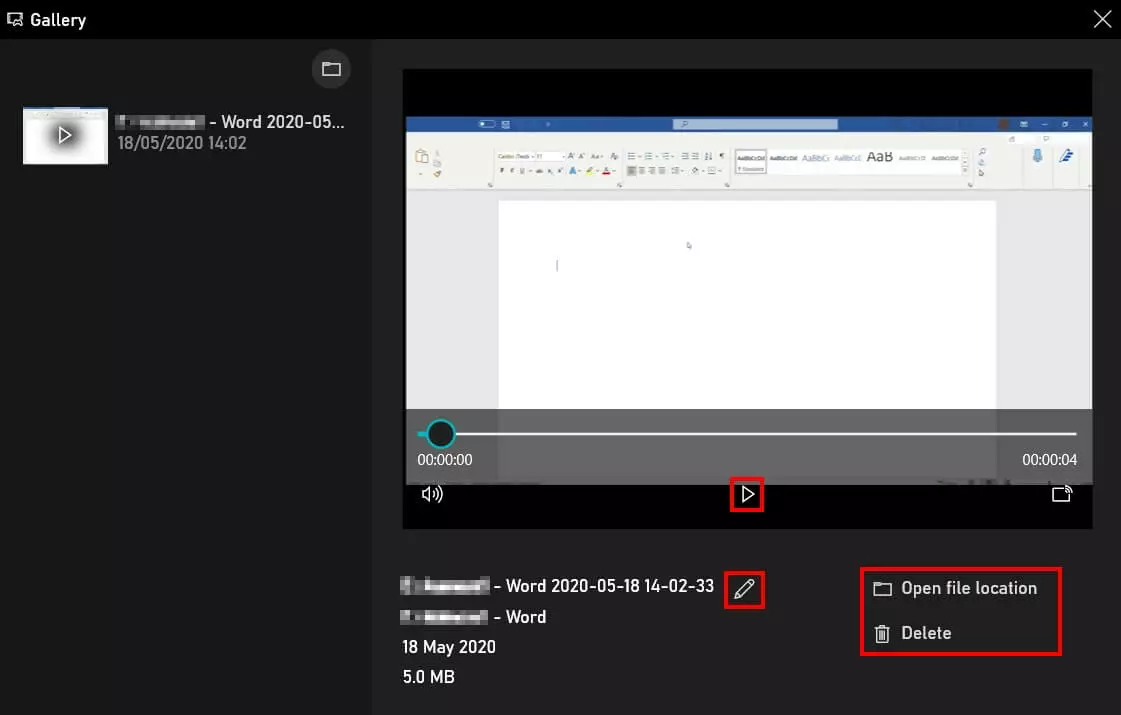
A gallery will now open, with various options to watch and edit your recordings:
- Click on the play button to start playing a screen recording
- Select the pencil symbol to change the file name
- Open the file location to save a file
- Delete a screen recording
- Store, share, and edit data easily
- Backed up and highly secure
- Sync with all devices


