How to install and use Composer on Windows 11
The package manager Composer greatly simplifies working with the PHP scripting language. Once installed, you can easily access a variety of ready-to-use PHP packages such as libraries and integrate your own packages. So how does the Composer Windows installation work on Windows 11?
Composer on Windows 11: How to install step by step
The easiest way to install Composer on Windows 11 is via the Composer Windows installer file. It’s available to download for free and executed in the usual manner. We’ve summarized the individual steps below.
Before installing and using Composer, you need to have a version of PHP set up on your system. Find out how to install PHP in our article on the topic.
Step 1: Download Composer installation file
Head to the official Composer download page. Click the Composer-Setup.exe link to download the installer file for Windows.
Step 2: Begin installation of Composer
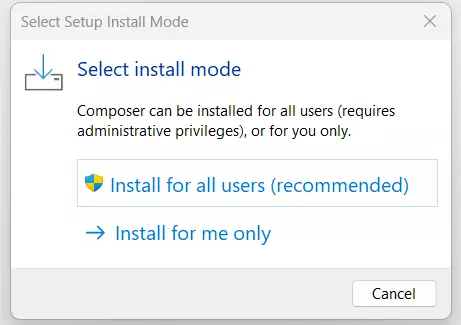
Navigate to your download directory and double-click the downloaded file. Then select the recommended option Install for all users so all users of the device are able to access the package manager later.
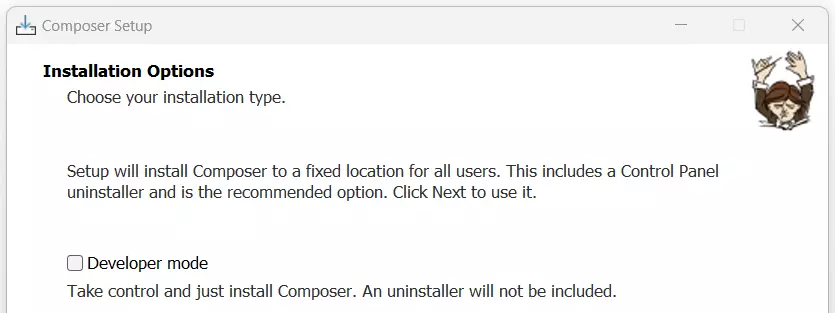
From the option that follows, you can activate the developer mode by setting a check mark. In this case, the wizard will automatically determine the path of your PHP installation. However, you cannot choose between the PHP version if you have multiple PHP editions installed.
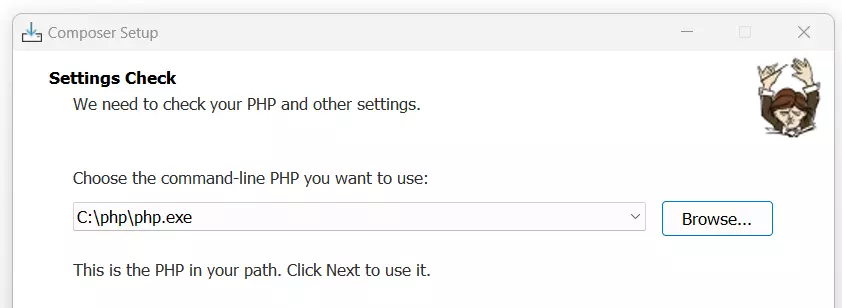
Skip the following proxy settings and finally press Install to start the installation.
Step 3: Finish setup
Following successful installation, you’ll receive a notification that you need to use a new command line instance to use Composer. That’s because the system environment has changed. Click Next and then Finish to complete the installation.
In some cases, you may need to restart Windows 11 for the Composer installation to be detected correctly.
Step 4: Test Composer installation via Windows 11 command prompt
Finally, check if the package manager setup worked. For this purpose, open the command prompt by pressing the key combination [Windows] + [R] and executing the “cmd” command.
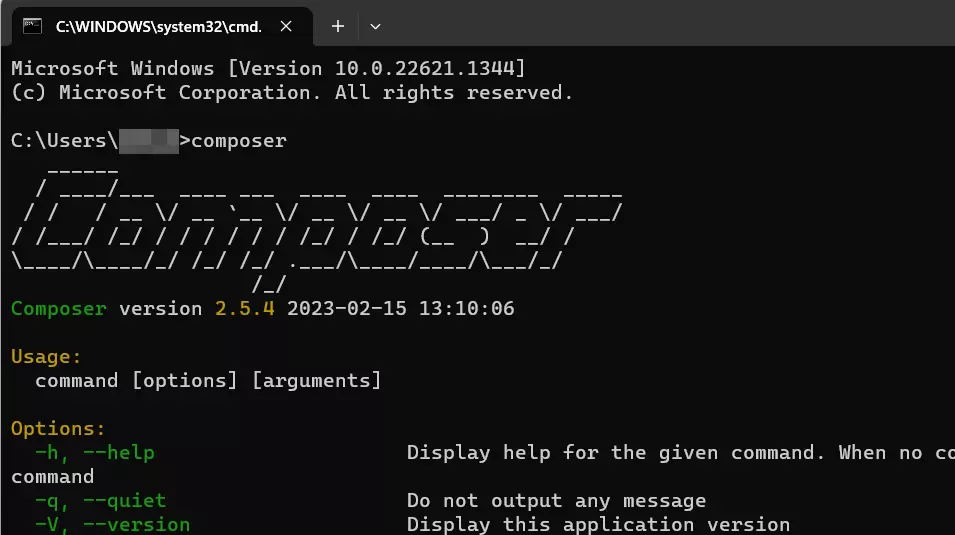
In the command prompt window, type “composer” and confirm by pressing Enter. You should see the installed Composer version and an overview of available commands.
You can even access PHP Composer using your IONOS web hosting plan. Find out more about using PHP Composer in IONOS web hosting plans in our Digital Guide.
How to use Composer on Windows 11 (An example with cocur/slugify)
Once you’ve installed Composer on Windows, you can use the package manager to obtain existing public PHP packages. We’ll show you how below using the cocur/slugify package as an example. This package is used to convert strings to slugs.
Step 1: Install Git and add to PATH
To download the cocur/slugify package, the Git version control system must be installed on your system and added to the PATH system variable. Windows 11 uses this variable to determine the required files for running a command-line program.
If you haven’t already installed Git, you can do so now. Detailed information on installing and using the tool can be found in our Git tutorial.
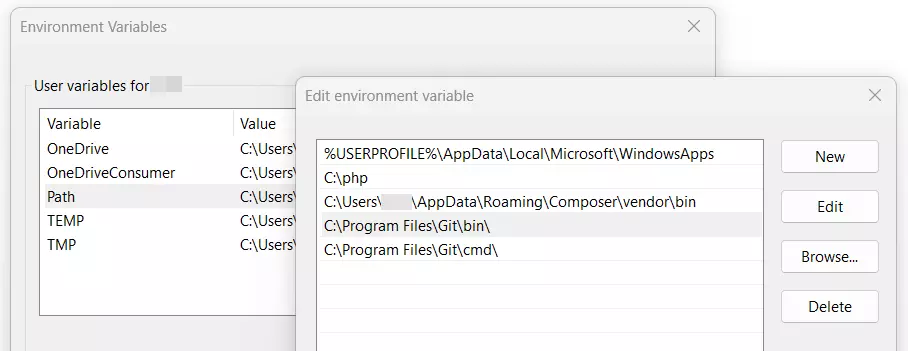
To add the version management tool to the PATH variable, do the following:
- Start Windows search and search for “Edit environment variable”.
- Click on the corresponding search result.
- In the Advanced tab, open the Environment variables menu.
- In User variables select Path and press Edit.
- Click New and paste the value “C:\Program Files\Git\bin\”.
- Repeat for “C:\Program Files\Git\cmd\”.
- Save your adjustments by clicking on OK.
Step 2: Create directory for the Composer package
Next, create a directory for the PHP package that you want to obtain using Composer. Launch the command prompt using the key combination [Windows] + [R] and the “cmd” command. We want to create the Slugify directory directly in C:, so we are going to change to the root directory:
Then we create the directory with the name “slugify” by entering the following command:
Step 3: Install package using Composer
Swap to the created directory by executing the following command:
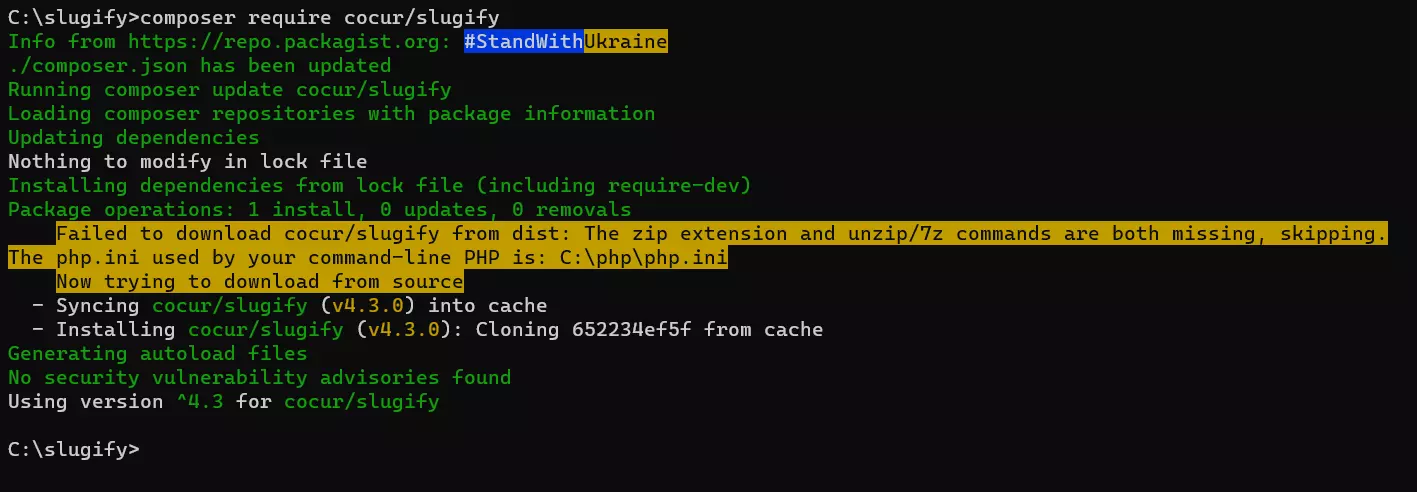
Once in the directory, install Slugify using Composer as follows:
Step 4: Create test PHP script
You’ll find the composer.lock and composer.json files and a folder named “vendor” in the newly created slugify directory. The autoload.php file, which you need to include in your PHP script to access the services of the cocur/slugify package, is located in the vendor folder.
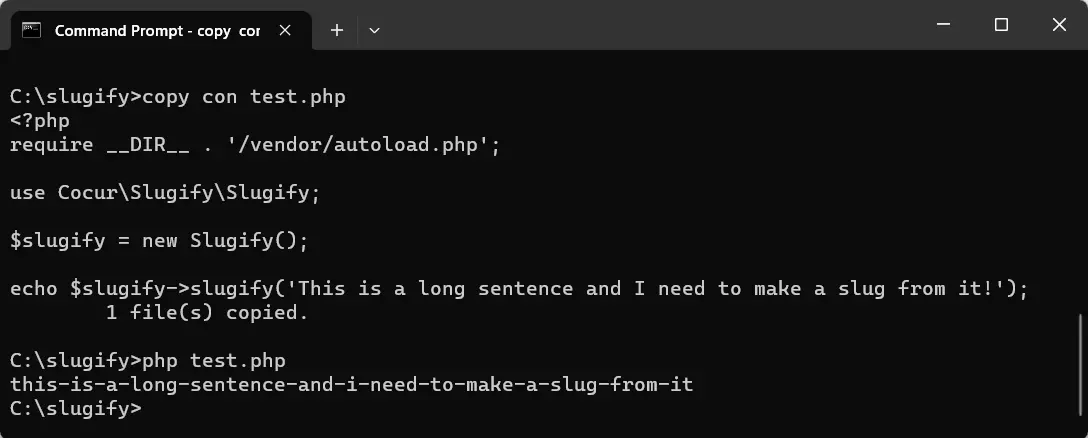
To create a simple test script, create a file named test.php in the main slugify directory by typing the following command:
Insert the following PHP code which, among other things, integrates autoload.php:
Save the file with the key combination [Ctrl] + [C] and execute the script using the following command:
The output is the slug of the string specified in the brackets:
Our Digital Guide provides many more exciting articles about PHP Composer that might be of interest to you:

