How to change your mouse cursor (A step-by-step tutorial)
Windows 11 and some updated versions of Windows 10 (starting in 2019) offer you the possibility to change your mouse cursor. With just a few clicks in the Bluetooth & other devices menu in Settings, you can customize the color and size of your mouse pointer.
How to change your mouse cursor in Windows 11
The classic white mouse cursor is a standard user element in the Windows operating system. This doesn’t mean, however, that you can’t change it. First introduced in Windows 10, the option to personalize the mouse pointer is also available in Windows 11. To find out which operating system you’re using, press [Windows] + [i] and go to System and then Info.
How to find the cursor settings
There are many personalization options for your cursor. You can change how it looks, its size, visibility, speed or color to fit your preferences. To find the cursor settings in Windows 11, do the following:
Step 1: Open Windows settings with the Windows shortcut [Windows] + [i]. On the left-hand side of the menu go to Bluetooth & other devices. Click on the Mouse option in the menu.
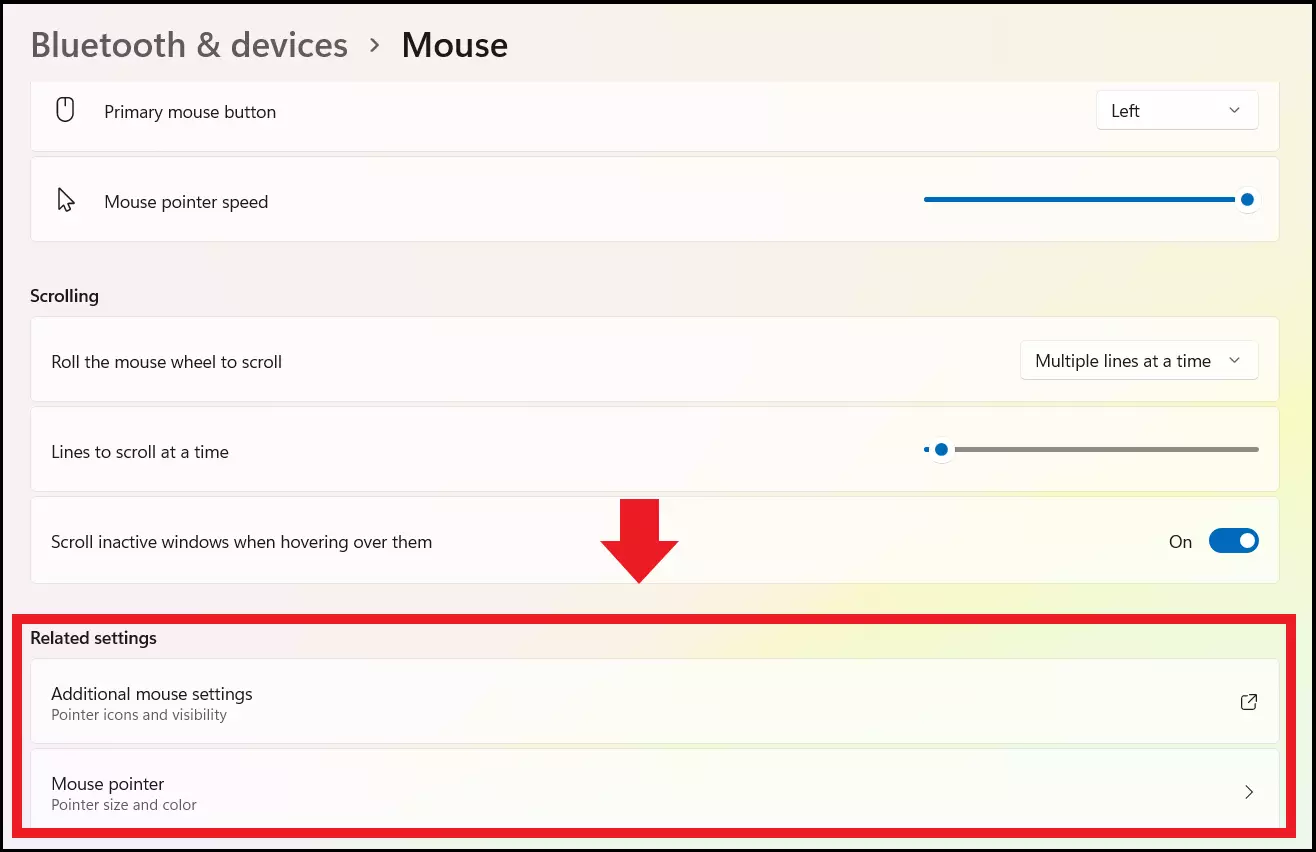
Step 2: Scroll down the menu. The most important settings for your cursor can be found in the Related settings menu under Additional mouse settings and Mouse pointer.
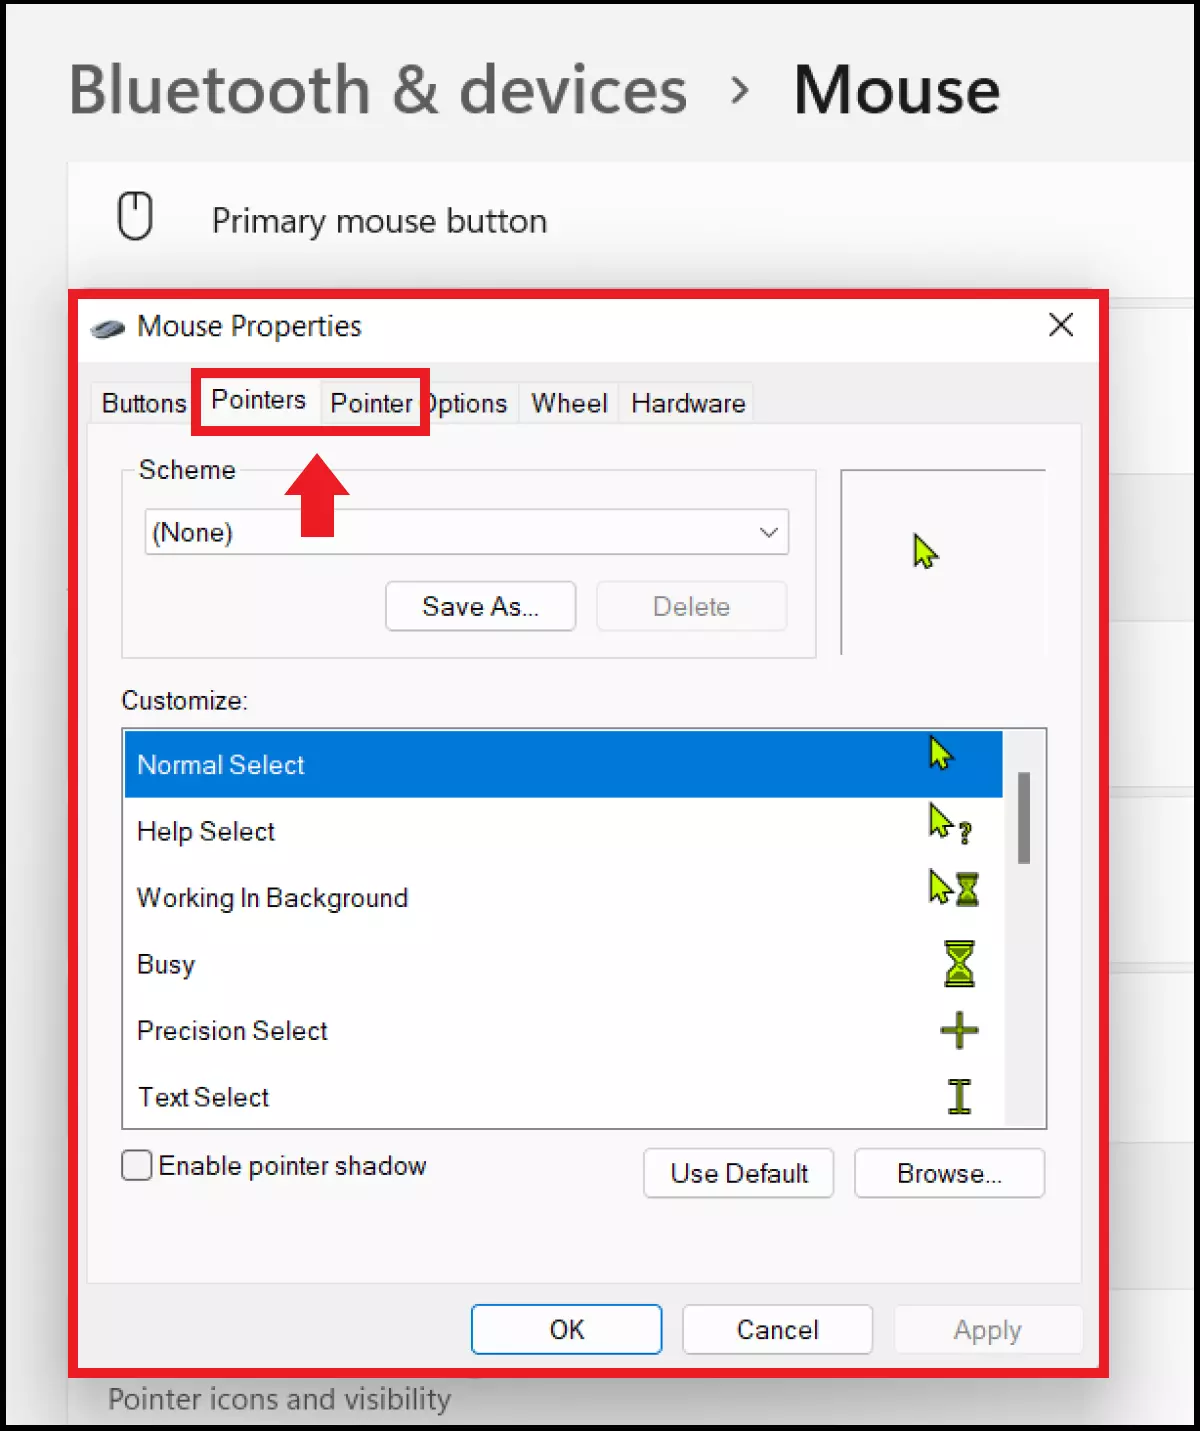
Step 3: Select Additional mouse settings. You will now see the Mouse properties window. You will find the most important settings for your mouse under the Pointer and Pointer options tabs. In the Pointer tab, you can choose from a range of templates for your cursor in the Scheme box. In Pointer options, you can change the speed of your cursor as well as its visibility and cursor trails. You can undo any changes by turning off mouse acceleration or by resetting the cursor settings to factory settings.
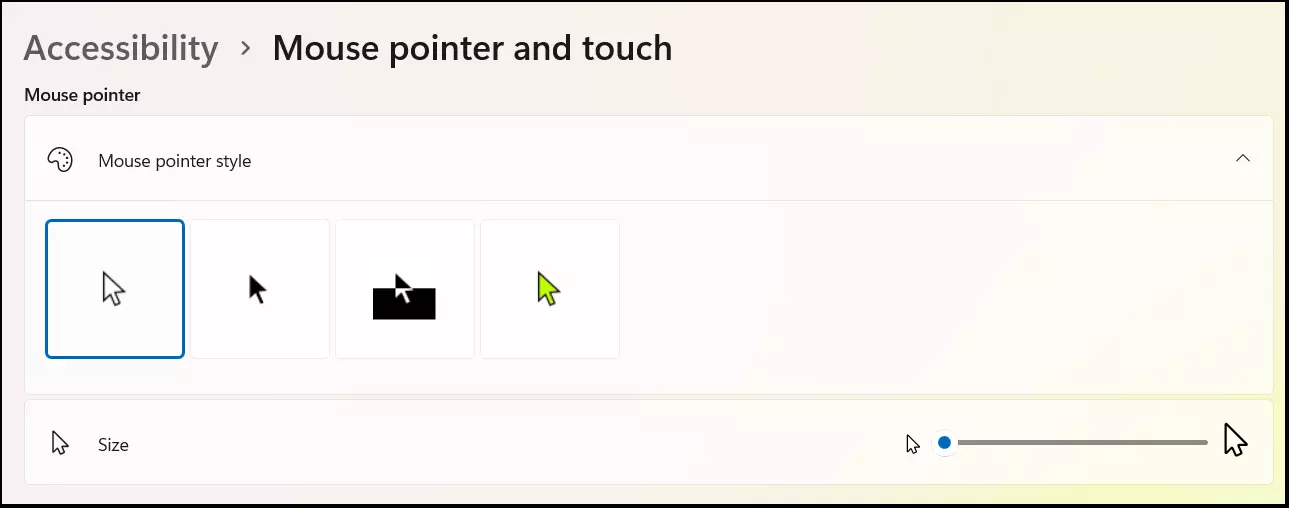
Step 4: You can change other basic features in the Mouse pointer menu. In this menu, you can change the size as well as find the touchpad submenu, where you can make changes to the touchpad cursor.
How to change the size of your cursor
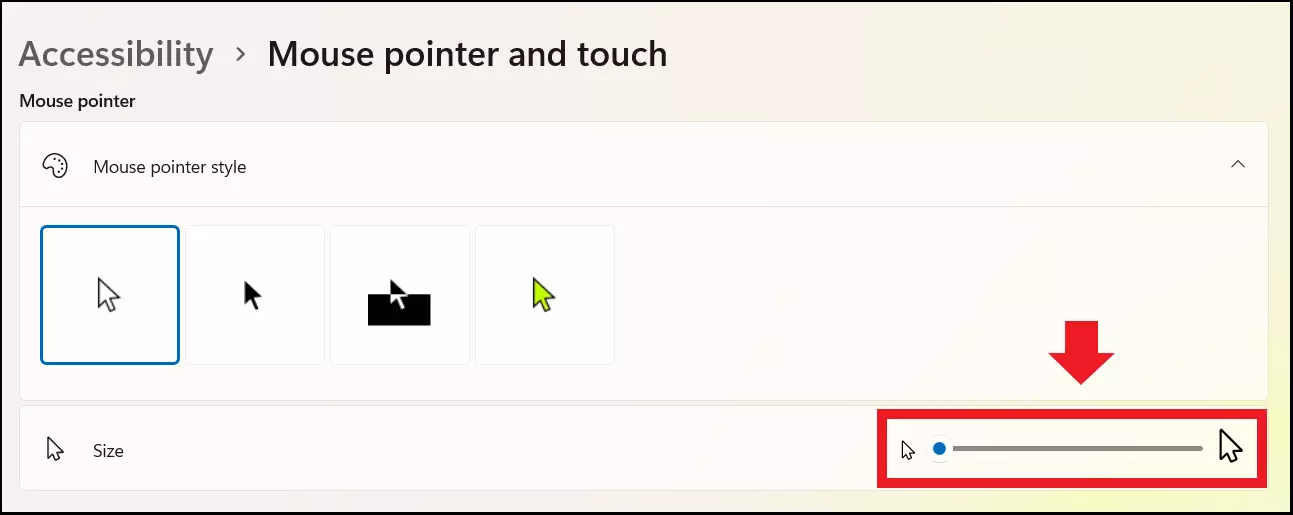
Step 1: If you want to change the size of your cursor, go to the Related settings menu and then to Mouse pointer.
Step 2: You can change the size of your cursor with the slider in the menu.
How to change the color of your cursor
Step 1: If you want to change the color of your cursor, go to Mouse pointer in the Related settings menu.
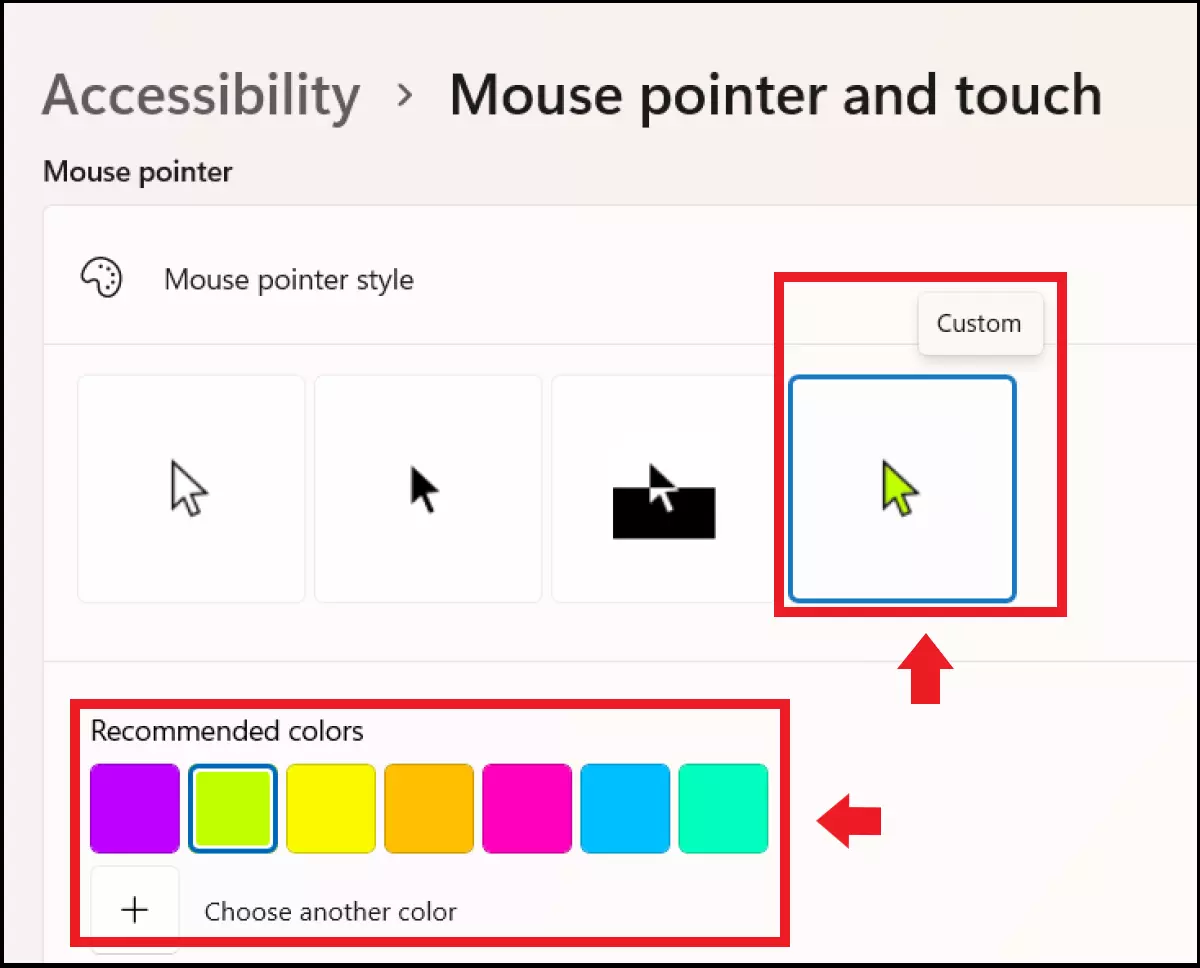
Step 2: Select the yellow-colored field on the right-hand side of the Mouse pointer menu and click Custom. Below you will see the Recommended colors submenu. From here you can select a color from the options presented to you or you can select Choose another color.
