How to create Screenshots in Ubuntu
Similar to taking screenshots in Linux, there are several ways to take screenshots in Ubuntu: Use the [Print/PrtSc] key and optionally [Alt] or [Shift] in addition, or use certain terminal commands. Conveniently, Ubuntu has its own screenshot tool, but you can also use programs like Shutter or GIMP. We will show you how the different methods work.
Create screenshots in Ubuntu using keyboard shortcuts
The easiest way to create Ubuntu screenshots is using keyboard shortcuts. While this option is easy to use, it only offers very few choices. You will need the [Print] key, which on conventional keyboards is found in the top row between the [F12] and [Scroll Lock] keys. It is labeled either with the word “Print” or with “Print Screen” or “PrtSc”. The following keyboard shortcuts are available to take screenshots in Ubuntu:
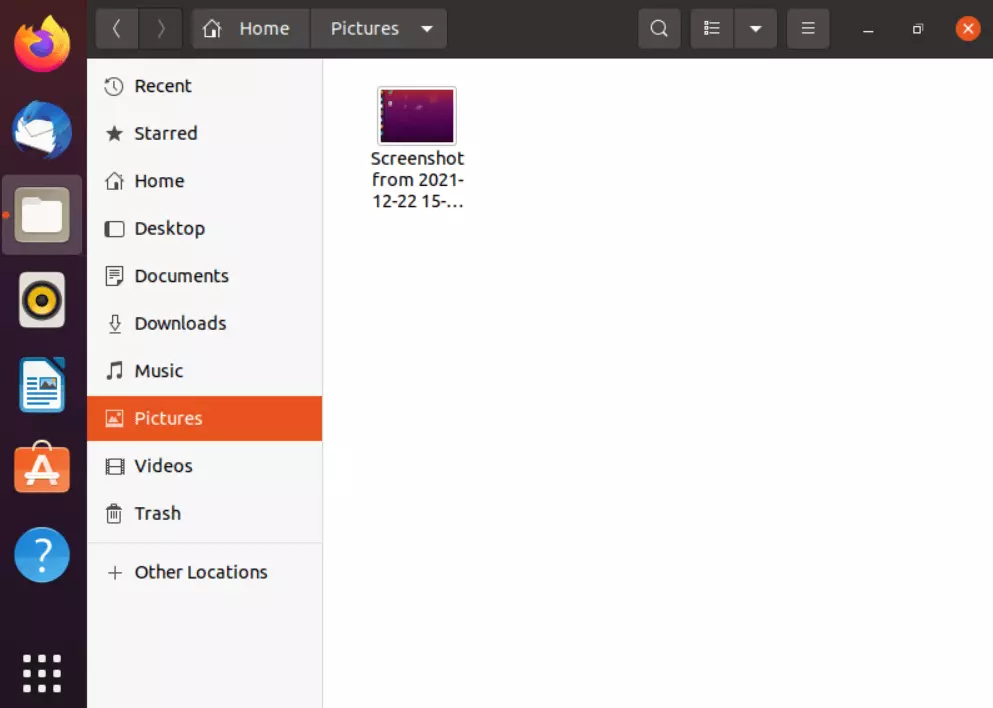
- [Print]: Use the [Print] key to create a photo of your entire screen, which is saved in the Pictures folder.
- [Print] + [Alt]: Using this combination, take a screenshot of the currently active window in Ubuntu.
- [Print] + [Shift]: This combination allows you to select which area of your screen you want to photograph. Drag and click to set the height and width of the image.
If you press [Ctrl] in addition to any of the above combinations, the image will not be saved, but merely copied to the clipboard.
With Linux Hosting from IONOS, you have a choice of four different plans. The best security features and a flexible scalable performance are always included in the price.
The screenshot tool in Ubuntu
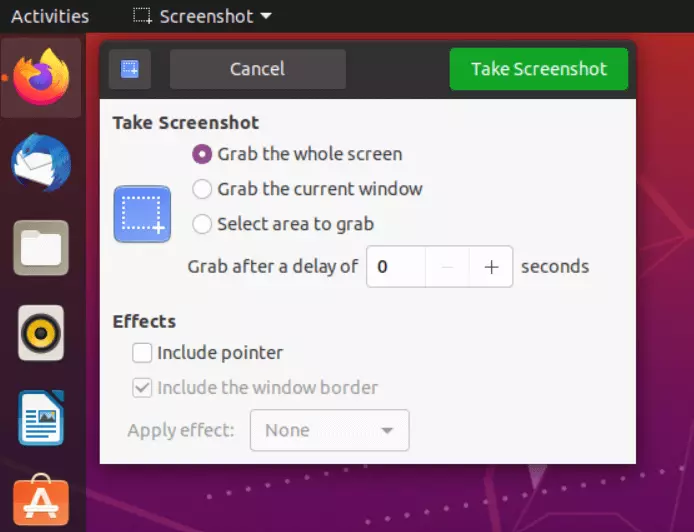
Ubuntu also offers a screenshot tool, with which you can easily create screenshots yourself. You can find the tool in the start menu. To do this, follow these steps:
- Click on the Start menu and enter the search term “screenshot”.
- Open the screenshot tool in Ubuntu.
- Now you have the choice of what kind of screenshot you want to create. Similar to the keyboard shortcut method, your options are an image of the entire screen, an image of the active window, or an image of a selected area.
- You also have the option to set a delay. This gives you time to prepare the capture area in the best possible way.
- Now click “Take screenshot” to take a screenshot in Ubuntu based to your settings.
- Once the screenshot is created, set the storage location. By default, the screenshots are saved in the Pictures folder.
The more complicated way using the terminal
You can also take a screenshot in Ubuntu using the terminal. However, this way is a bit more cumbersome than the options already presented. First, download and install the programs ImageMagick and fbgrab. Once this process is complete, type the following command in the terminal:
This will give you a text file that you can convert via fbgrab. To do this, use the following command in the terminal:
However, this method offers rather few advantages overall.
Useful tools for taking screenshots in Ubuntu
Instead, it is worth reaching for a professional screenshot tool. Shutter, for example, is not only suitable for simply creating a screenshot in Ubuntu, but is also very useful for later editing. In addition to the above-mentioned choices for the screenshot, the program also offers watermarks, a comment function, subsequent shading, and an editor for post-processing. Especially if you create screenshots in Ubuntu for professional use and want to forward them to customers or employees later on, a tool like this is a good choice. Besides Shutter, there are alternatives such as GIMP, Flameshot, or Deepin Screenshot.
Conclusion: Create screenshots in Ubuntu easily
So, it is possible to create a screenshot in Ubuntu without any problems. In most cases, the tools provided by the operating system itself are already sufficient to do this. Only for professional use, external tools are the better choice. With these tools, the screenshots can also be edited or commented on directly.
If you use another operating system and want to create screenshots, we have the following guides for you:


