How to create a PowerShell Script step by step
With Windows PowerShell, you can perform various system tasks by entering commands in a text interface.
What is a PowerShell script?
Windows PowerShell is a command-line interface and scripting language designed specifically for the administration and automation of Windows operating systems and related Microsoft products. It was first published in 2006 and has since played an important role in the system administration of Windows systems.
A PowerShell script consists of a sequence of PowerShell cmdlets, functions, variables, conditions and other instructions to automate processes and recurring tasks. PowerShell scripts are saved in text files with the file extension .ps1. You can use any text editor or the PowerShell Integrated Scripting Environment (ISE) console to create them. To execute the script, open the PowerShell console and enter the path to the script file.
Regardless of how you invoke a PowerShell script, you should ensure that the script execution policies are properly configured in your PowerShell environment. By default, PowerShell script executions are disabled on many systems to minimize security risks. You can change the execution policies using the Set-ExecutionPolicy cmdlet.
- Dedicated enterprise hardware
- Intel® Xeon® or AMD processors
- Leading security technologies
How to create a PowerShell script using Visual Studio Code
Visual Studio Code (VS Code) is a popular, free code editor from Microsoft designed specifically for creating scripts and applications. It includes powerful syntax highlighting for PowerShell code and supports IntelliSense, which enables codes to be completed automatically.
Step 1: Install VS Code
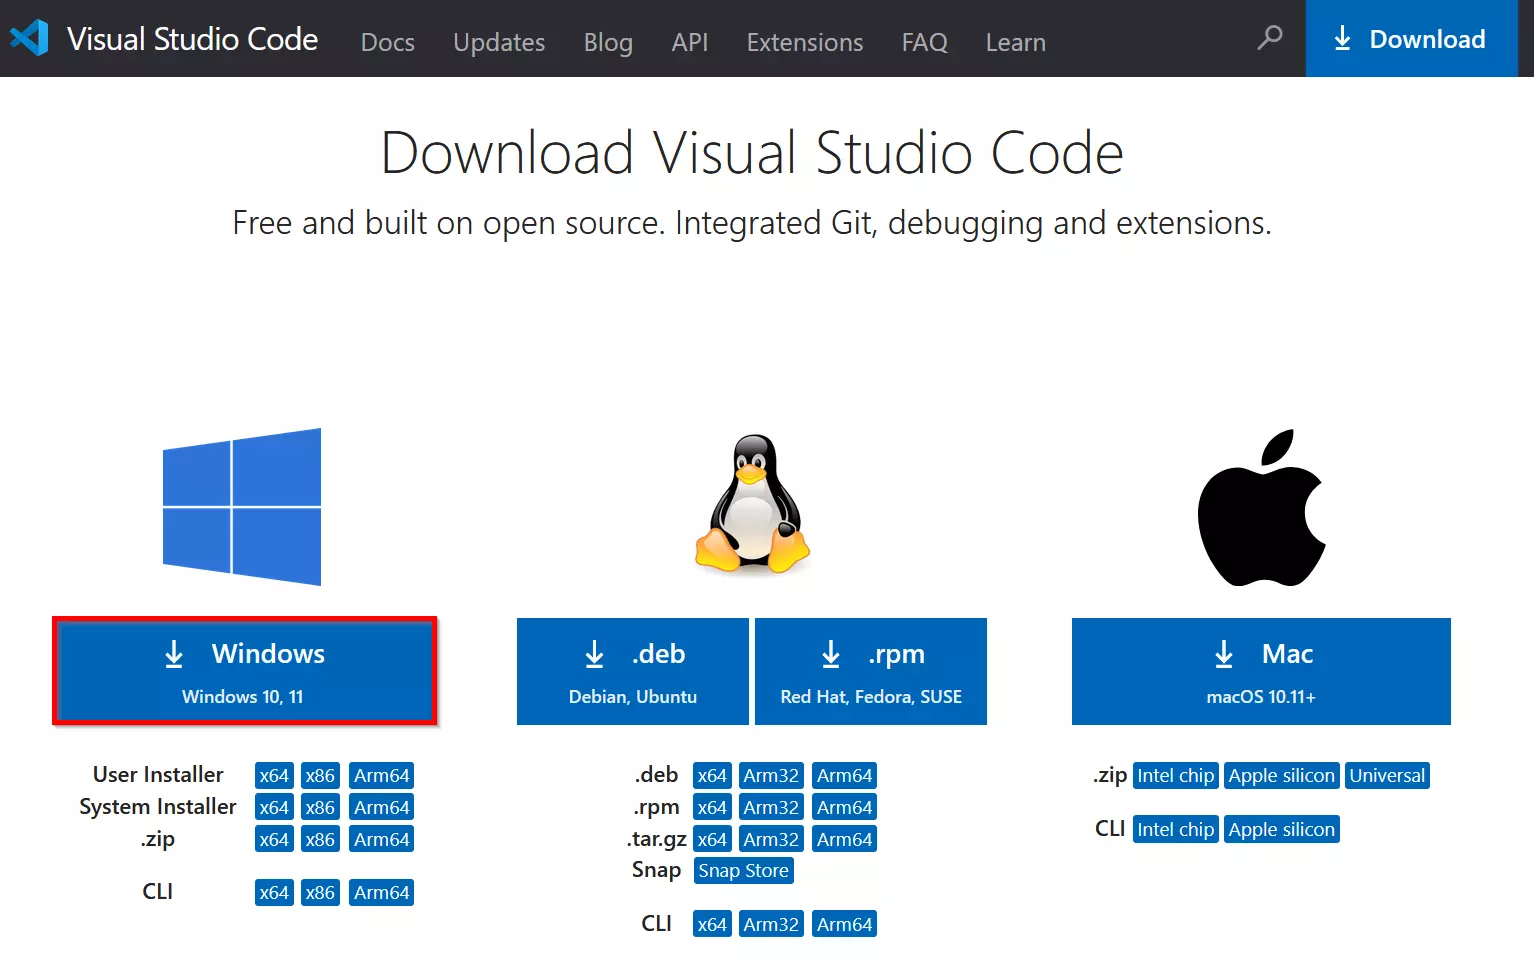
If you don’t have VS Code installed, you can download it from the official website. Select Windows as the operating system and double-click to start the installation.
Step 2: Add PowerShell extension
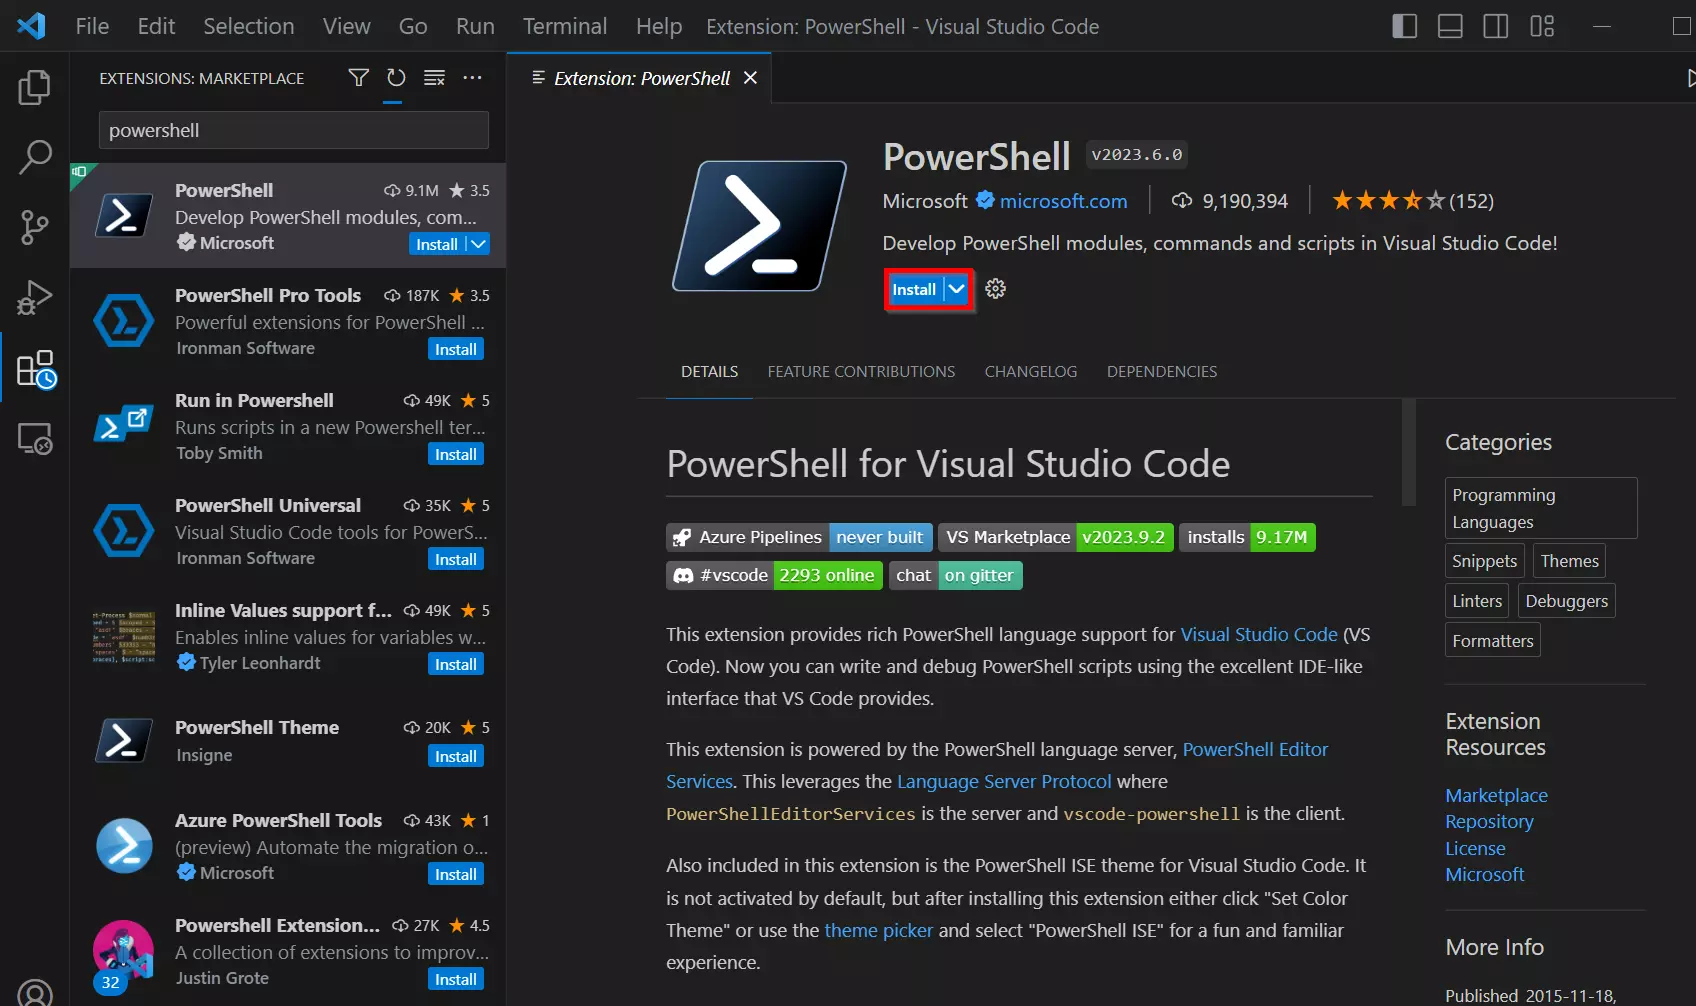
To be able to use PowerShell efficiently in VS Code, you should install the official PowerShell extension from Microsoft. To do this, go to the Extensions area in VS Code (icon in the left sidebar) and search for PowerShell. Alternatively, use the [Ctrl] + [Shift] + [X] shortcut. Install the extension by clicking on Trust Workspace & Install.
Step 3: Create PowerShell script
You can open an existing PowerShell script or create a new one by selecting File > New Text File and then entering the file name including the extension “.ps1” under Save As.
Here is an example of PowerShell code that can be written to the open file:
Step 4: Run PowerShell script
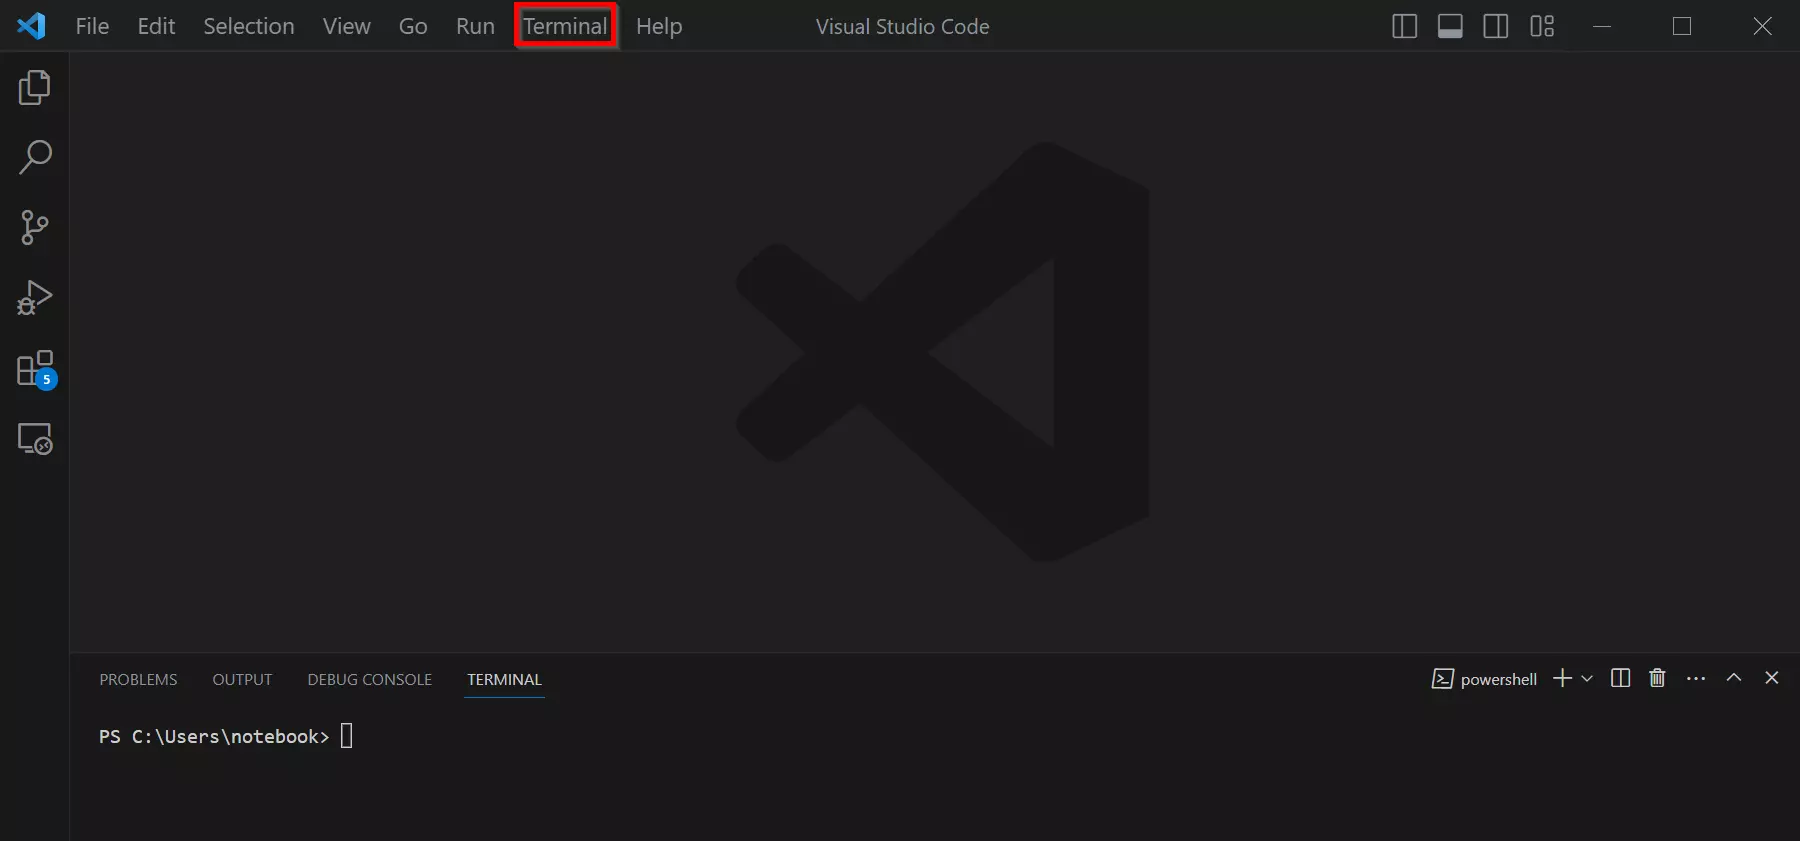
VS Code contains an integrated terminal that you can use to execute PowerShell commands directly in the environment. Open the terminal by clicking on Terminal > New Terminal and selecting PowerShell as the terminal type.
How to create a PowerShell script using Notepad
In this section, we will show you how to create a PowerShell script using the Notepad text editor.
Step 1: Open Notepad
Click on Start or on the Windows icon at the bottom left of your desktop. Enter “Notepad” in the search bar and press the Enter key. This will open the Notepad text editor.
Step 2: Write PowerShell code
You can paste the PowerShell code directly into the Notepad editor.
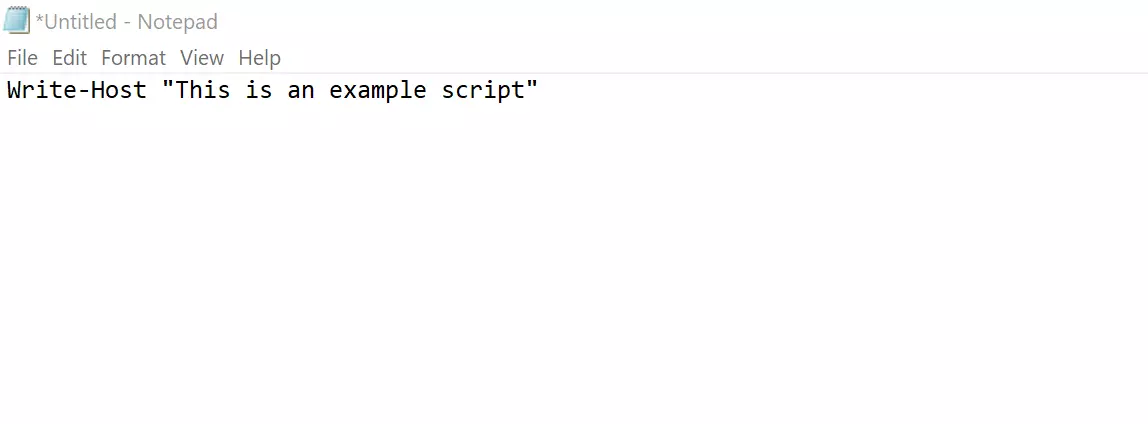
Click on File > Save or use the key combination [Ctrl] + [S]. Enter a file name and add “.ps1” onto the end to save the script as a PowerShell file. Select a storage location on your computer and click Save.
How to create a PowerShell script using Integrated Scripting Environment (ISE)
The PowerShell Integrated Scripting Environment (ISE) is an integrated development environment (IDE) from Microsoft. PowerShell ISE is available on Windows systems by default and is a robust and user-friendly environment for developing PowerShell scripts. Note that the ISE has been replaced by Visual Studio Code (VS Code) in PowerShell 5.0 and higher, as it has additional features and flexibility.
Step 1: Open PowerShell ISE
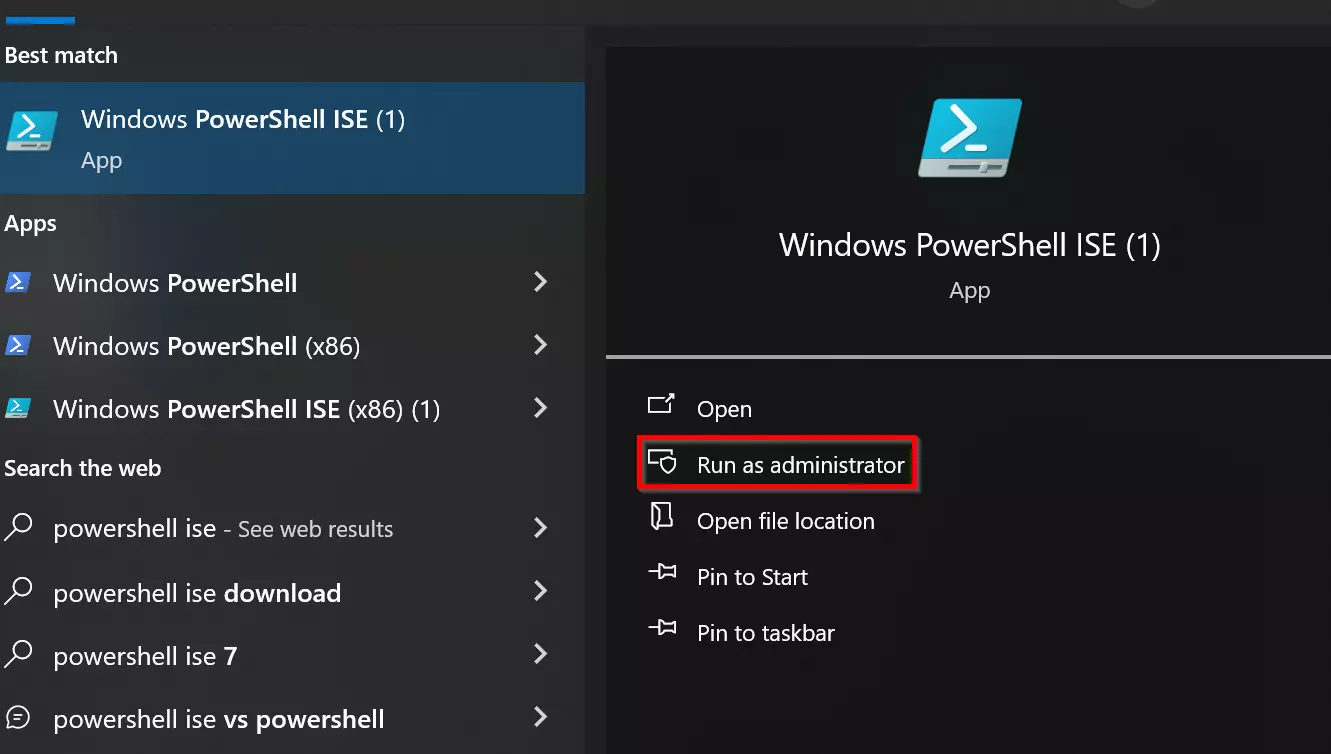
Click on Start at the bottom left of your desktop. Type “PowerShell ISE” in the search bar and select Run as administrator.
Step 2: Create a new script
In PowerShell ISE, you can create a new script by clicking on File > New or by using the key combination [Ctrl] + [N]. Write your PowerShell code in the main window of the ISE. You have access to features such as syntax highlighting, automatic code completion and a clear user interface that makes script development easier.
Here is an example of a simple PowerShell script:
Step 3: Save the script
Click on File > Save or press [Ctrl] + [S]. Make sure you add “.ps1” on the end to save the script as a PowerShell file.
How to run PowerShell script
A PowerShell script is usually started via the PowerShell console or another terminal.
Step 1: Start PowerShell
First open PowerShell with administrator rights as in the ISE example.
Step 2: Change the execution policy
PowerShell has four different execution policies that control security and the ability to execute scripts in the PowerShell environment. The four execution policies are:
- Restricted: This is the default execution policy for PowerShell. With this policy, scripts are disabled, and only interactive commands can be executed in the console. Since this prevents all scripts from running, it provides the highest level of security.
- AllSigned: With this policy, all scripts must be digitally signed in order to be run. This means that the author of the script must use a digital certificate to sign the script.
- RemoteSigned: With RemoteSigned, only scripts originating from the internet or from a network location must be signed. Local scripts that are stored on your computer can be executed without a signature. This makes it easier to use local scripts.
- Unrestricted: This policy allows the execution of all scripts without signature or restriction. It is strongly discouraged to use this policy in a production environment as it poses a security risk. It should only be considered for testing purposes or in secure environments.
You can view the current execution policy in your PowerShell environment by using the Get-ExecutionPolicy command. To change the execution policy, use the Set-ExecutionPolicy command followed by the policy you want.
You can enter the following command to allow scripts to be executed in PowerShell:

Step 3: Confirm execution (if necessary)
Depending on the security settings of your PowerShell environment, you may receive a security prompt to confirm that you want to run the script. Enter “Y” or “A” to agree, or “N” if you don’t want to run it.
Step 4: Run Powershell script
To run the PowerShell script, insert the path to the file:

