How to change your username in Windows 11
There are many reasons for wanting to change your username in Windows 11. Maybe a typo happened during setup, or the name has to be changed for security reasons. It takes just a few simple steps to rename your user account or Microsoft account. Read on to find out how.
- Simple registration
- Premium TLDs at great prices
- 24/7 personal consultant included
- Free privacy protection for eligible domains
How to change the username of a local account in Windows 11
Local user accounts are the classic account type for logging on to Windows operating systems. The account provides access to all important resources and lets users adjust settings and install applications. However, unlike Microsoft accounts, which are discussed in the next section, you cannot use local user accounts across multiple devices.
If you want to change the username of a local Windows 11 account, follow the step-by-step instructions below:
Step 1: Launch Control Panel
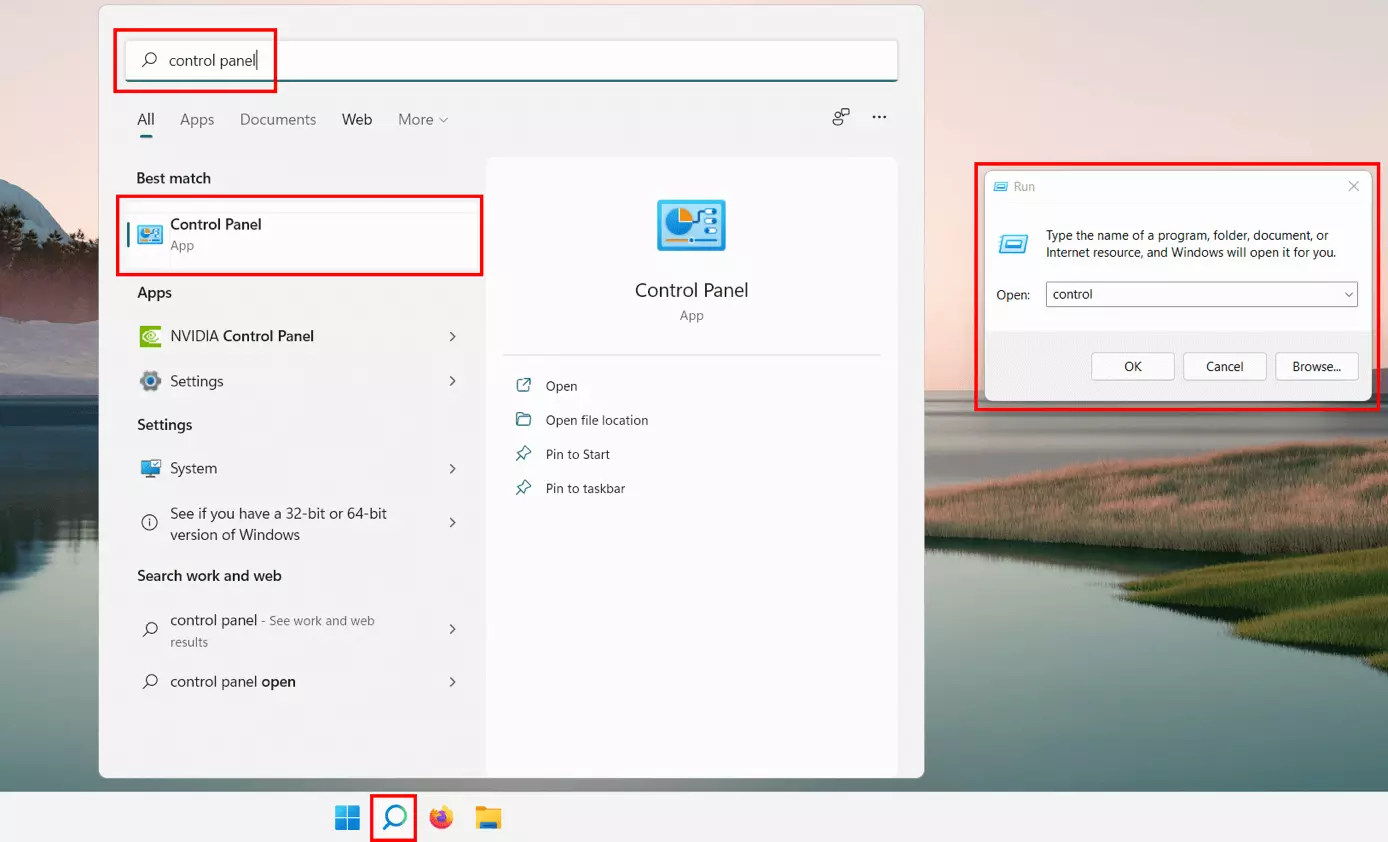
Local user accounts are managed via the Windows 11 Control Panel. You can open this by launching the search function (magnifying glass icon) and typing “Control Panel” or typing “control” into the search bar. Alternatively, use the Windows shortcut [Win] + [R] to start the “Run” dialog and open the configuration menu by typing “control”.
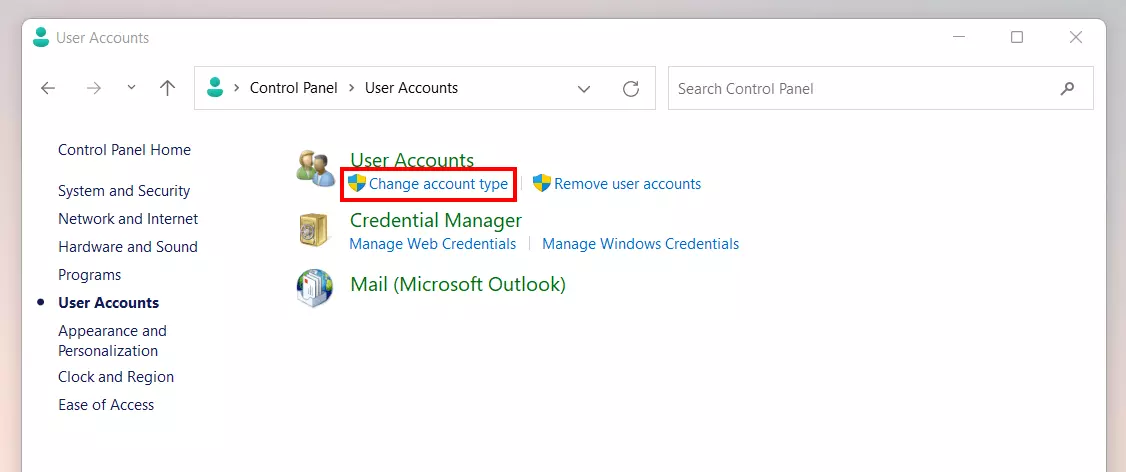
Step 2: Call User Accounts
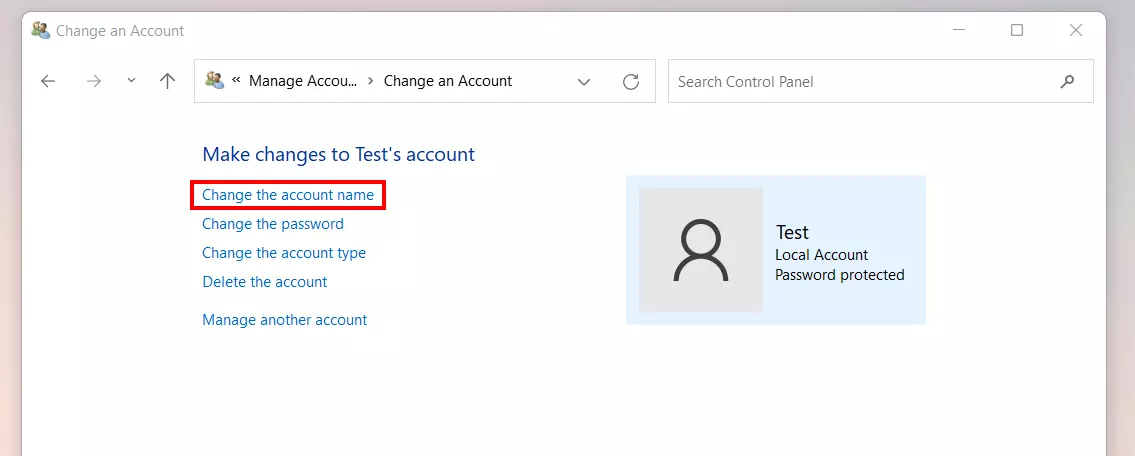
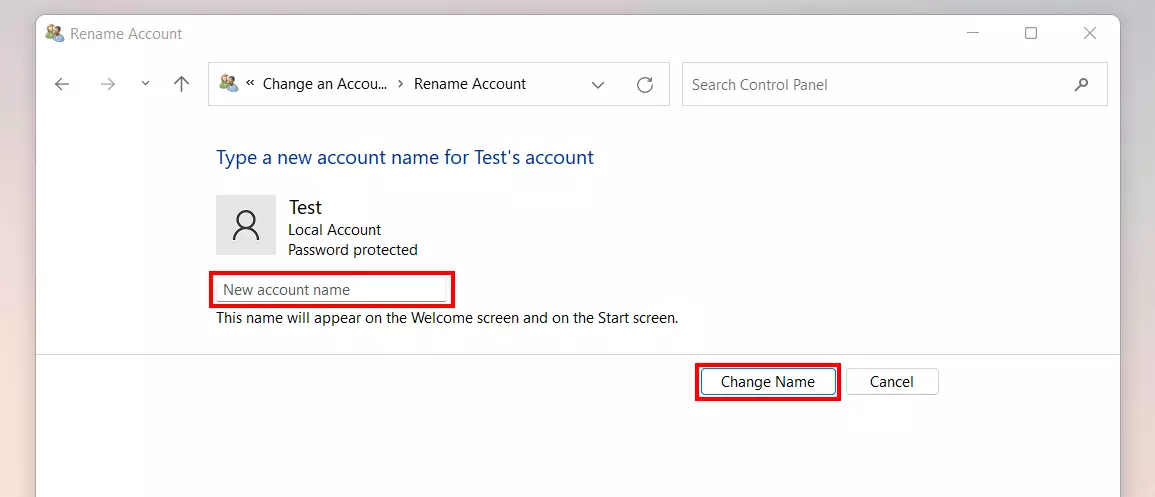
Step 3: Change the username of the local Windows 11 account
Not a Windows 11 user? You can change the username in Windows 10 just as easily.
How to change the Windows 11 username of a Microsoft account
Since Windows 10, you can log in to the system as a user using your Microsoft account. The main advantage is that you can synchronize your system settings across multiple devices. However, the respective device has to be connected to the Internet.
Usually, the email address associated with the Microsoft account acts as your username. However, you can also enter your first and last name. These entries can be modified at any time. The steps to do so are summarized in the following section.
Step 1: Log in to Microsoft account
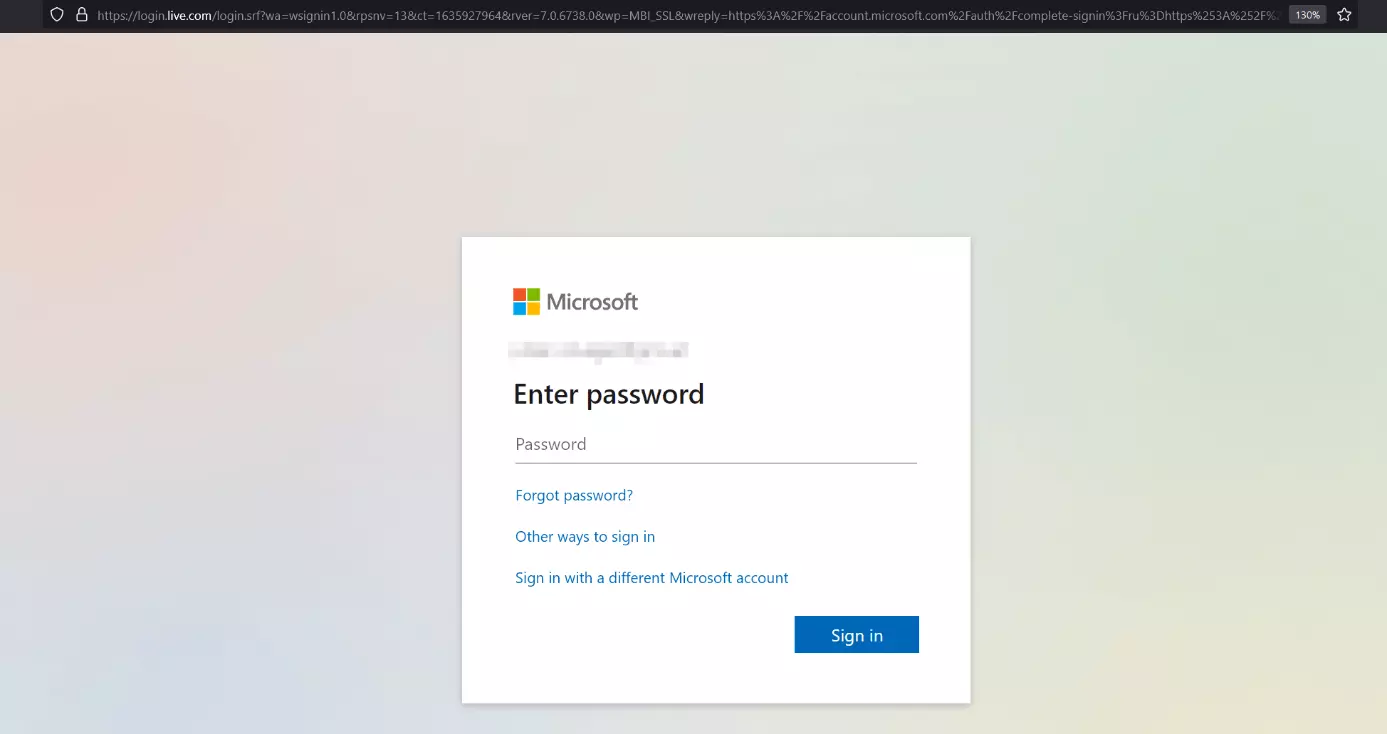
If you want to modify the Windows 11 username associated with your Microsoft account, you must first log in to the web-based Microsoft Account Management. You can access the login page from the system settings as follows:
- Call up the start menu.
- Select “Settings”.
- Select “Accounts” in the left-side menu.
- Switch to the “Email & accounts” section.
- Select the Microsoft account you want to customize and click Manage.
- Windows 11 launches the login screen to manage the account in your default browser.
Step 2: Launch menu to manage personal settings
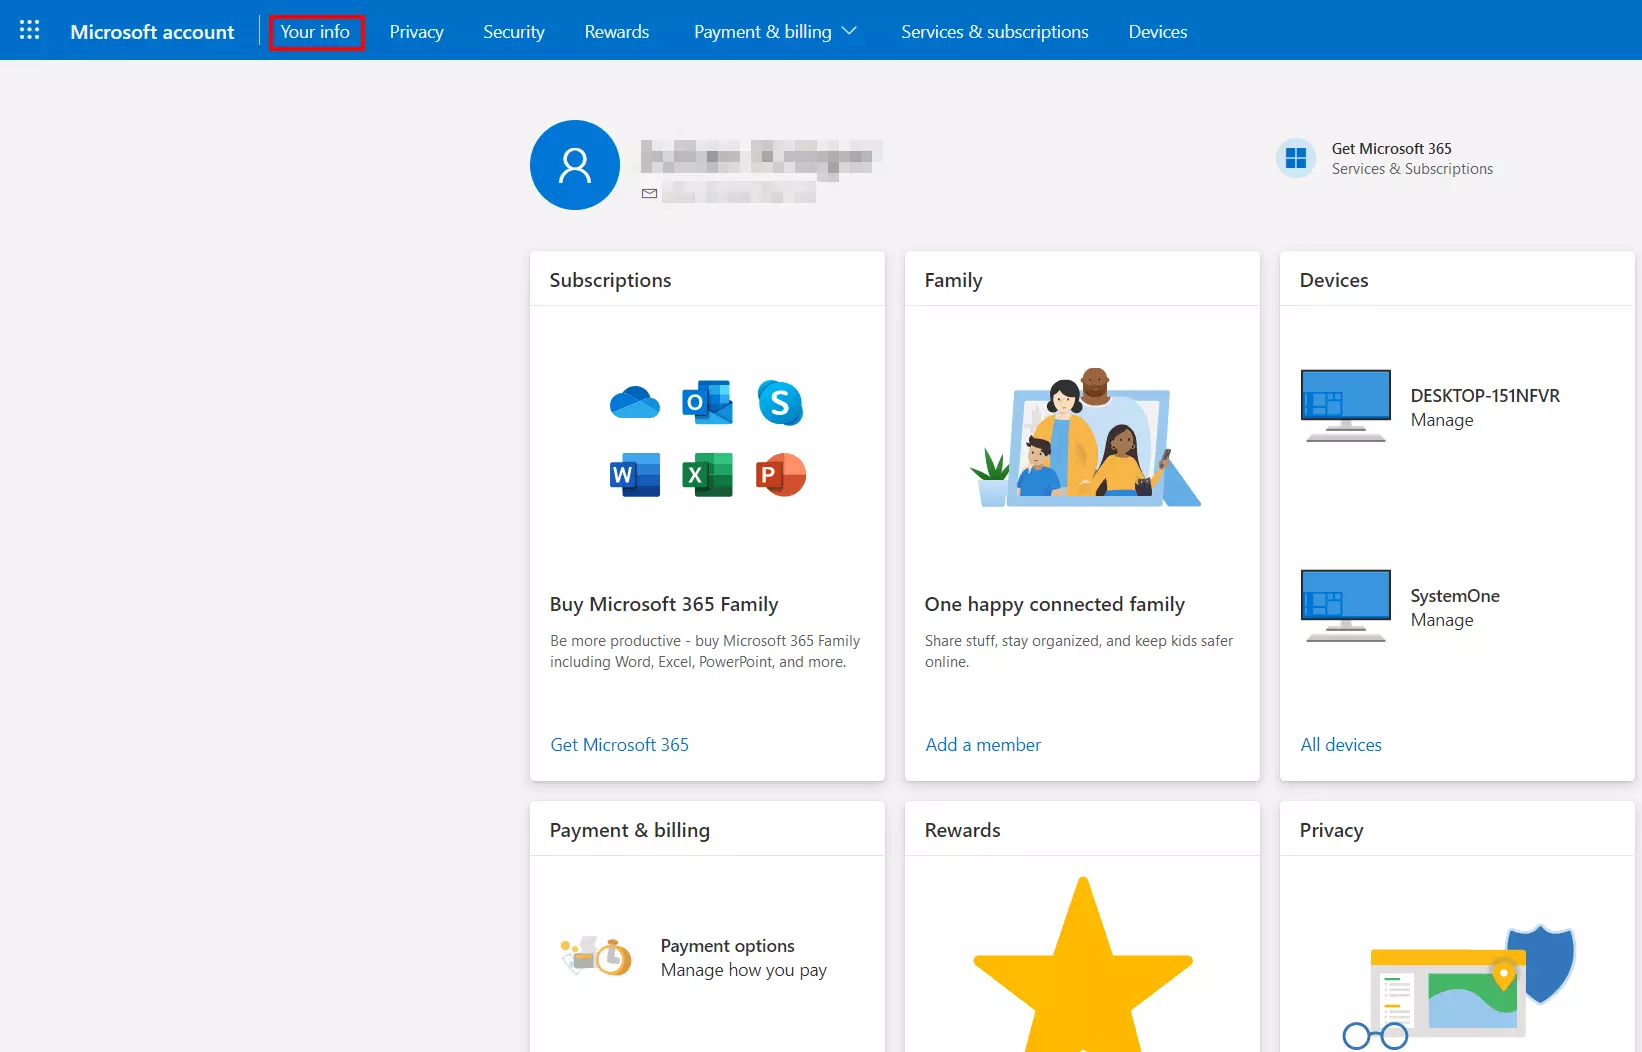
After login, your browser presents a detailed overview of your Microsoft account: linked devices, subscriptions, privacy settings, and more. Below the menu bar, the current Windows 11 username associated with the account is displayed. To change it, navigate to the “Your info” menu tab.
Step 3: Change username of Windows 11 Microsoft account
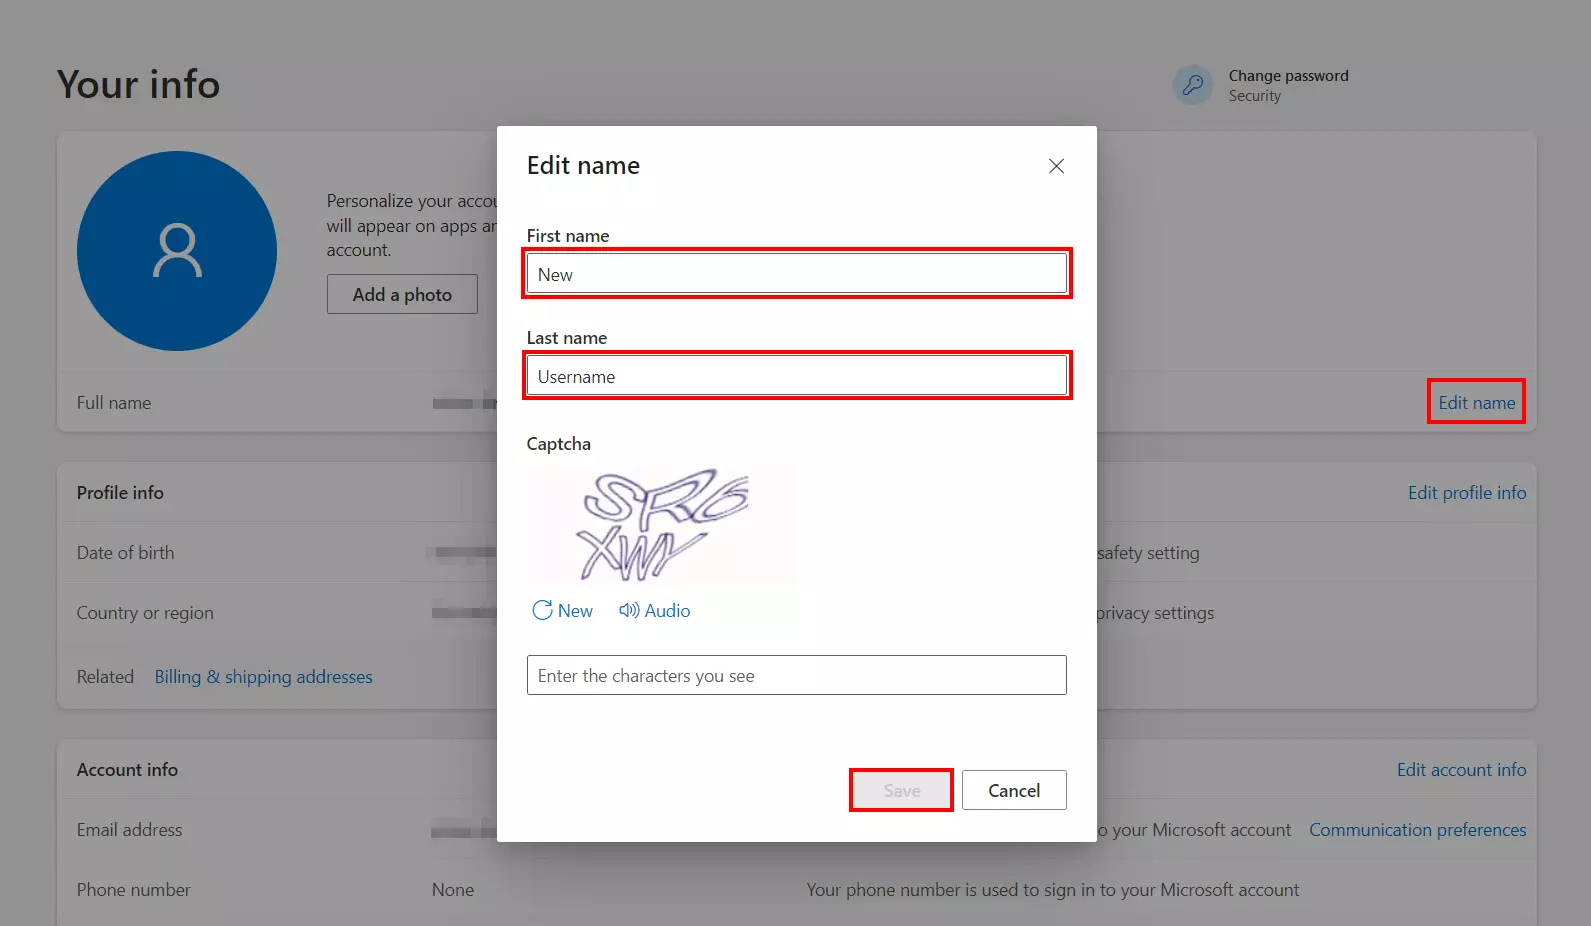
Click on “Edit name” to adjust the entries for first and last name. Then solve the captcha and apply the changes by hitting “Save”:
The username associated with the Microsoft account should now be customized to your liking. You can always swap back to the previous name using the same steps. The same principle applies if you want to change the Windows 11 username of a local account.
Want some more tips and tricks to using Windows 11? Our guides offer plenty of useful information and instructions to:


