How to upload a YouTube video - a step-by-step guide
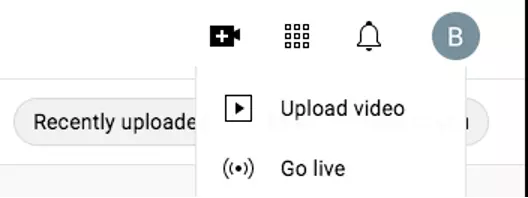
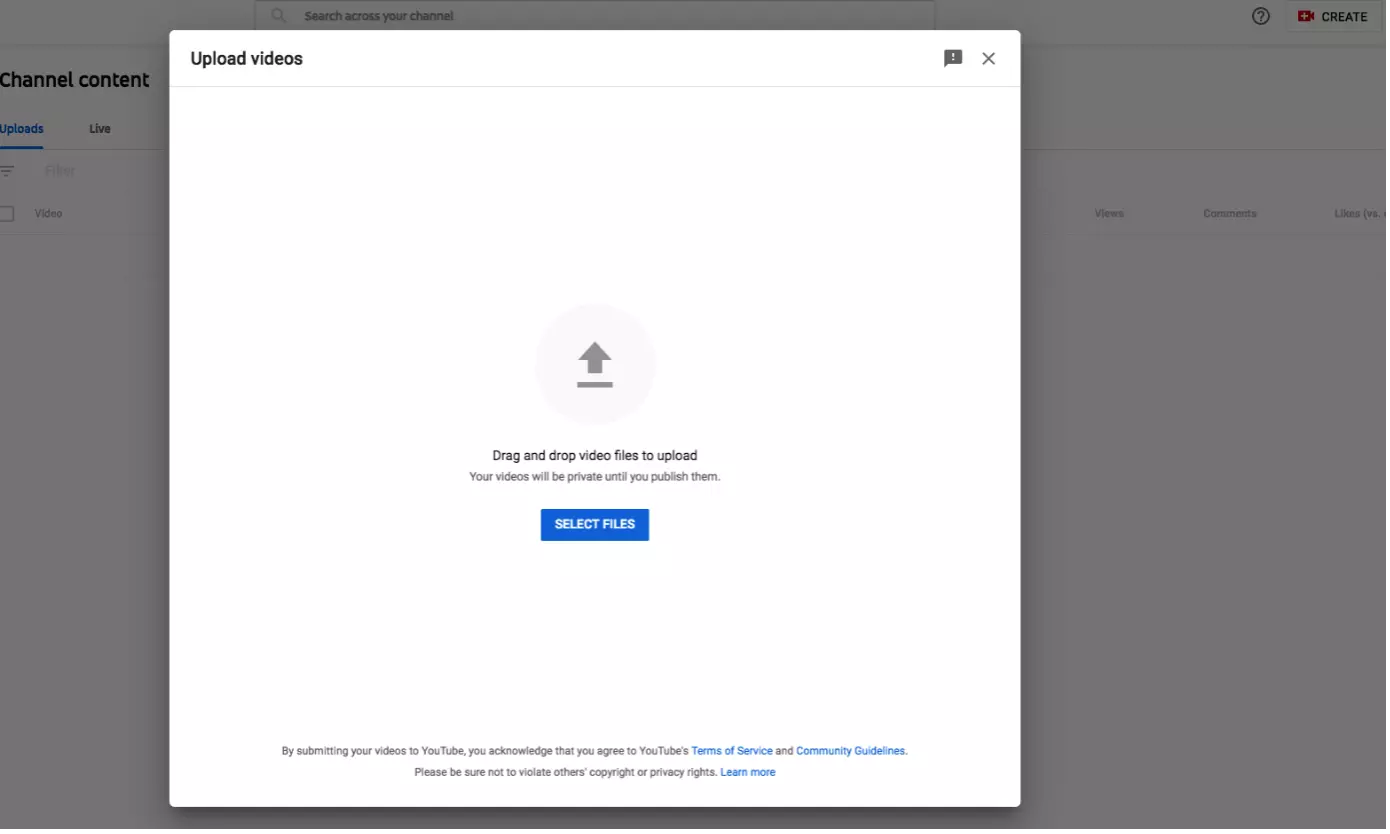
To be able to post a video on YouTube, one of the most important video platforms in the world, all you need to do is create a YouTube account and complete a few simple actions on it. When you click on the camera icon, you will find the “Upload video” option. Select a file that has a format suitable for YouTube, adjust this information, such as its title, and you’re ready to post the first video to your YouTube channel. We’ll show you how to do this.
- Simple registration
- Premium TLDs at great prices
- 24/7 personal consultant included
- Free privacy protection for eligible domains
YouTube - the popular video portal
The days of cute cat videos may not be over yet, but YouTube has long been much more than a site for fun pastimes. From influencers to linear television channels and from small, owner-operated businesses to global corporations, individuals and companies share content on the video platform. You too can easily upload YouTube videos. All you need to do is create your own YouTube channel. Once you have done that, you are ready to go.
Upload various video types to YouTube
You can upload various video formats to YouTube. The platform supports most popular video formats:
- .MOV
- .MPEG4
- .MP4
- .AVI
- .WMV
- .MPEGPS
- .FLV
- 3GPP
- WebM
- DNxHR
- ProRes
- CineForm
- HEVC /h265)
If you want to upload a video to YouTube that has a different format, you can convert it with various programs - such as HandBrake or XMedia Recode.
Protect your data! With MyDefender from IONOS you get the highest possible security for your data on all devices. Benefit from individual plans, protection against ransomware and optimized memory usage!
Upload videos to YouTube in just a few steps
Step 1: First, log in to your YouTube account with username and password.
Step 2: On the top right, you will find a camera icon. It is located next to the “YouTube App” field. Hover your cursor over the field and the “Create” option will light up. Click on the icon and “Upload video” will appear.
Step 4: The next step is to give your video a title and add a description. This is especially important to ensure your video can be easily found later on.
Step 5: When you upload a video to YouTube, you should add tags. These improve the ranking of your video and ensure that the clip is found and seen by more viewers.
Step 6: Optionally, now add credits or an info card. This is especially useful if you post videos to YouTube regularly and want to allow your viewers to go to your other clips directly.
Step 7: In the last step, you determine who should see your video in the first place. In that regard, you have three options:
- Public: Once uploaded, the video can be found on YouTube by any user in the search and then viewed.
- Unlisted: Only users who enter the direct video link can find the video.
- Private: The video can only be viewed by you and any selected users.
Distribute and promote videos
After uploading a YouTube video, it is important to make sure that users can also find and watch your clip. On the one hand, the aforementioned tags, titles, and descriptions will help you do this. On the other hand, however, distribution is also crucial.
Use your website to embed the video with HTML, share the clip across your social media channels, set time stamped links for particularly important posts and keep your channel up to date as well.
Under certain circumstances, a suitable channel picture, a YouTube Sponsorship, or the name of your channel can be enough to attract viewers. Especially the latter should be well thought out and ideally have a certain memorability. But even if you don’t immediately come up with a suitable idea, that doesn’t matter. On your channel, you can change your YouTube name anytime.
A website as unique as your business. With the website builder MyWebsite from IONOS, you can create your professional web presence in just a few steps and benefit from numerous security features as well as an email inbox included.


