How to delete a Facebook account step by step
If you’re looking to delete your Facebook account, you can easily do so in just a few steps, whether you’re using your browser or the Facebook app. However, if deleting your account feels too drastic, you should at least take the time to carefully review and adjust your profile’s ever-changing privacy settings.
- Store, share, and edit data easily
- Backed up and highly secure
- Sync with all devices
How to delete your Facebook account quick guide
- Go to the Facebook account overview and click on “Personal details.”
- Select the option “Account ownership and control,” and then choose “Deactivation or deletion” in the pop-up window.
- Click on the profile you want to delete and choose the option “Delete account.”
- Follow the instructions and confirm the deletion by clicking the “Delete account” button.
Good reasons to permanently delete your Facebook account
Whether it’s because Facebook users tend to develop more social envy and stress with some even becoming addicted to social media, or that Facebook founder Mark Zuckerberg attempted censorship concessions to gain a foothold in China, the reasons for permanently deleting Facebook range from personal to political.
Many people are aware that Facebook reserves the rights to all content shared on its platform. You’ve likely also heard that Facebook shares profile data and friend lists with advertisers. But how far does this reach actually go? What about the apps you use on Facebook or those you log into using your Facebook account—what kind of data do they have access to? Before deleting your Facebook account, it’s worth taking a look at the Facebook App Settings. To do so, click on your profile picture and select “Settings & privacy” > “Settings” from the dropdown menu. Then, scroll down the left sidebar to the “Apps and websites” section.
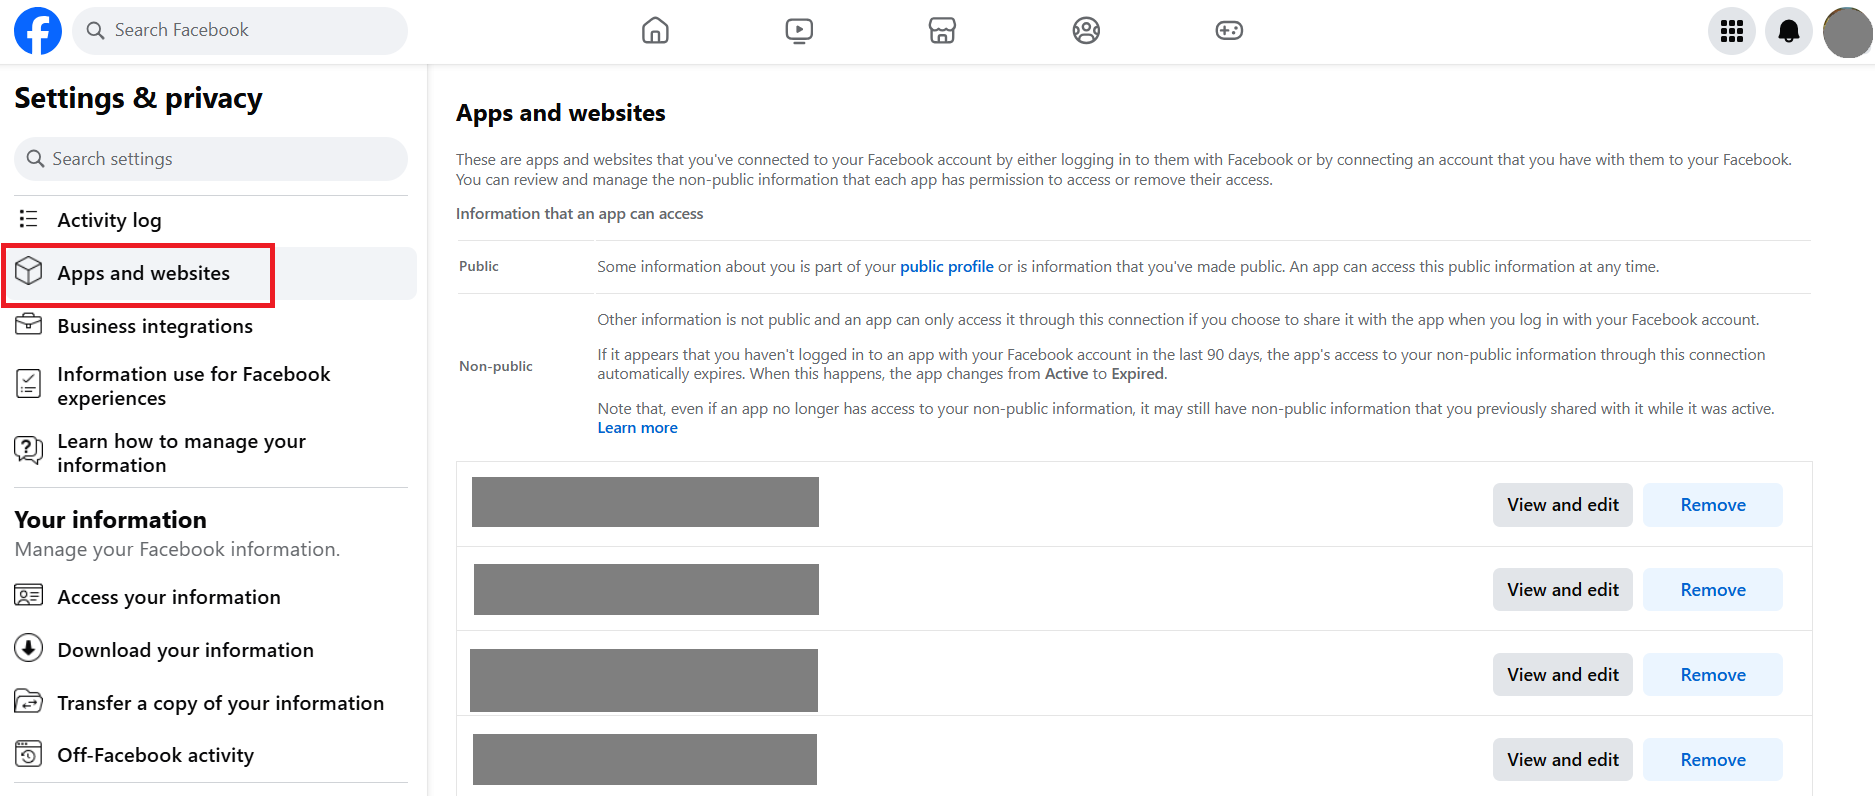
Here, you can decide whether you want to use your Facebook account to log into third-party apps.
Don’t want to completely banish Facebook from your life? If you deactivate your Facebook account, you can reactivate it anytime by logging into your account or by using an app connected to Facebook.
How to delete your Facebook account step by step
If the privacy policies seem too confusing and you just want to put an end to the Facebook issue instead of just deactivating your account, we’ll show you how to delete your Facebook account with just a few clicks, although a bit of patience is required.
Back up your data
Naturally, you don’t want to lose your vacation photos and messages when deleting your account. To avoid this, it’s a good idea to use the backup feature to download all your important media and conversations to your computer. To do so, navigate to your profile picture and select “Settings & privacy” > “Settings” from the dropdown menu. Then, go to “Download your information” in the sidebar to access the account overview where you can download your data.
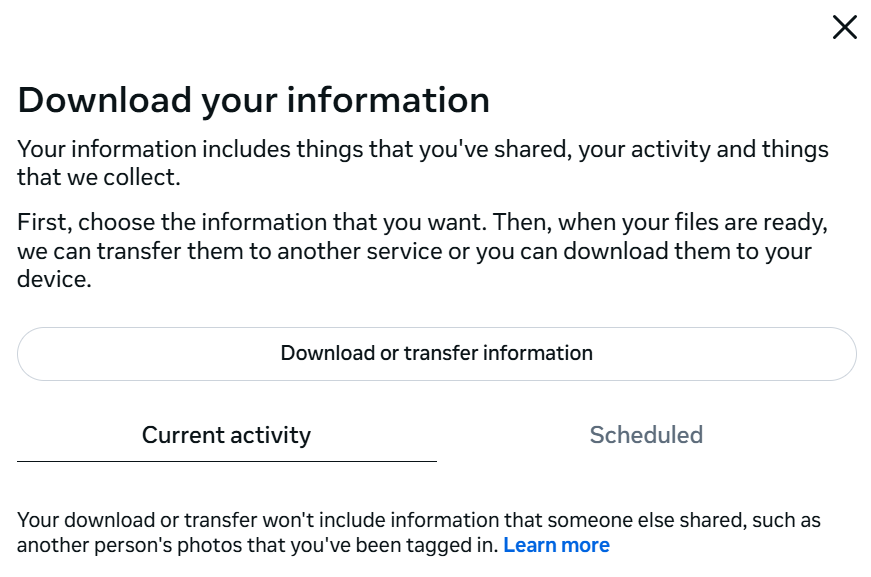
In the next section, select the relevant profile and decide which data you want to save and in which format.
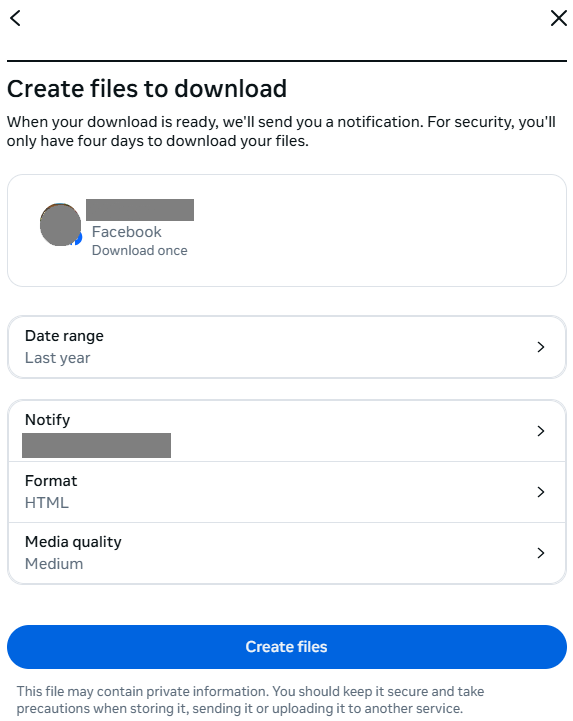
Since it can take several hours to create the file, you’ll receive an email once it’s ready. The email will contain a download link, which you can click. After entering your password again, you can download the requested file. Note that for security reasons, the download link will only be valid for four days.
Delete Facebook permanently with just a few clicks
Deactivating your account is fairly simple, and Facebook displays the link clearly. Deleting your actual Facebook account is another matter, however.
First, log in to Facebook. Then visit the following link to delete your Facebook account:
https://www.facebook.com/help/delete_account
Click on the “Delete account” button.
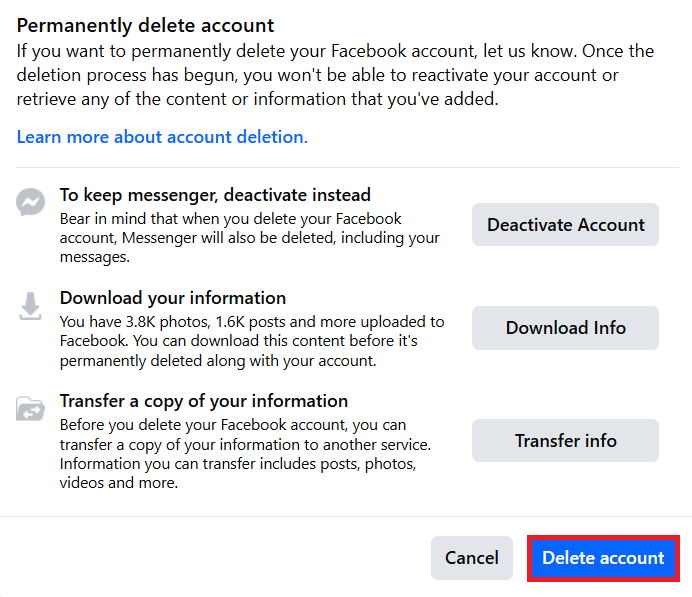
You’ll need to enter your password one final time. Then, confirm by clicking the “Delete account” button to request your Facebook account be deleted.
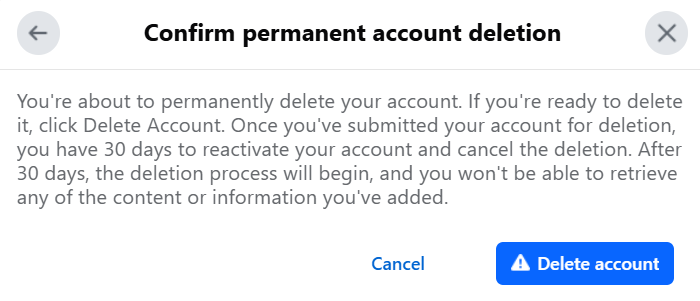
From now on, other Facebook users will no longer be able to see your profile or any media uploaded to Facebook. Within 30 days, you can reactivate your account by simply logging in. After the grace period, the deletion of your data and files from the Facebook database will begin. It can take up to 90 days for all data associated with your Facebook account to be fully deleted. Only then will your Facebook account be permanently deleted.
However, please note that messages and chats you’ve had with others will remain stored on their accounts. Only your own timeline posts, profile, media, and chats stored on your account will be deleted. Images from other accounts where you appear will remain. If your profile was tagged, the link will disappear, but if you want the image removed, it’s best to contact the person who uploaded it.
Want to delete Facebook permanently but still be active on social media? Check out our article on the best Facebook alternatives for some options.
Reach out in your name every time you hit send — includes domain, 2 GB+ storage, and more.

