PowerPoint Outline View: how to structure your presentations
In Microsoft PowerPoint, design options are plenty, allowing you to easily create professional presentations. In just a few clicks and without any programing know-how, you can add animations, transitions, graphics, and images. But many of the software’s practical functions remain unused – among these is the so-called Outline View. This presentation overview function simplifies how you structure your content. In our step-by-step guide, we’ll show you how to use PowerPoint’s outline view.
What presentation views are offered in PowerPoint?
When you launch PowerPoint and open a presentation, “normal view” is automatically activated. However, PowerPoint offers a host of different viewing options to choose from that can be used interchangeably. Below you’ll find an overview of the different viewing options and their benefits.
- Normal: The view that’s automatically selected when you start PowerPoint. In normal viewing mode, you can work on individual slides and navigate via the miniature slides pane.
- Outline view: In this view, you can structure your presentation around an outline in PowerPoint and can easily optimize your content in this way.
- Slide sorter: This view offers an overview of your slides and information on transitions and their duration. Easily organize your content in this view with just a few clicks.
- Notes page: In normal view, it’s possible to add notes to your slides. In this view, PowerPoint creates a preview of what a print-out of slides looks like using notes.
- Reading view: This view includes animations and transitions, without switching to full-screen mode.
Besides presentation viewing options, PowerPoint also offers various master views. With these, you can create design and layout templates, which PowerPoint automatically applies to all slides.
- Up to 50 GB Exchange email account
- Outlook Web App and collaboration tools
- Expert support & setup service
PowerPoint outline view: benefits and application
When you create a new presentation, it’s recommended to have a rough structure in place for your content. The tools to do this can be found in PowerPoint’s outline view. Here, you can define the structure, review it continuously, and make changes when needed. At no point is it necessary to switch to normal view.
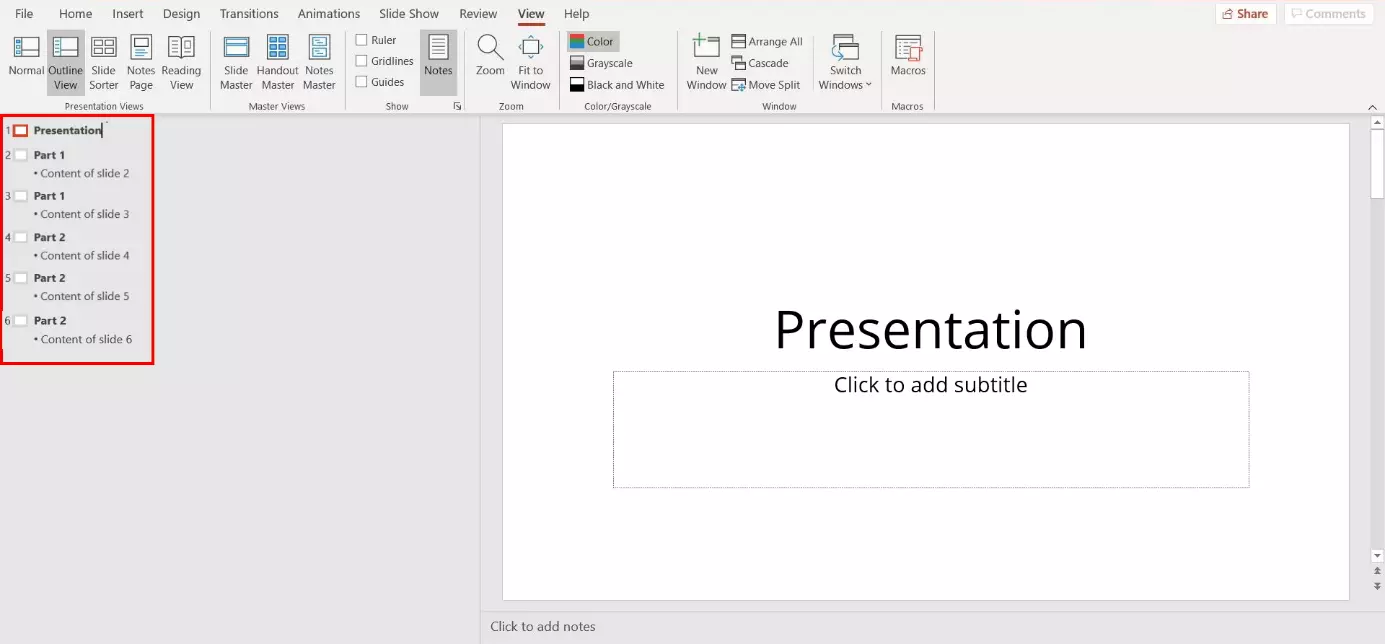
The outline pane in PowerPoint includes these elements:
- The selected slide
- A numbered overview of all slides
- Main item: the title of your slide
- Sub item: main text on your slides
The popular presentation software, PowerPoint, comes included in Microsoft 365, which is available from IONOS – including plenty of storage space and your very own domain!
How to use PowerPoint outline view – a step-by-step guide
Below, we explain how to open outline view and optimally make use of all its functions.
Step 1: open outline view
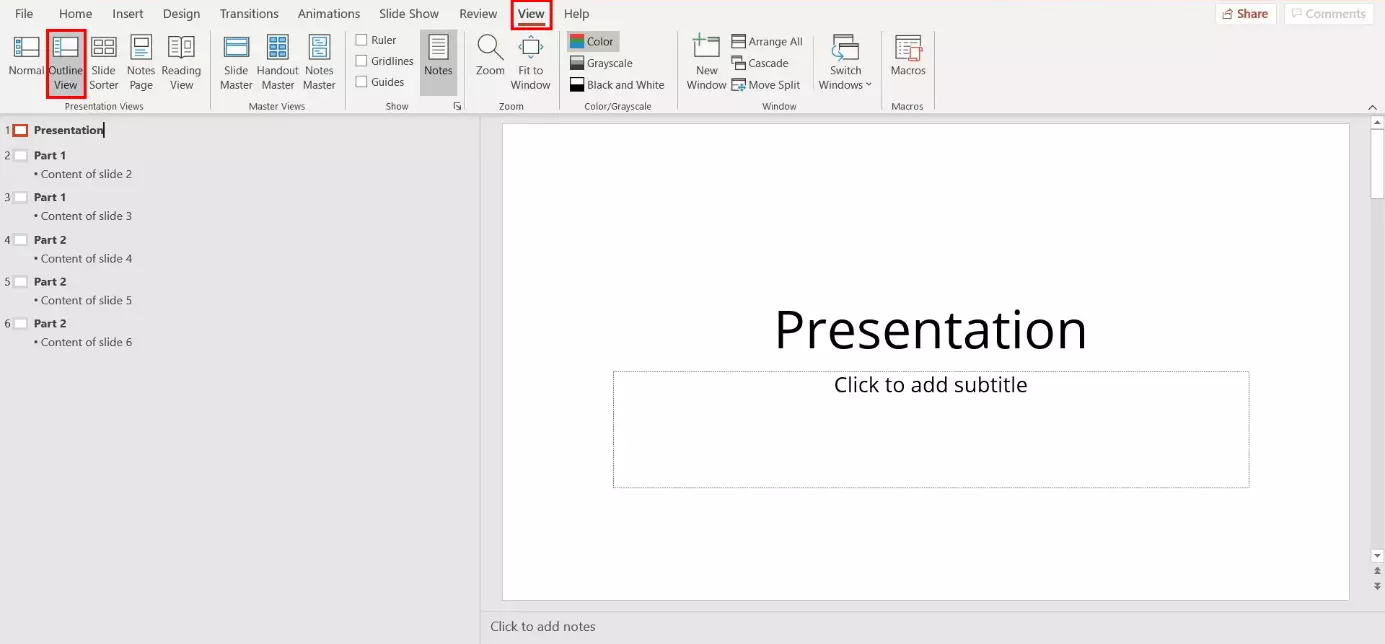
To open the presentation view, start PowerPoint and select “View” in the top navigation bar. In the menu ribbon, PowerPoint will now show all presentation views available. Select “Outline View” with a left-click. An outline of your PowerPoint slides will now present your content in a structured way:
Step 2: edit structure
Below, we’ll show you the most common editing options available in outline view.
Change order of slides
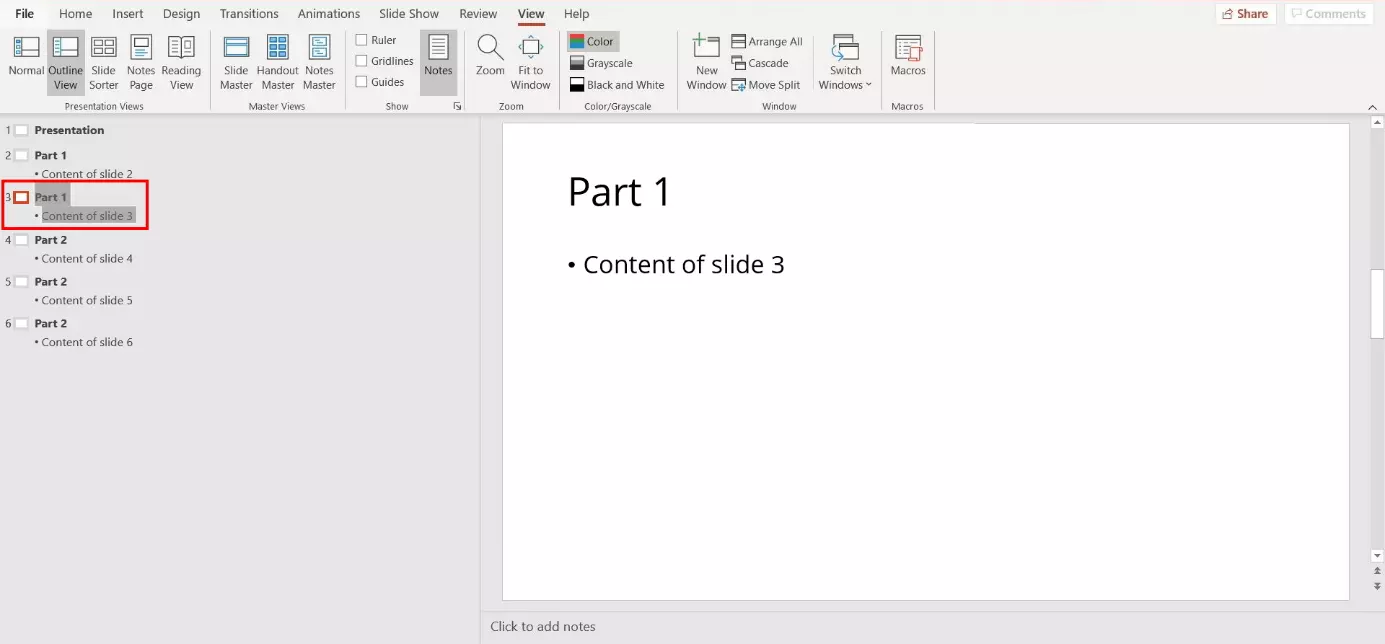
Have you just noticed that the order of your slides isn’t correct in the outline pane? With PowerPoint outline view, you can easily change their order. Click on the square next to the slide that you want to move to select it (it will automatically mark it). Now, hold your mouse down and pull the slide to its intended place in the structure.
Change the contents of slides
In outline view, not only can you change the structure of your presentation: you can also change the content of your slides. For example, to expand on a sub-item on one of your slides, PowerPoint offers two options:
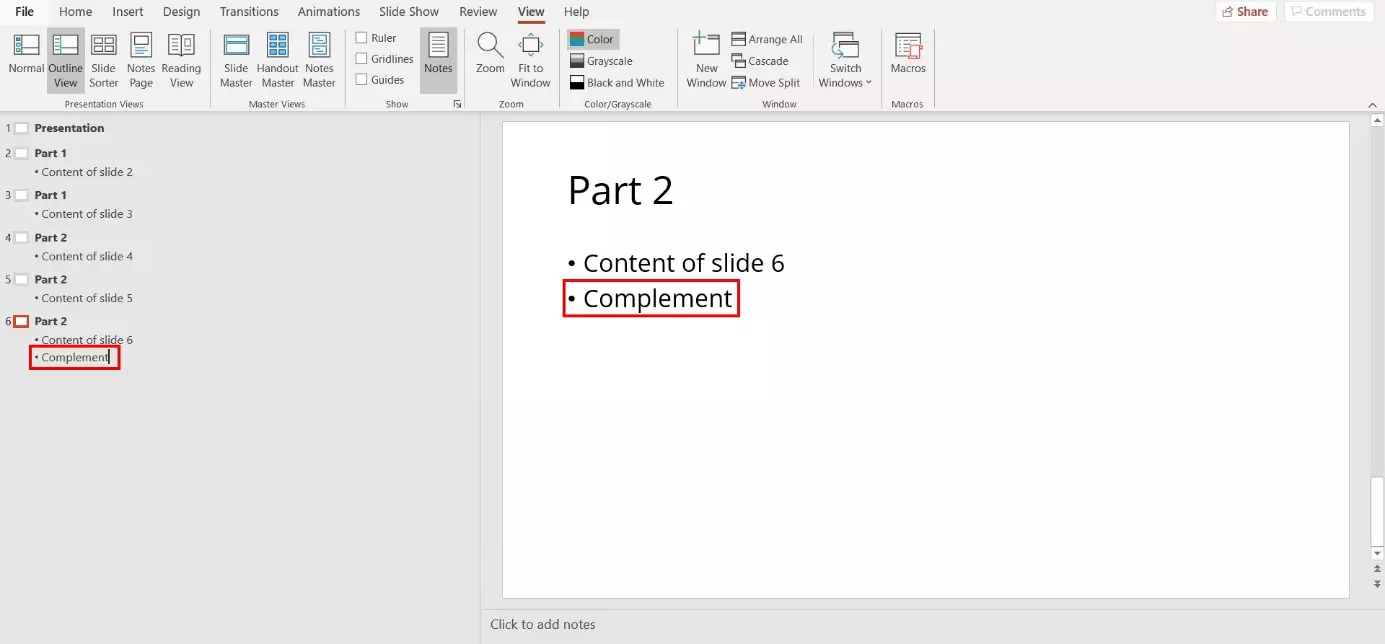
- On-slide adjustments: Select the slide you want to edit in the outline pane. PowerPoint will expand in on the right. Now you can make your changes to the slide as you would in normal view.
- Overview adjustments: To make changes directly in the left-hand outline pane, click on the section you want to work with. Now you have the option to delete or expand your content.
Add a new slide
If you’re adding a lot of new content, it’s recommended to create a new slide. You can do this in PowerPoint’s outline view. To add a new slide, you have two options:
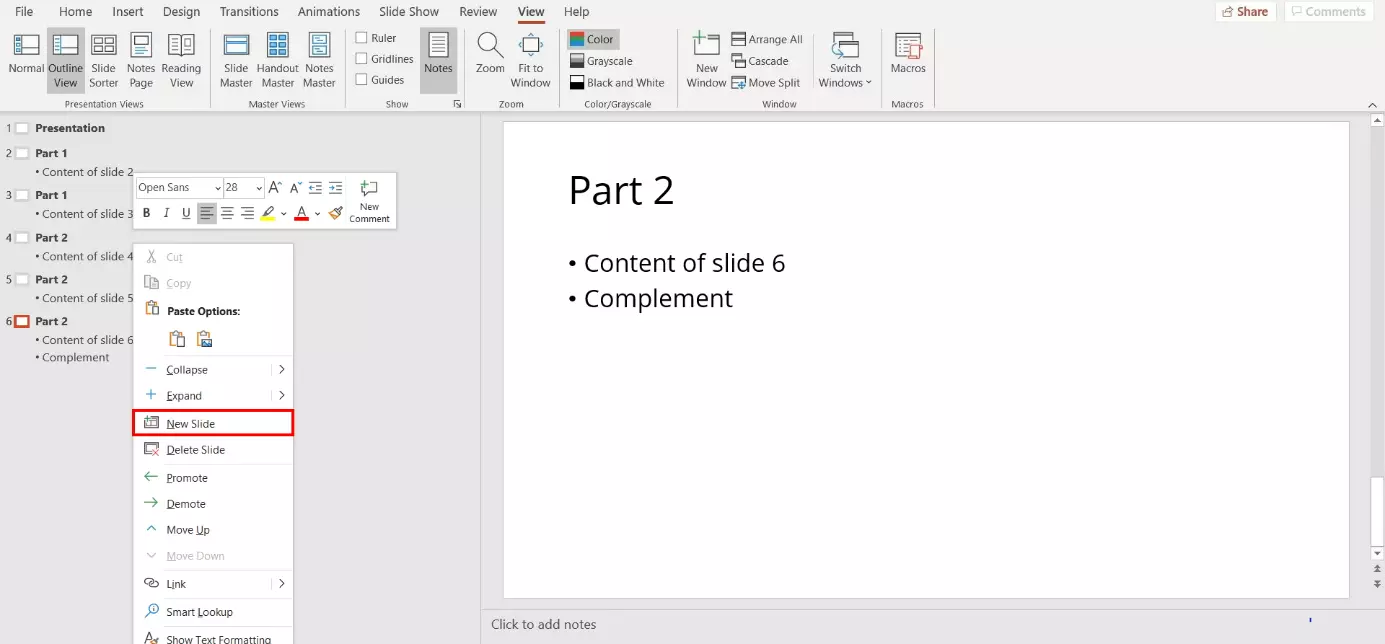
- Via the shortcut menu: Open the navigation of the shortcut menu with a right-click and select “New Slide.”
PowerPoint-Shortcuts give you quick access to functions. To add a new slide, for example, hold down the keys [Ctrl] and [M] at the same time. This shortcut works in outline and normal view.
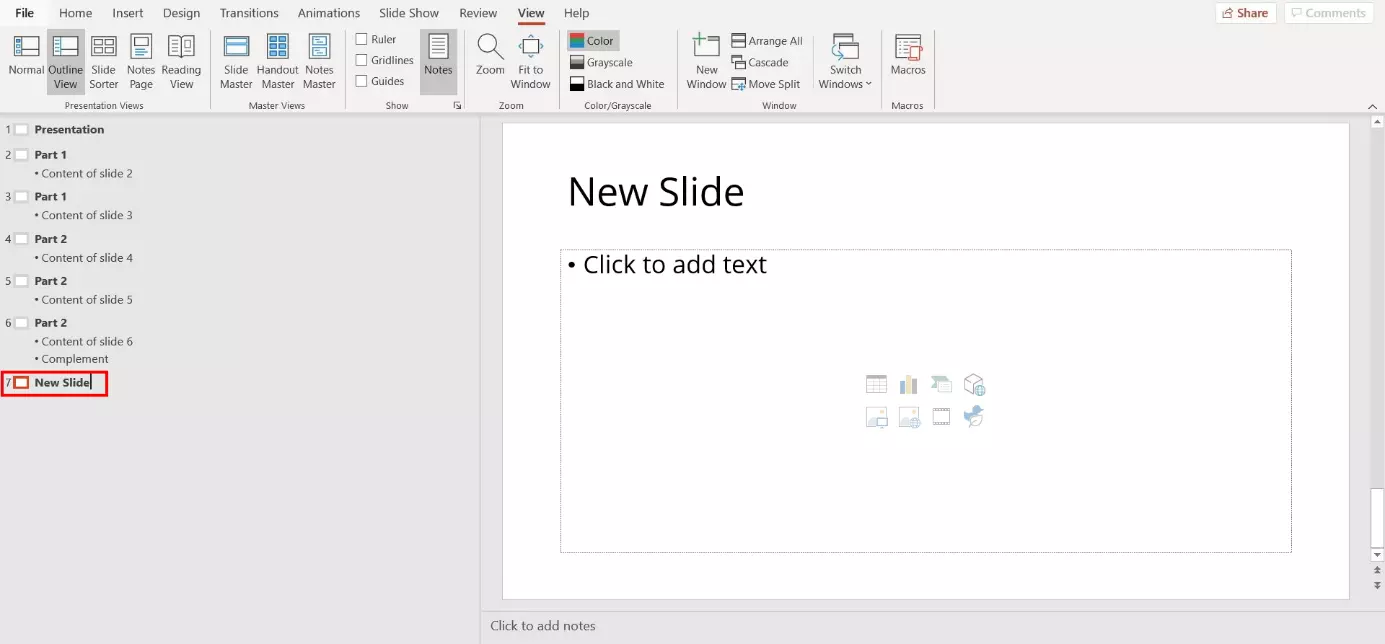
- Via the outline pane: Click on one of your slides in the overview. Make sure that the cursor is positioned at the end of the title. Now press the Enter key on your keyboard. A new element will now be added to the outline pane in PowerPoint. This will automatically be on the same level as the previous element and represents a new slide.
Adjust the hierarchy of your content
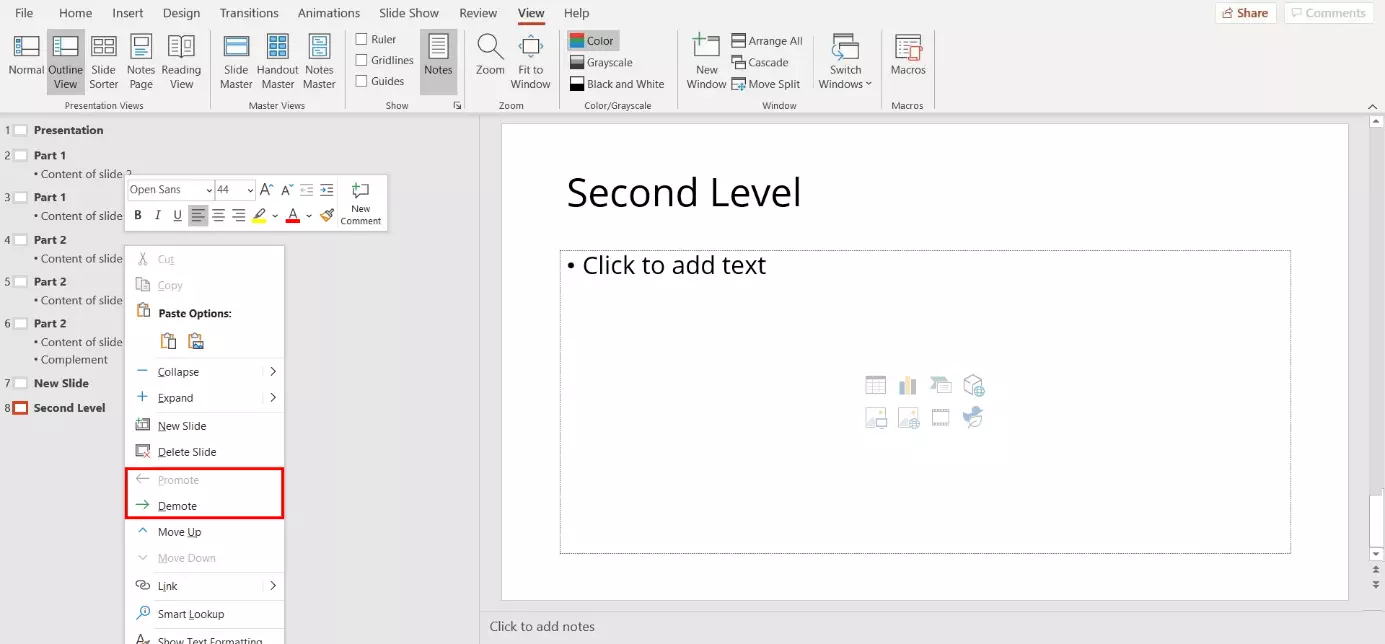
The headlines i.e. the main item on your slide is automatically superordinate to the sub items on your slides. In the outline pane in PowerPoint, you have the option to change this structure. To do this, select the layer you want to change, and hold down the tab key on your keyboard to move the selected layer down by a hierarchical level. To move a layer up, press the tab key and the shift key at the same time.
To change the hierarchy without your keyboard, right-click on the line of text. PowerPoint will now open a drop-down. Select “Move Up” or “Move Down” to level the hierarchy of the elements.


