How to delete your Google account’s history
Like almost no other company, Google collects user data in order to be able to create services such as its web search engine, the video-sharing website YouTube, or personalized Maps that are convenient and reliable.
How much information you disclose to Google and which data the company can use in order to optimize your user experience is decided to a certain extent by you. You can do this by configuring your Google history, for example.
We’ll show you where you can find your Google account’s history, which activity settings are available to you there and how to permanently clear the entire history, a specific logging period or just those records related to specific activities.
Google History
Google uses information from your online activity in order to improve the function of the Google product range: through personalized search results, for example, or video recommendations geared toward your interests. This can only happen, however, if you are logged into a Google account and have activated its browsing history.
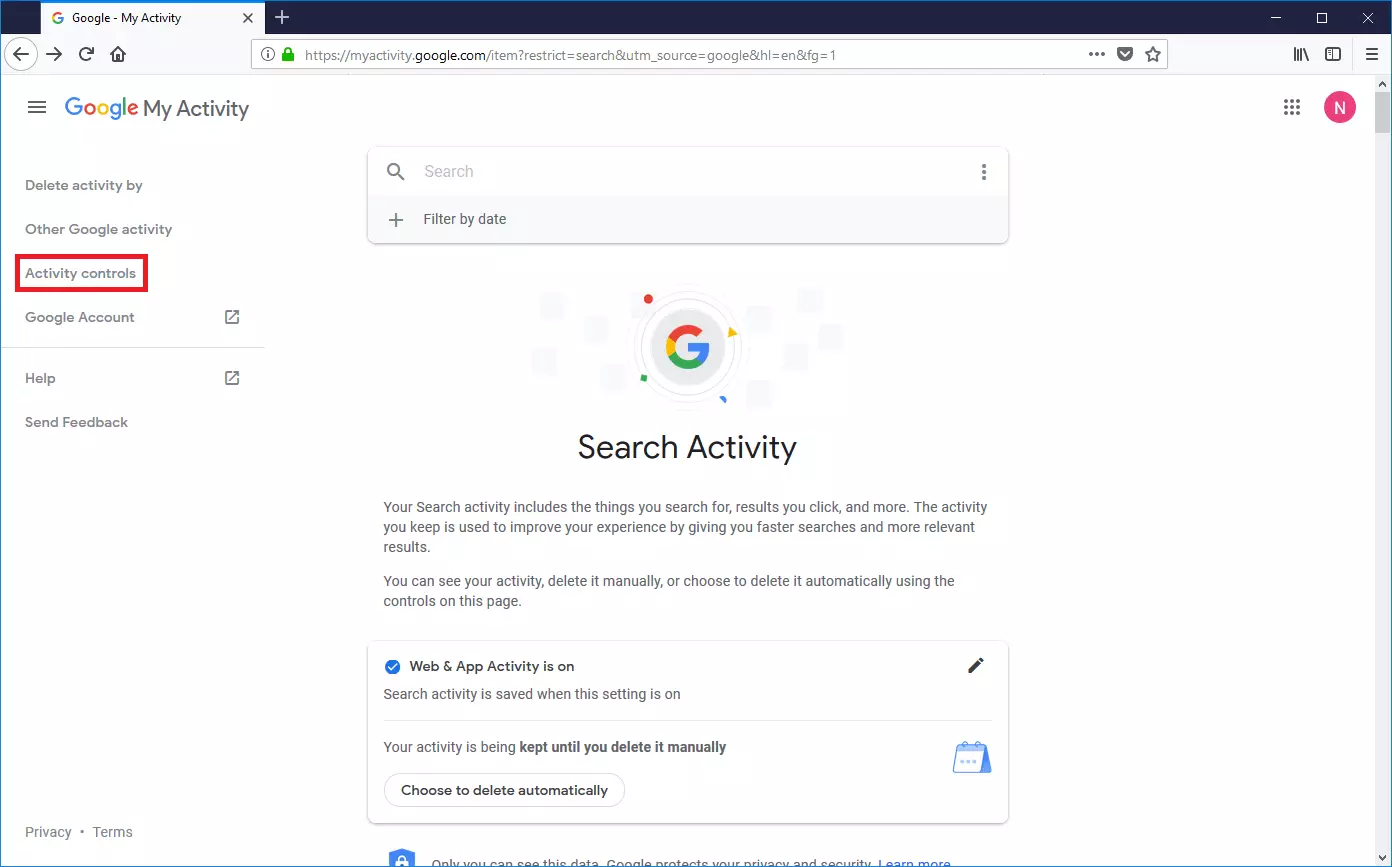
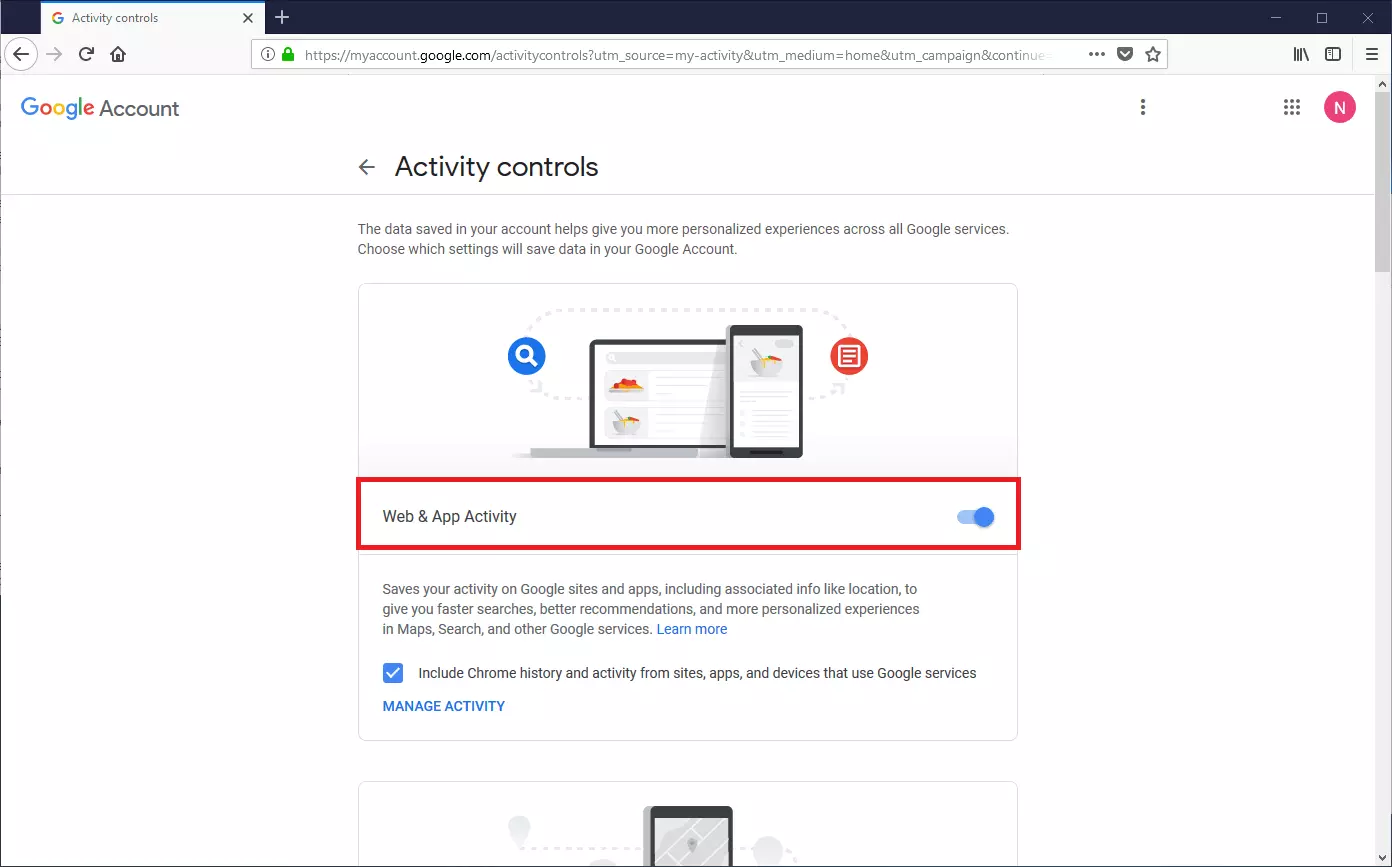
In your account’s activity controls, you can define which information Google collects and saves. You can also determine the degree of personalization for each Google service that you use. Your history is stored centrally in the cloud and contains the data from all your devices.
Google only lists your history in relation to Google products if you have activated this service in your Google account’s activity controls.
Activate and Deactivate Google History
Provided that you give your permission, Google can incorporate the following information when compiling your activity history:
- Web and app activity
- Location history
- Device information
- YouTube search history
- YouTube viewing history
Each option can be activated or deactivated independently of the others.
Clear Google History
Users who access the Google product range with an activated history sometimes like to exclude certain time periods or specific activities from their history. For example, when these are not representative of their usual surfing behavior, and for this reason should not be included when personalizing the web search or other Google services.
For this purpose, Google offers you comprehensive options for customizing the search history and other activity data to suit your needs.
Clear Google History on Your PC
Follow these instructions to clear your Google account’s history via your desktop PC’s web browser:
Step 1: Make sure that you are logged into your Google account.
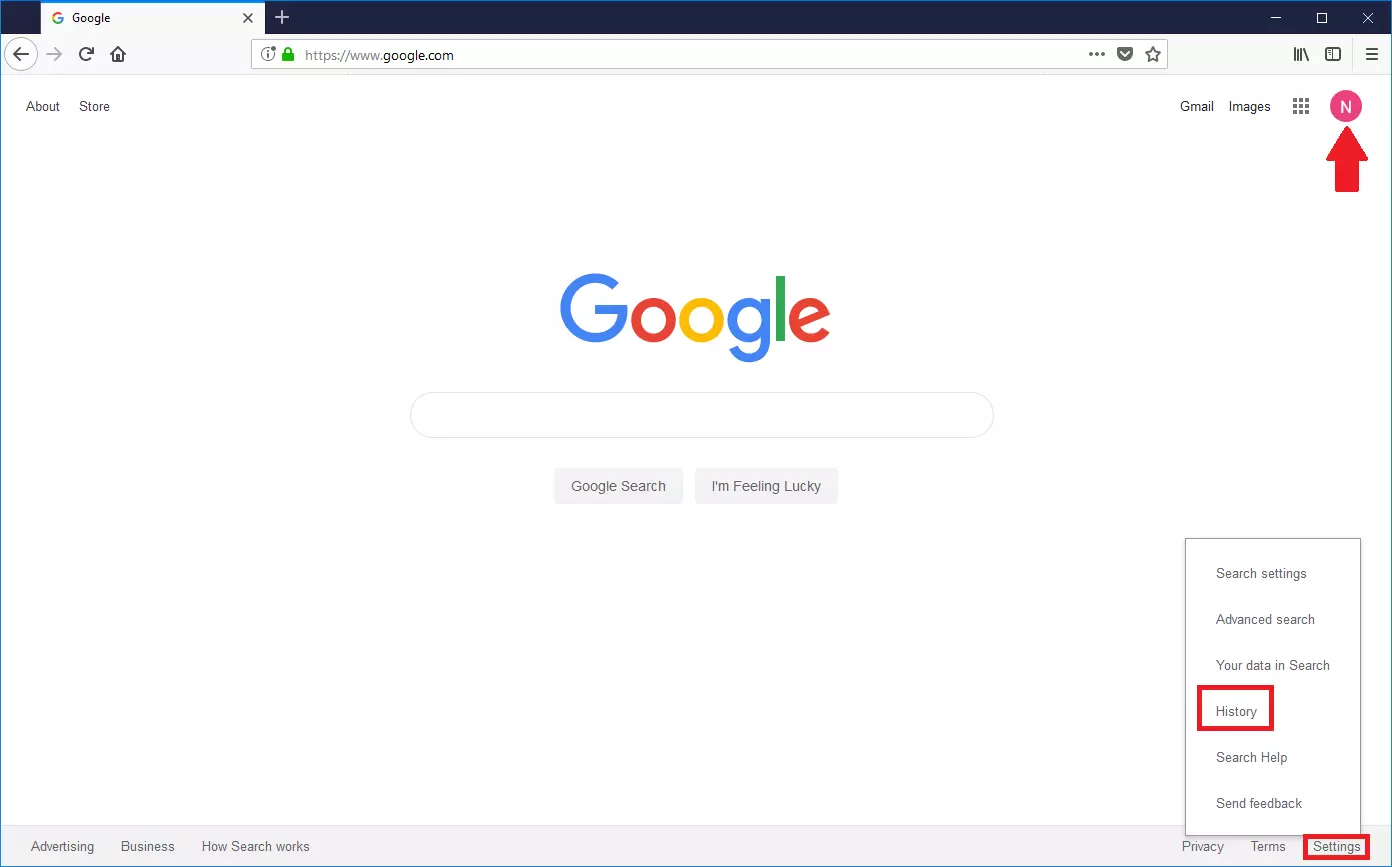
Step 2: Bring up the Google homepage.
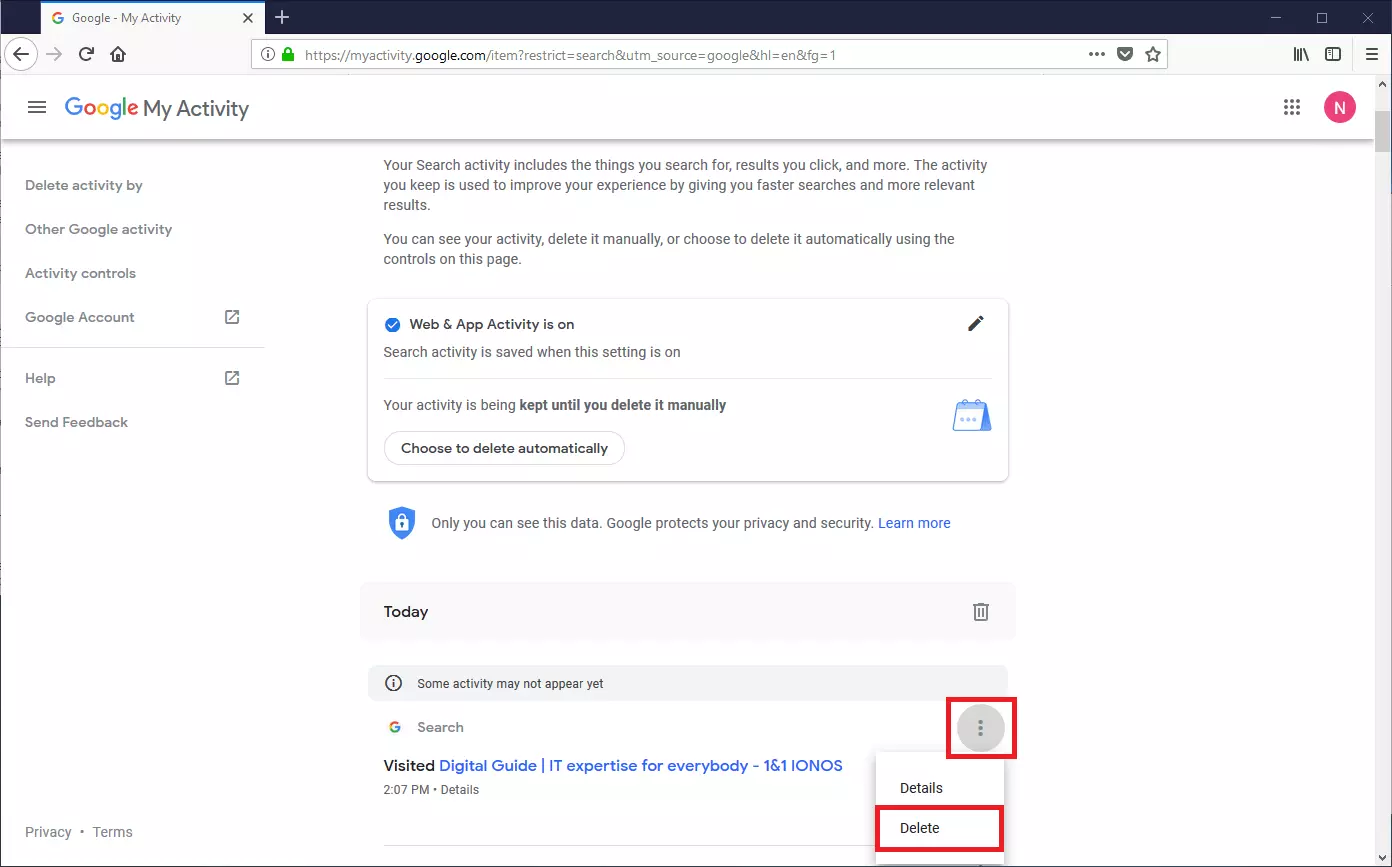
Step 3: Click on the “Controls” button and choose the “History” menu option in the pop-up menu.
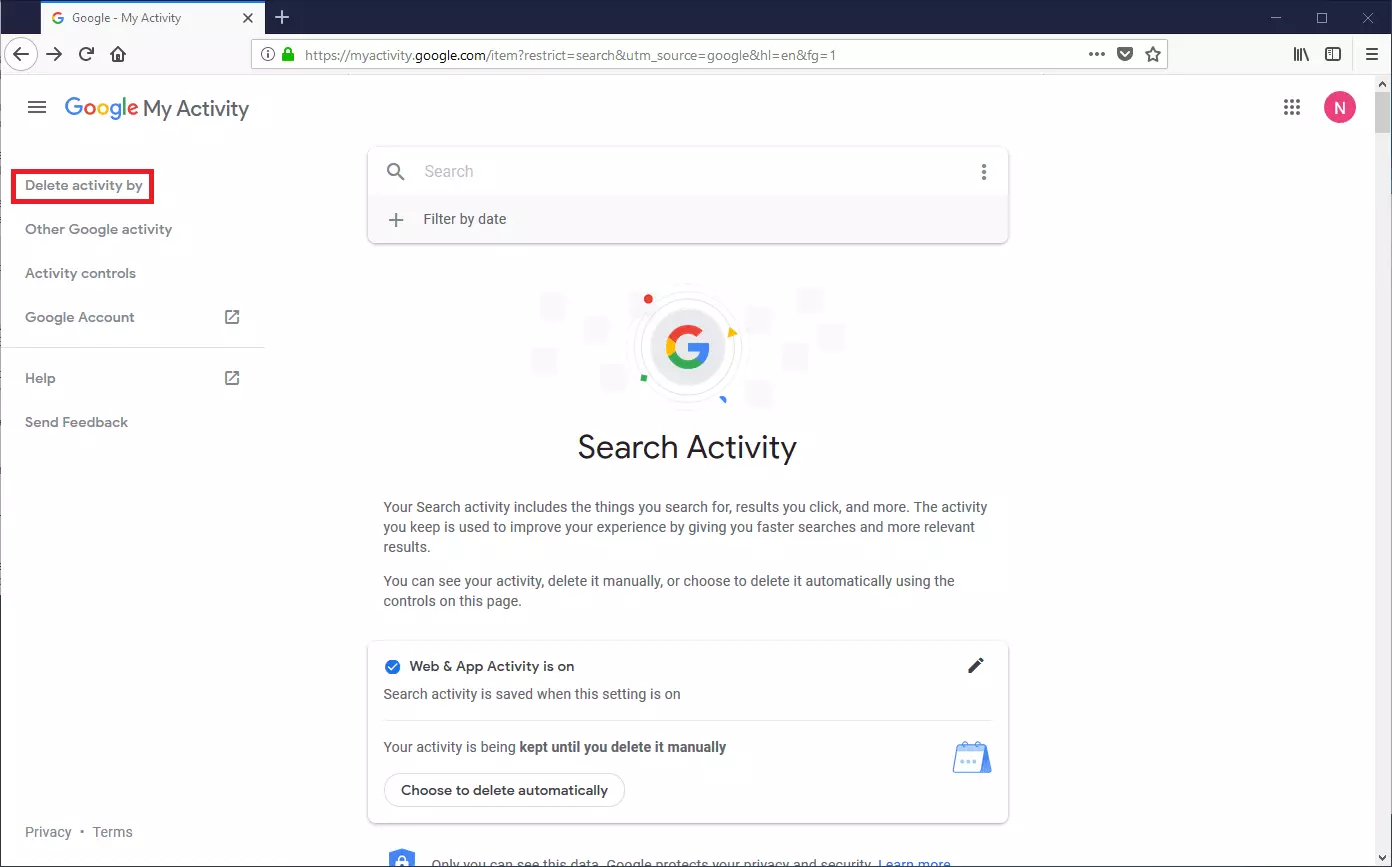
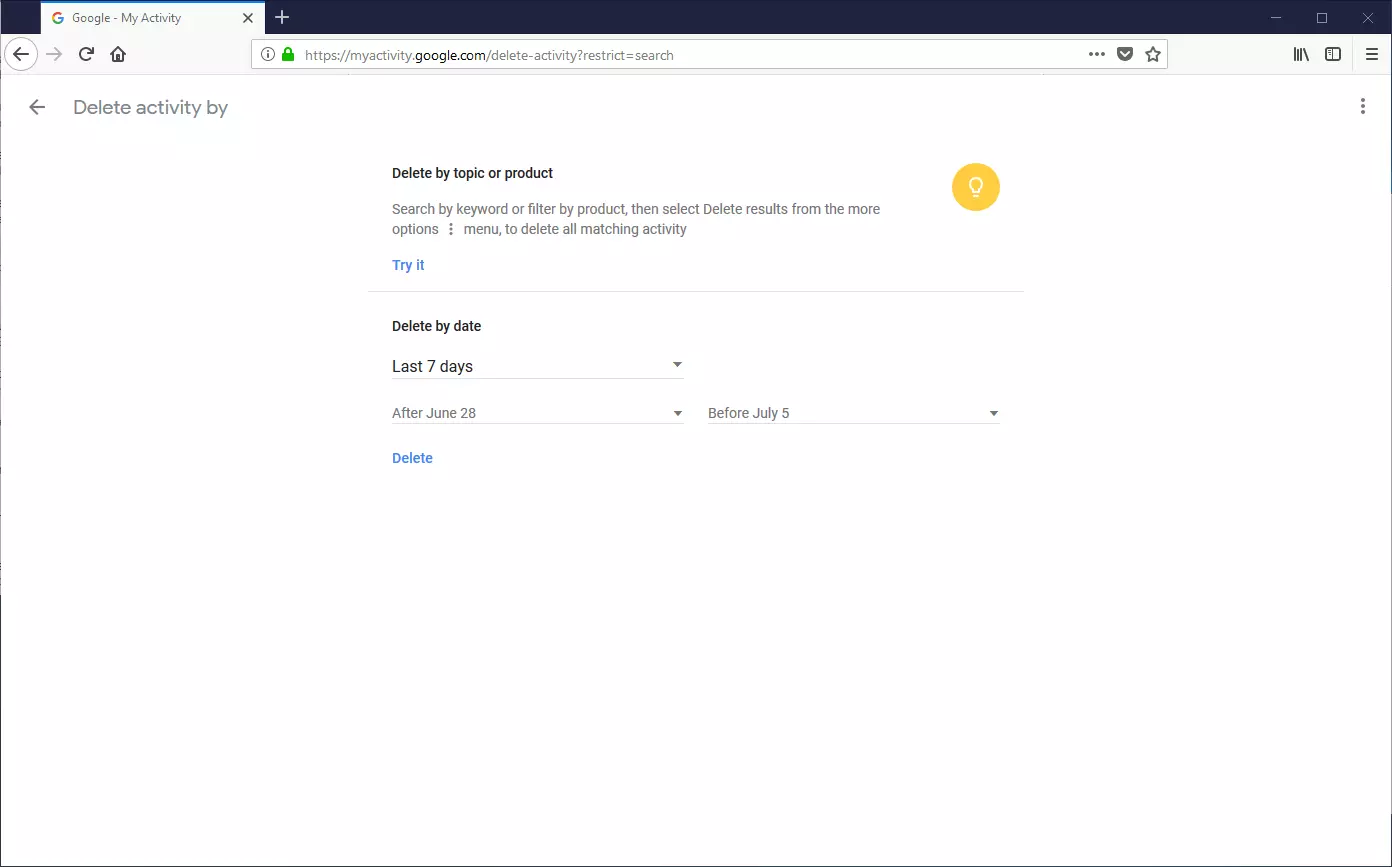
Step 4: Then choose the menu option “Clear history” on the right-hand side of your browser window.
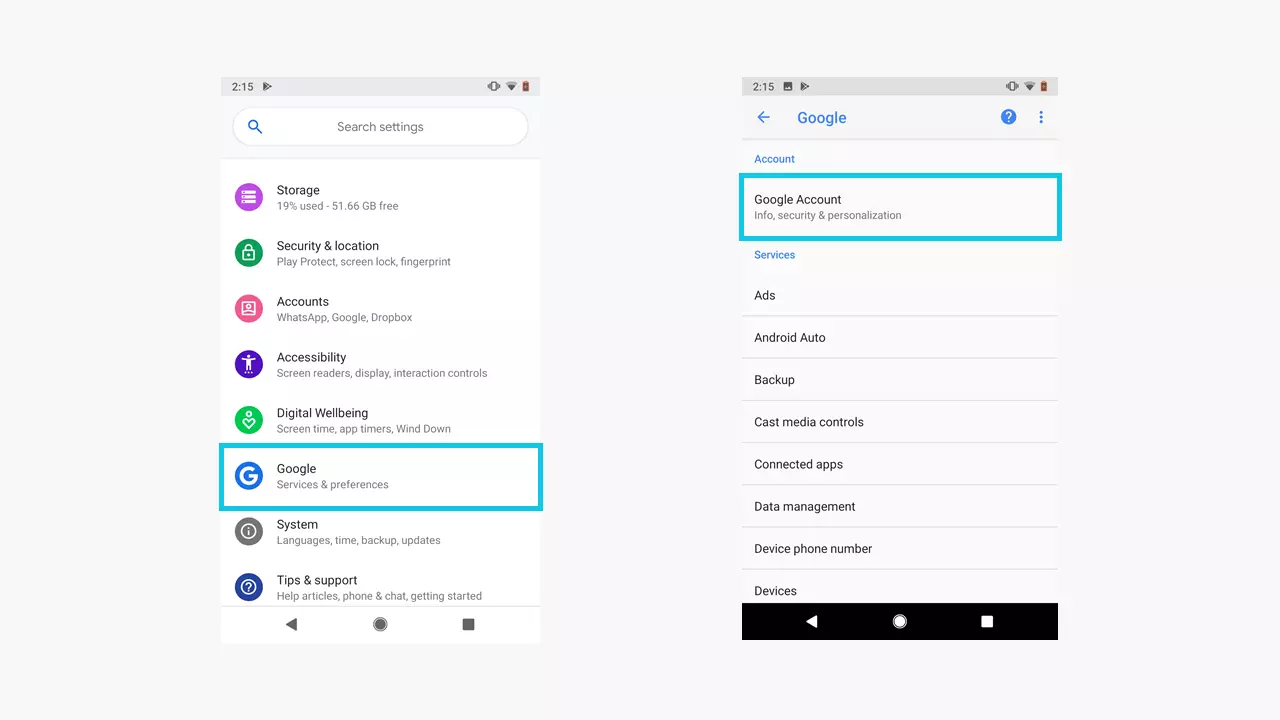
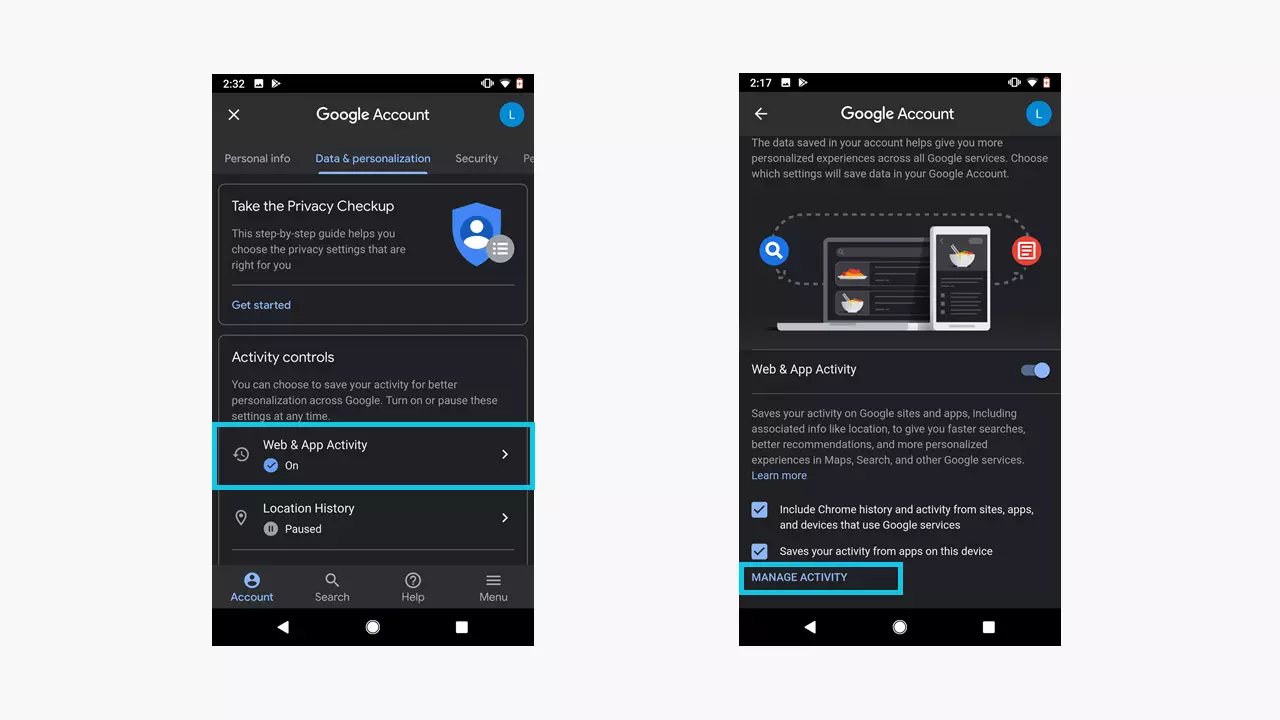
Clear Google History on your Android smartphone
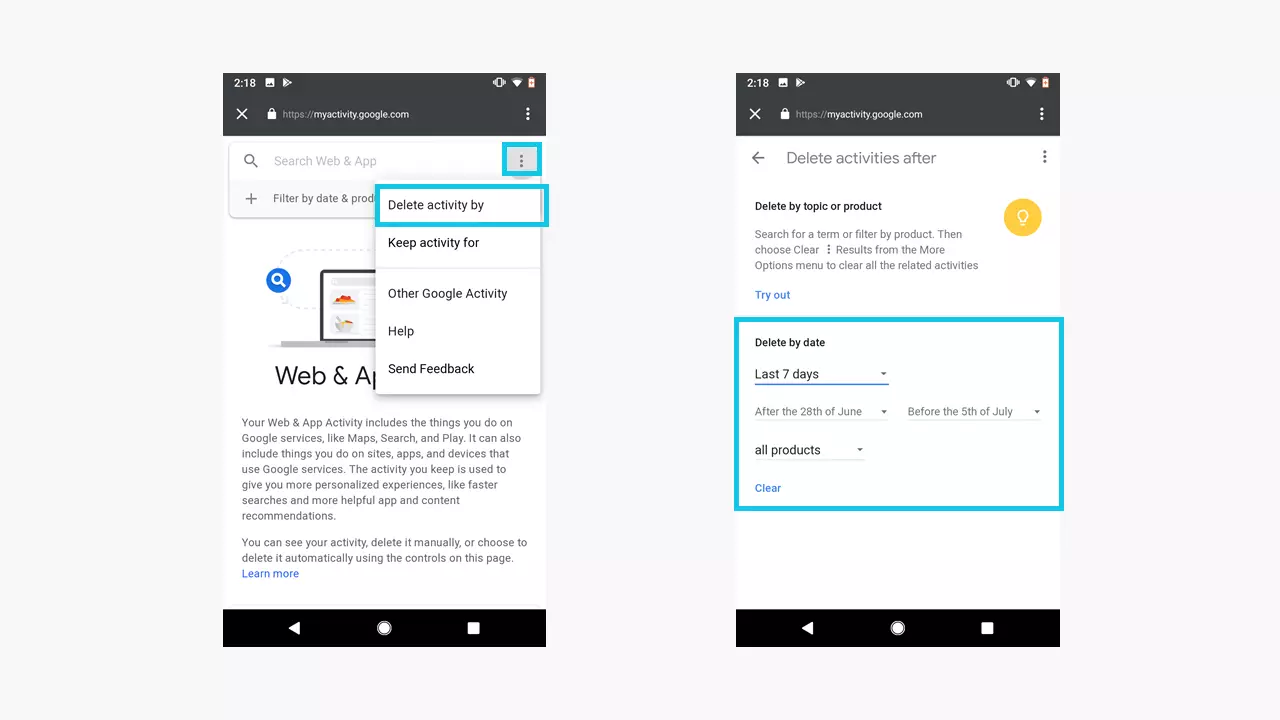
Your Android smartphone opens the website myactivity.google.com.
Step 3: Tap the menu symbol to the top right and choose the “Delete activity by” option.
Step 4: Set the desire time period and tap on “Clear”.
Clear Google History on Your iPhone/iPad
Unlike Android, iOS does not have any functions specific to its operating system for customizing your Google account. This is why you set the corresponding settings via your web browser as you would on your PC desktop. For this you should follow the steps as described above.
