How to create a Joomla eCommerce website
Use Joomla and want to set up your own store? When using the right extensions and templates setting up a Joomla eCommerce website is easy enough, so long as you take care of the hosting and a domain.
- Simple registration
- Premium TLDs at great prices
- 24/7 personal consultant included
- Free privacy protection for eligible domains
Step by step to creating a Joomla eCommerce site
Step 1: Hosting and domain
Before you install and set up your Joomla eCommerce site, check you have a suitable hosting environment. You won’t require particularly powerful hardware to this end. But for your store to run stably and reliably regardless of how many customers are accessing it, hosting from a professional provider is recommended. Their hardware tends to be more fail-safe and the provided internet connection is usually better. Some providers also offer special Joomla hosting plans tailored to a CMS.
Want reliable and secure CMS hosting for your Joomla online store? Joomla hosting from IONOS offers plenty of benefits such as flexibly scalable hardware, daily backups and one-click installation.
Many hosting packages include a domain. If one is not included, you can buy it separately. For your Joomla web store to be successful it’s a good idea to choose a meaningful, catchy web address. Take your time to select a suitable domain name. Thanks to generic top-level domains such as .shop, .store or .online, you’ve got some great alternatives to the classic .com ending.
Find our if your desired .com domain is still available or chosse from a range of various generic top-level domains:
Step 2: Install Joomla
Once you’ve sorted the hardware for your Joomla eCommerce store, install the content management system on your server. You don’t need to choose any specific edition. Simply select the basic version to create Joomla websites.
Some providers offer ready-to-use installation packages for Joomla. If yours does not or you prefer to install it manually, open the official Joomla website and download the latest Joomla version.
For an in-depth tutorial on how to install Joomla check out our guide.
Step 3: Select and install store extension
Next, you’ll want to convert Joomla to a web store CMS. Use a Joomla extension to extend the system with eCommerce features and functionalities. The most popular extensions include:
- VirtueMart: VirtueMart has been running since 2005. The open source eCommerce solution offers over 500 features to start your international Joomla eCommerce store. Additional VirtueMart plugins can be used to add yet more functions.
- J2Store: J2Store has already been downloaded over 350,000 times. The extension is available in a slim, free, basic version or in a paid pro edition (monthly subscription) with additional features such as coupons, vouchers or invoice templates.
- HikaShop: HikaSHop is available in three different editions. The free Starter package is best suited for those setting up their first Joomla eCommerce store. To operate a store long-term, however, you need one of the paid (one-off payment) versions “Essential” (small stores) or “Business” (large stores).
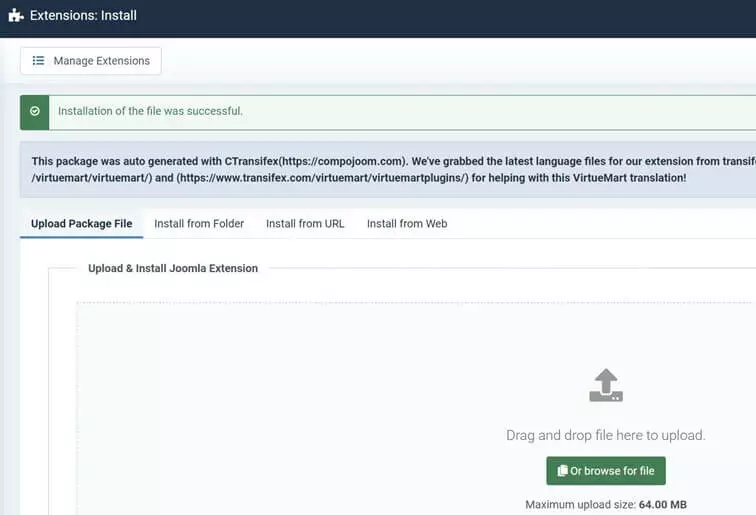
For the purposes of this tutorial, we will use the VirtueMart extension. Regardless of your selection, installation of the store extension works as follows:
- Launch the Joomla backend.
- On the left click on “System”.
- From “Install” select “Extensions”.
- Specify the location of the Joomla web shop plugin package files, if you’ve already downloaded them.
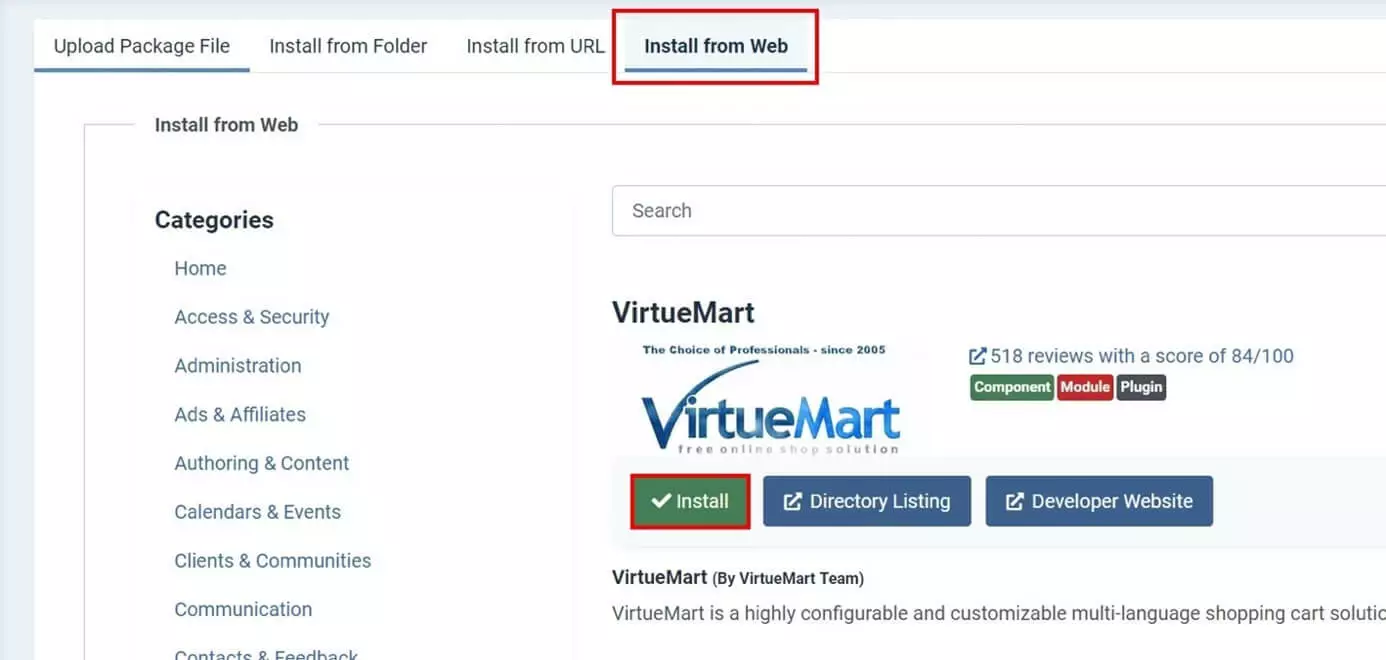
- Alternatively, you can navigate to the “Install from Web” tab and search for the desired extension.
- Click the appropriate search result and press “Install”.
Step 4: Design your Joomla web store
A store plugin adds the necessary functionalities, but you’ll still need to take care of the design of your web store. You can design your web store yourself or using a Joomla template.
There are two things to consider when choosing a template. First, the design template must be suitable for the Joomla version you’re using. Secondly, the template must be compatible with the store extension. If you’re using VirtueMart, you can check out the VirtueMart subcategory on themeforest.net to search for a suitable store style.
Register your desired domain with IONOS, get a SSL/TLS certificate and your personal email!
Step 5: Create product categories for Joomla eCommerce store
To organize your products optimally, set up the store by creating suitable product categories. It’s a good idea to consider which categories are best suited for your project. Once you’ve worked out a concept for classifying your products, proceed as follows:
- Click “Components” on the left in the Joomla backend.
- You should be able to see the VirtueMart menu after installing the extension. Open it and select “Product category”.
- Click “New” to create a new category.
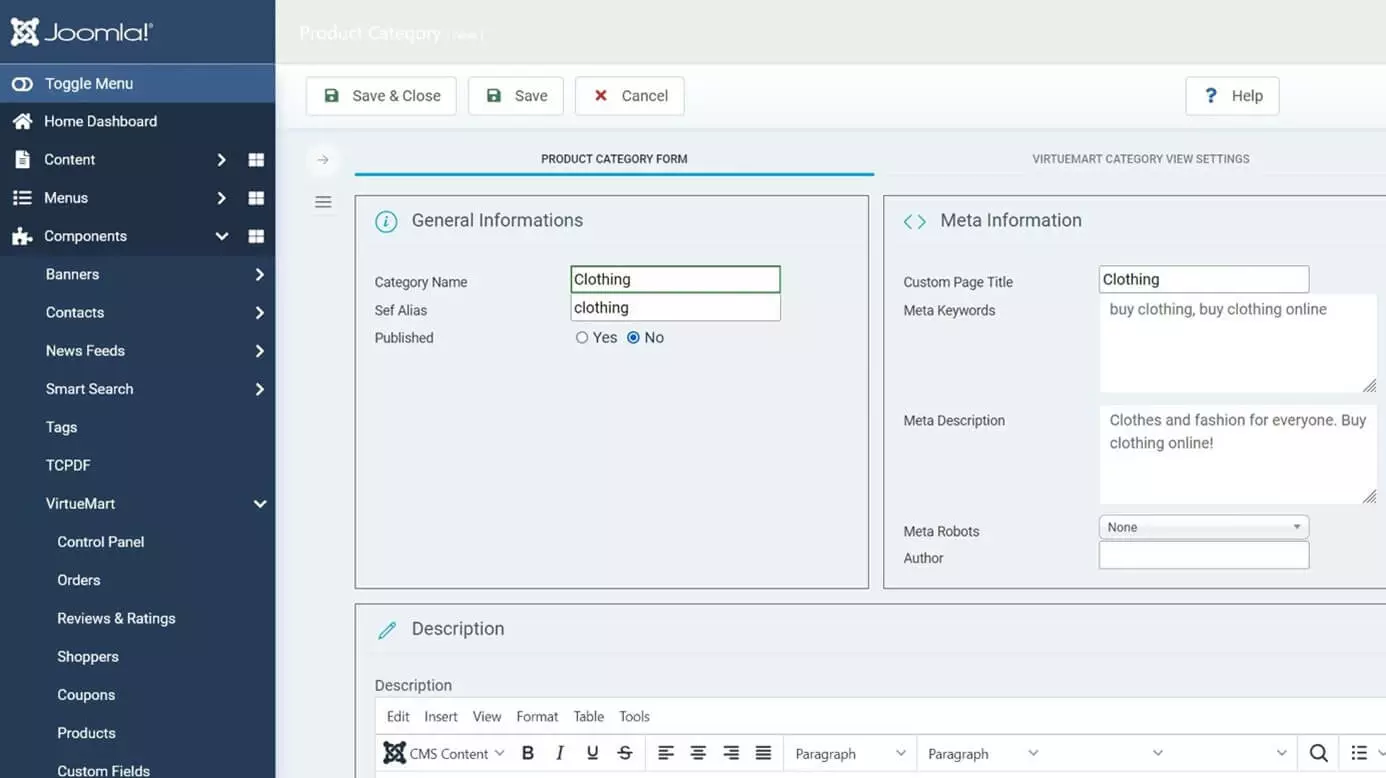
Now, adjust the settings for each category. Enter important information such as the category name and a search engine-friendly alias and metadata in the first tab. You can then add a description to your category.
In the “VirtueMart Category View Settings” tab, you can now configure the category structurally and visually. For example, you can specify whether the search function and subcategories are viewable and which templates and layouts should apply to the respective pages.
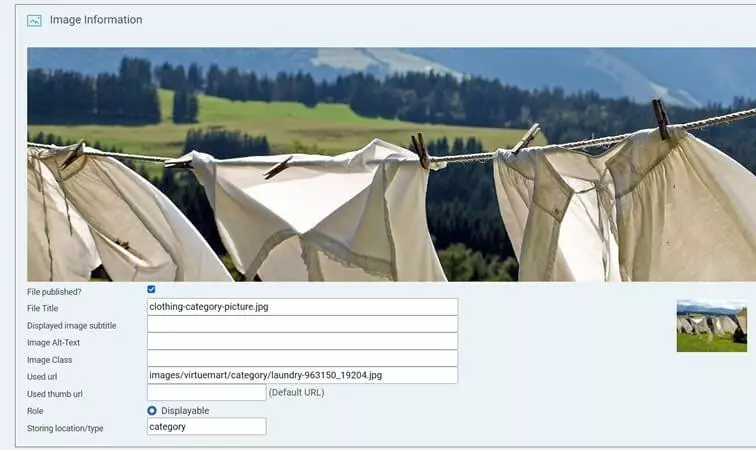
Finally, add one or more images to the product category in the “Images” tab. If you haven’t uploaded any images yet, you can do so at this point. Scroll down and select the desired photo via “Upload file”. To upload, hit “Save” in the top menu bar. The image is automatically selected and you can define all important image information such as the file name, alt text or description:
Once you’ve added all information, hit “Save and close” to create the category.
Step 6: Adding products
Once you’ve created categories for your Joomla eCommerce store, you can fill them by adding products. To add a new product, follow these steps:
- Call “Components” from the left-side menu.
- Click on “VirtueMart”.
- Select “Products”.
- Click “New”.
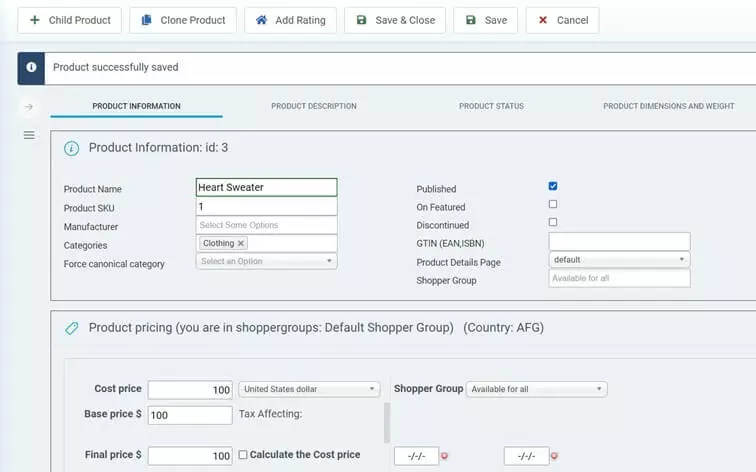
Setting options for individual products are extensive. Enter all relevant product information in the first tab — product name, manufacturer and ISBN, for example. You can also set the price. Assign a category you created in “Categories” and check “Published” for the product to be displayed.
Other options for product maintenance are as follows:
- “Product description”: Add a short and detailed description and meta information for the respective product.
- “Product status”: Define information as to the status of a product. How many items do you have in stock? How many items can individual users purchase? Additionally, you can prepare and send emails to buyers.
- “Product dimensions and weight”: Add information on length, width, height and weight (with and without packaging).
- “Product image”: As with categories, you can upload product images.
- “Custom field”: If you want to tease products or categories, you can set it up in this tab. If necessary, you can also define your own fields.
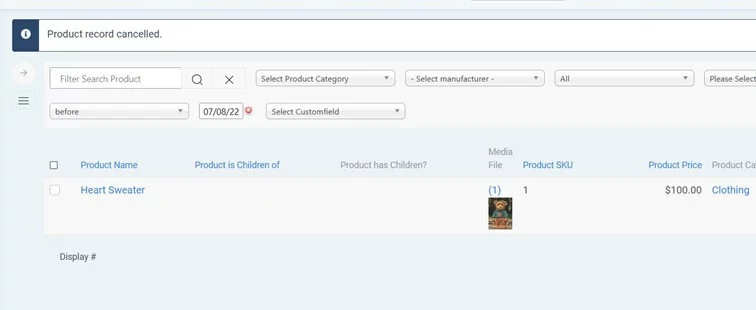
Once you’ve saved the finished product entry, it’ll be listed in the overview.
High-quality product photos are the be-all and end-all for the success of your Joomla eCommerce store. Find some of the top tips on optimal product photography in our dedicated guide.
Step 7: Publish your Joomla eCommerce store
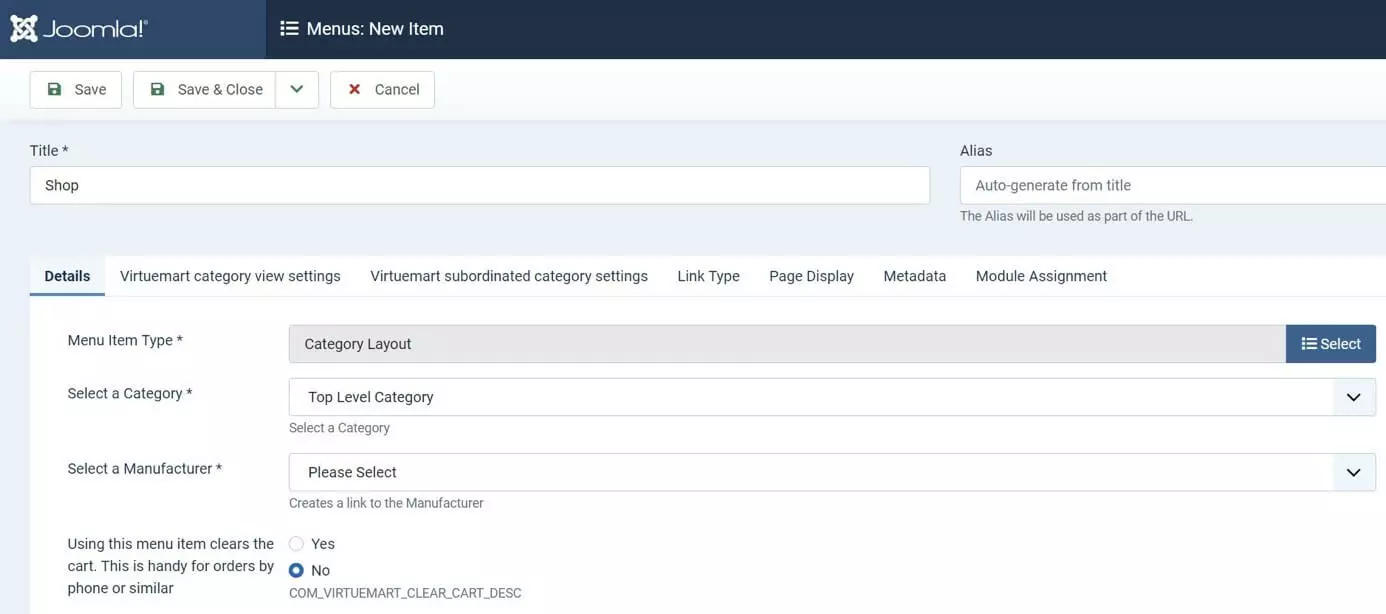
After you’ve created and linked category pages and products, it’s time to display them on your Joomla site. The VirtueMart store can be integrated as a single page in any menu since all shop-internal pages are linked to each other. For example, you can integrate the store into the main menu as follows:
- Call up “Menus” from the left side.
- Select “Main Menu”.
- Click “New”.
- Enter a title such as “Store”.
- “Select” the category layout in “Menu Item Type".
- Click “VirtueMart” and “Category Layout”.
- Hit “Save”.
Back up Joomla while you’re adding products and before you integrate your web store. That way, you’ll always have a backup copy to hand.
Step 8: Add payment and shipping options
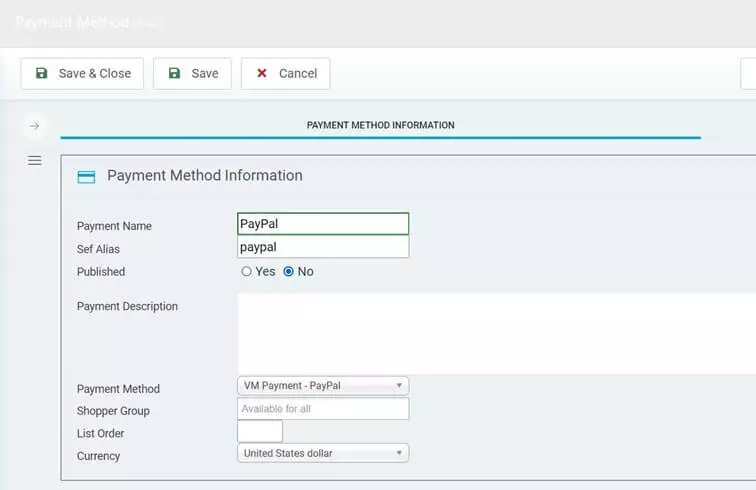
You should carefully consider the payment and shipping options you’d like to offer in your Joomla web store. In principle, the more options you offer, the better. VirtueMart supports various payment options such as PayPal, Amazon Pay and 2Checkout.
The shipping or payment options you add are up to you to decide, but you must create individual entries for each option. Proceed as follows:
- Select the category “Components” on the left.
- Launch the “VirtueMart” menu.
- Click “Shipping Method” or “Payment Method”.
- Add a new entry with “New”.
The above are the most important steps when creating a web store in Joomla. There are, of course, various other tasks that need consideration. For example, you should ensure that the individual components of your online store are legally compliant. And don’t forget to consider the marketing of your online store.
Pros and cons of creating an eCommerce website with Joomla
Designing a web store with Joomla offers benefits because of its high flexibility. Joomla is highly extensible and there are various extensions available to create a web store. The content management system itself is free to use. The store extensions may incur charges, especially when you’re planning a large project. In case of VirtueMart, costs are only incurred if you want to use one of the professional, ready-to-use templates.
On the other hand, creating a store using Joomla and extensions is more demanding than using a classic store system or a website builder. You’ll want to make sure you’ve got enough time and have the nerves to successfully master using the software.


