How to clear your WordPress cache with and without plugin
Have you ever visited a website only to give up on it a few moments later because it was taking so long to load? If so, you’ll understand why fast load times create a positive user experience and why load speed is so important when it comes to Google rankings. To achieve fast load times, most site owners use caching.
However, simply installing a caching plugin isn’t enough. You also need to remember to clear the WP cache from time to time. Doing so ensures that visitors to your site always see the latest version of each page and reduces the risk of technical problems. Not sure how to clear the WordPress cache? Then keep reading!
Why enable caching on your WordPress website?
If you’ve got your own website, the user experience (UX) is just as important as the actual content. Making your site easy for visitors to browse will encourage them to stay on it for longer and interact with it more, which in turn will have a positive effect on your Google ranking. And good UX design is not just about making your site visually appealing and easy to understand – you also need to make sure it loads quickly.
Whenever somebody visits your website, a number of processes automatically start up in the background whose job it is to ensure the website is displayed correctly. The problem is that all of these background processes (loading and executing JavaScript, reading the CSS file, querying the database) take time. And if they take too long, your visitors may give up waiting, and your Google ranking will drop. Thankfully, there’s a way of speeding things up – caching.
Caching is an important consideration when it comes to making a WordPress website faster, although it’s by no means a catch-all solution. You should also clean up your code and database and reduce the number of plugins that are running. The size of images and videos also has a significant effect on page load speed.
There are a number of different caching plugins for WordPress, all of which basically work in the same way: The plugin saves a static image of each page of your website and shows this to visitors, which significantly reducing the load time.
Why clear the WP cache?
Although using a caching plugin allows your website to load more quickly, there are some disadvantages. For example, when you update components or make changes in the back end or the CSS file, visitors may not see the changes straight away, because the older, cached version will probably be displayed. You should therefore clear the WordPress cache after all changes and updates, as explained below.
- Clear the cache after running WordPress system updates to make sure that all of the updated components are correctly displayed.
In theory you only need to delete the WordPress cache if the updates affect the website appearance. However, it’s often just easier to clear it after every update rather than checking whether or not you really need to.
- It’s also a good idea to do a WordPress cache clear after updating plugins. This will ensure that all of the changes are visible in the front end.
- The same applies to updates to widgets, as these changes often only become visible to site visitors once the cache has been cleared.
If you’re planning to make major changes to your website, we recommend creating a WordPress backup so that you can restore the original version if you run into any problems.
Using a professional WordPress hosting package can improve the response time of your site by up to 50%, which means improving the user experience and boosting your Google ranking.
How to clear the WordPress cache using a plugin: a step-by-step guide
The easiest way of deleting the WordPress cache is to use a caching plugin. The following paragraphs present three popular caching plugins and give step-by-step instructions for clearing the cache.
The process is very similar for all caching plugins, so these steps will most likely work for other plugins too.
How to clear the WordPress cache using W3 Total Cache
W3 Total Cache is a free caching plugin. It has over one million active installs, which just goes to show how popular it is! This plugin provides two easy ways of deleting your WordPress cache:
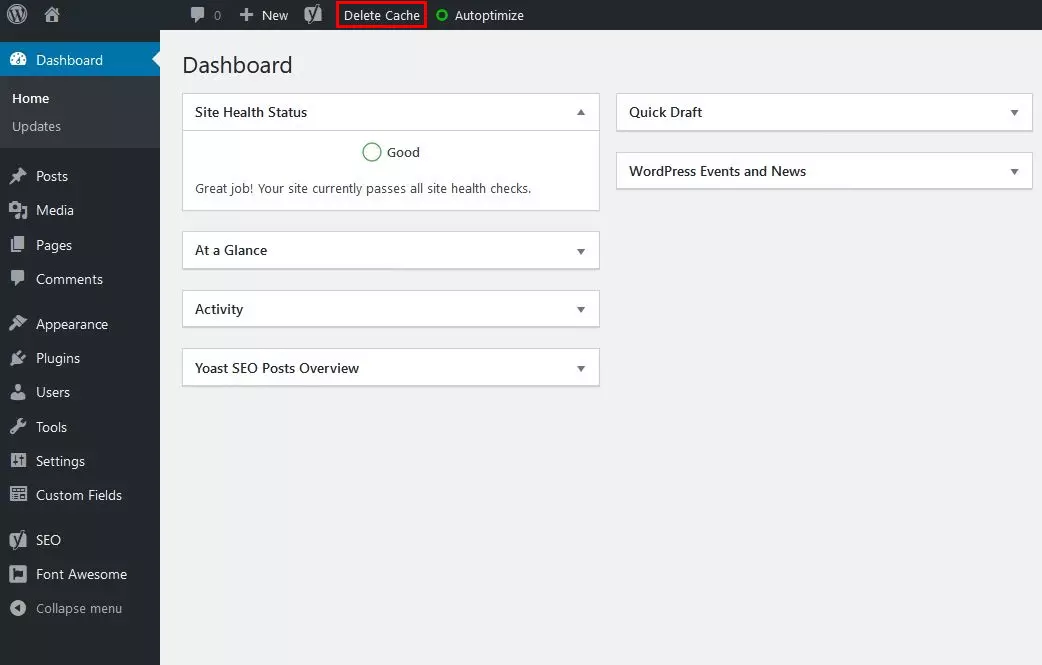
Option 1 – via the Admin Bar
Option 2 – via the settings
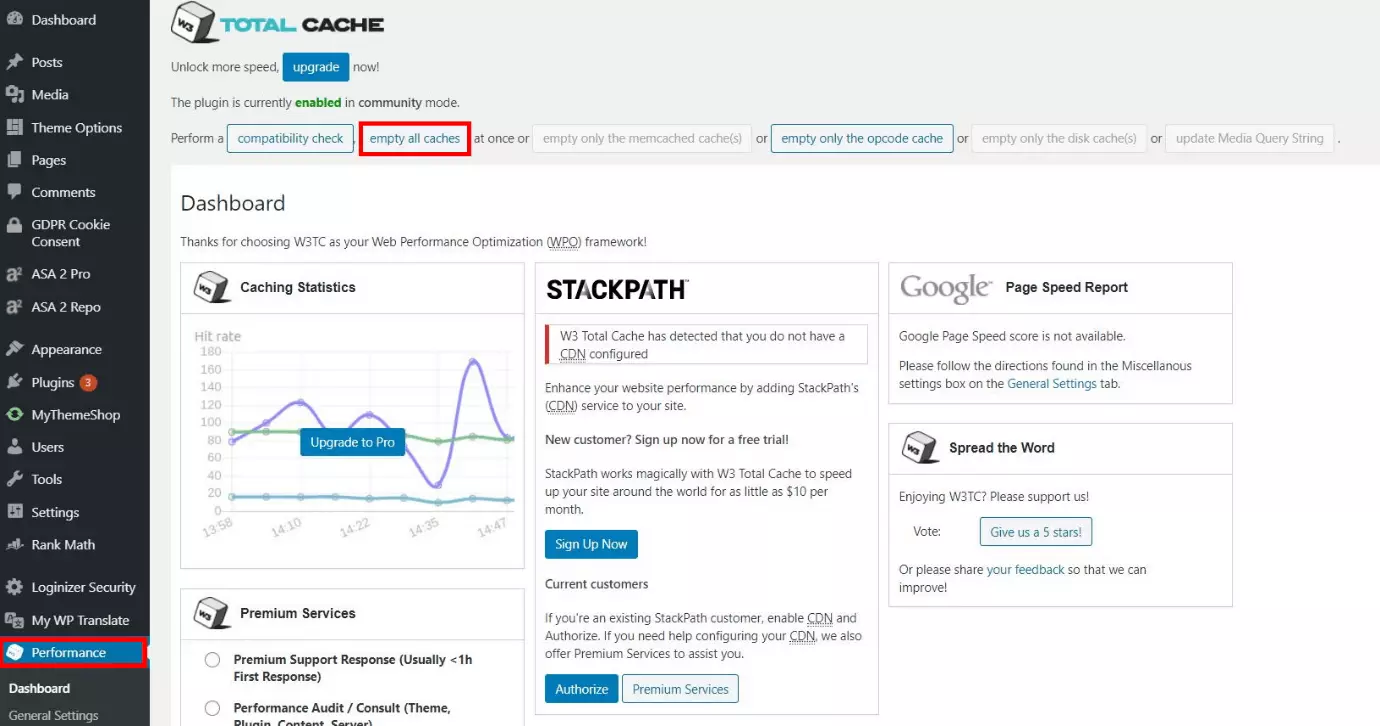
Alternatively, you can clear the WordPress cache from the settings page. To do this, click on “Performance” in the left-hand pane to display the W3 Total Cache dashboard. Now click on the “empty all caches” button. And that’s it!
How to disable caching using W3 Total Cache
Like other caching plugins, W3 Total Cache also lets you temporarily disable caching (you can turn it back on anytime). This can be useful if you’re making lots of changes in a short space of time, because otherwise you’d have to keep deleting the WP cache. To disable caching in W3 Total Cache, open the plugin dashboard by clicking on “Performance” in the left-hand pane. Next, open the “General Settings” section. Here you’ll find a checkbox for enabling/disabling the cache.
How to clear the WordPress cache using WP Super Cache
With more than two million active installs, the WP Super Cache plugin is speeding up a tremendous number of pages on the web! It achieves this by displaying static HTML files to most visitors – pages are only refreshed when somebody signs in or leaves a comment. Here, too, there are two ways of clearing the WordPress cache:
Option 1 – via the Admin Bar
Option 2 – via the settings
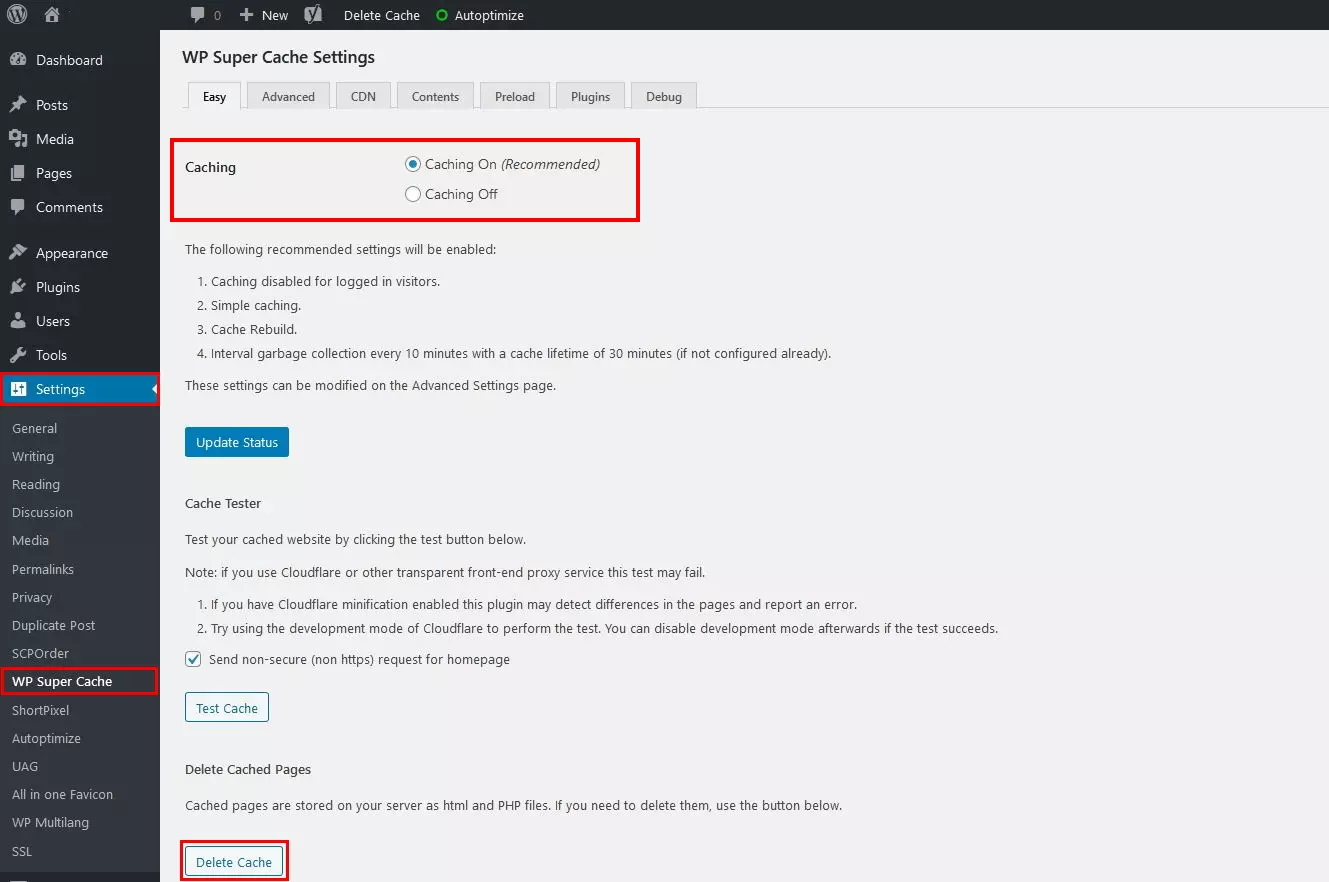
You can also clear the cache from the settings page. Open the “Settings” page and locate the section for the WP Super Cache plugin. If you scroll down you’ll see a sub-section entitled “Delete Cached Pages” and a “Delete Cache” button. The button for disabling caching is in the “Caching” sub-section.
How to clear the WordPress cache using WP Fastest Cache
The WP Fastest Cache plugin has more than one million active users. It has a particularly handy function – it automatically clears the cache whenever a new post or page is created. With this plugin you can use short code to disable caching either for all site visitors or for specific devices or groups of users. Here’s how to clear the WordPress cache:
Option 1 – via the Admin Bar
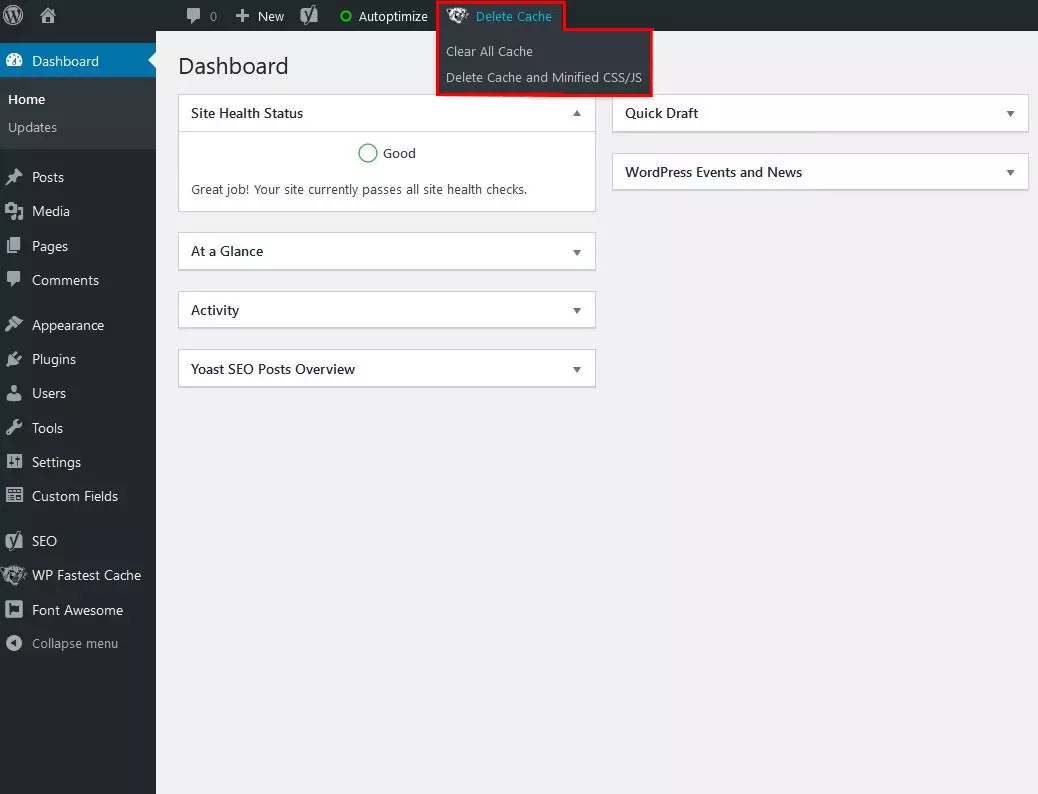
This plugin also adds a button to the WP Admin Bar to make it really easy to clear the WordPress cache manually. Simply click on “Delete Cache” to open the drop-down menu and then select “Clear All Cache.”
Option 2 – via the plugin options
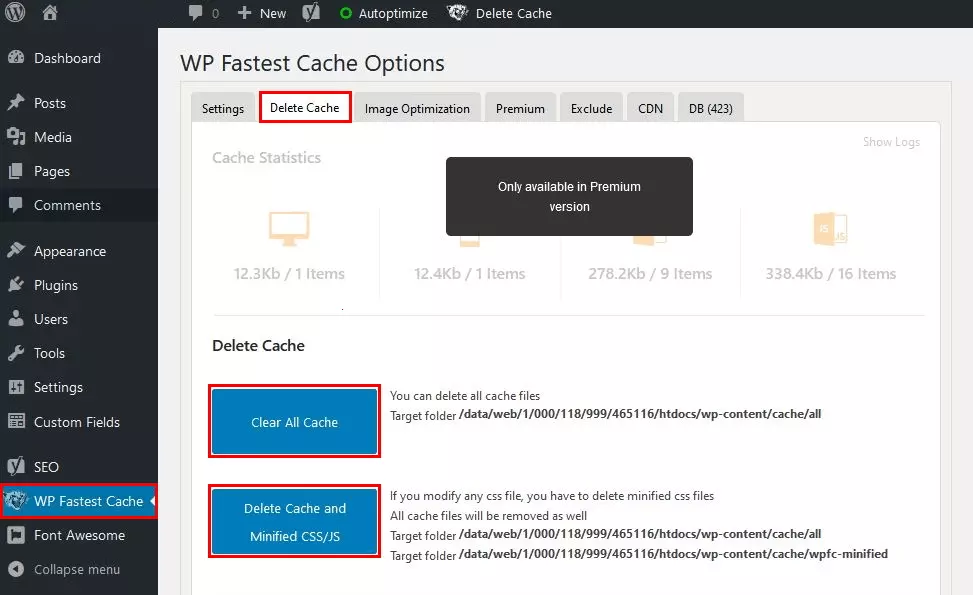
If you’ve installed the WP Fastest Cache plugin, you’ll see that it has its own section in the left-hand menu pane. Open this page to see the plugin settings. In the “Delete Cache” tab you’ll find a button labeled “Clear All Cache” that will delete all of your cached files.
If there are still display issues even after you’ve cleared the WordPress cache, click on the “Delete Cache and Minified CSS/JS” button. This will delete any remaining files.
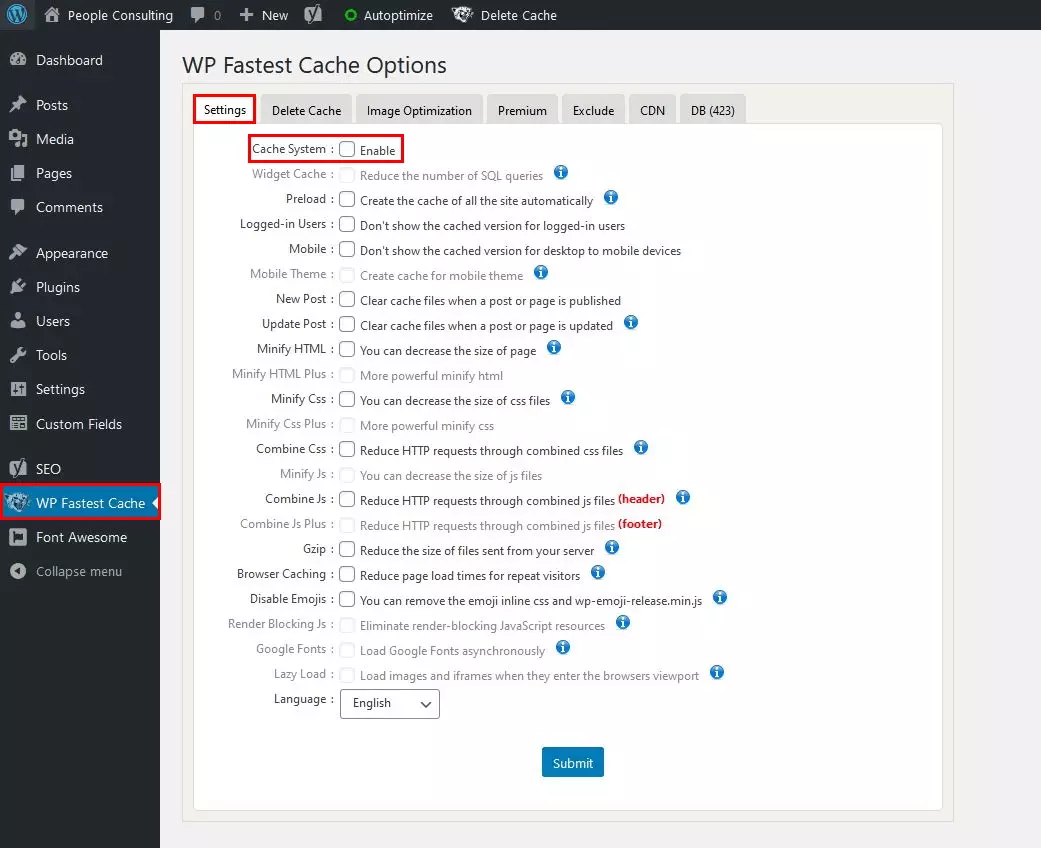
How to disable caching in WP Fastest Cache
- Create & customize your site with AI tools made for everyone
- 3x faster: SSD, caching & more
- Daily security scans, DDoS protection & 99.98% uptime
How to clear the WordPress cache without using a plugin
You can also disable caching and clear the WordPress cache without using a plugin, although this requires SSH or FTP access. The instructions for both options are given below.
How to disable caching via FTP
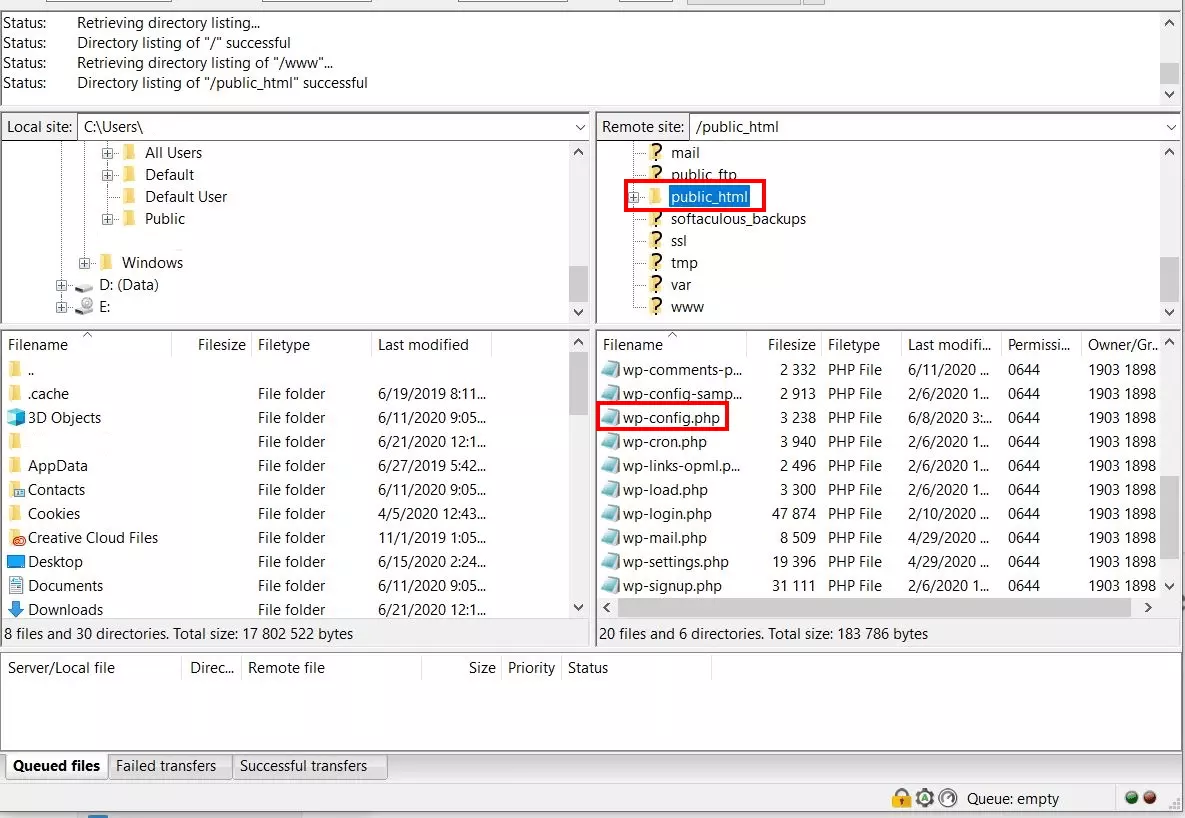
If you want to disable caching without using a plugin, you’ll need FTP access to your WordPress files (e.g. via FileZilla. Open the wp-config.php file (usually located in the main WordPress folder) and insert the following line of code:
How to clear the WordPress cache via FTP
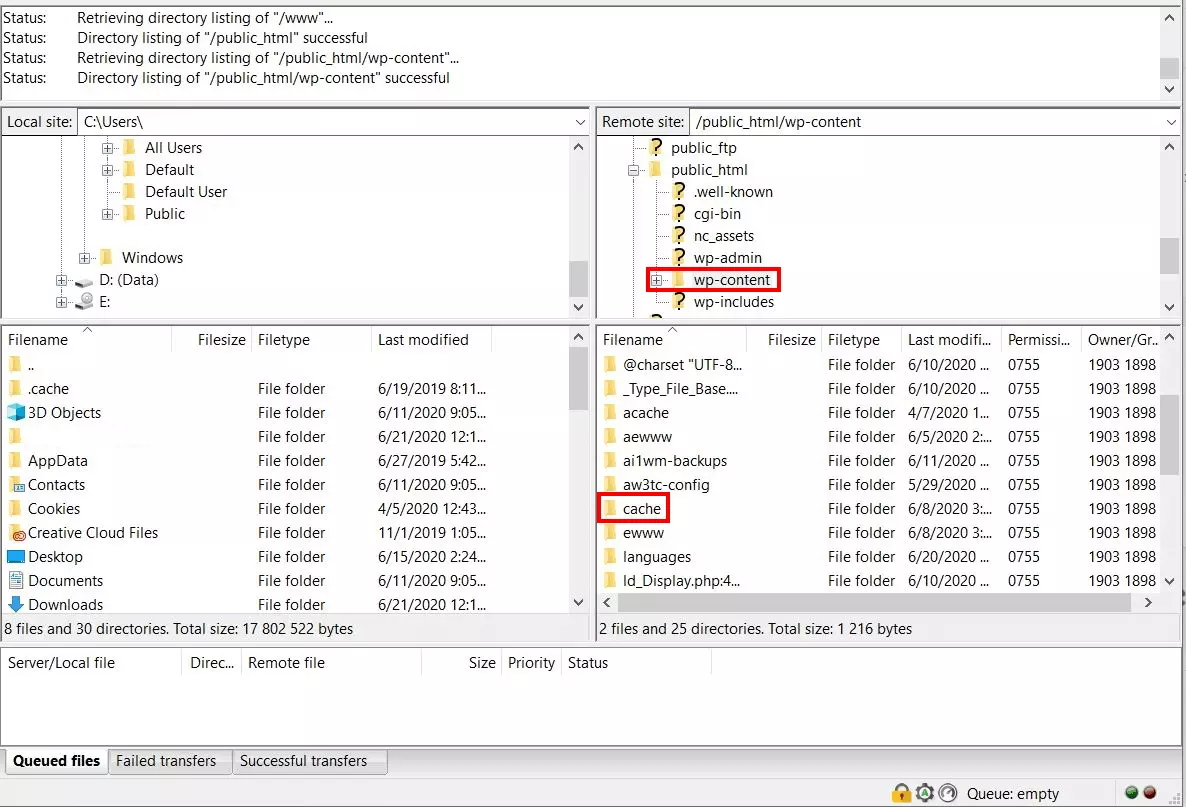
To clear the WordPress cache (rather than disabling caching completely), use FTP to access your WordPress files. Go into the “wp-content” folder and open the “cache” folder. Now delete everything from this folder.
Make sure you only delete the contents, not the folder itself.
How to clear the WP cache using SSH
If your hosting provider has enabled SSH (Secure Shell) access, there’s another way you can clear the WP cache. Simply insert the following command:


