How to turn on spell check in Outlook
An email can be written and sent in no time, but typos and mistakes can occur just as quickly. With Outlook’s spell check feature, you can identify and correct most writing errors.
Powerful Exchange email and the latest versions of your favorite Office apps on any device — get started with our free setup assistance.
How to turn on spell check in Outlook quick guide
- Open Microsoft Outlook and go to the File tab.
- Select the menu item Options.
- Click on Email and then on Spelling and AutoCorrect.
- Check the boxes next to Check spelling as you type and Mark grammatical errors as you type (uncheck both boxes to deactivate them).
What is Outlook spell check?
The proofing tool in Outlook checks the spelling of your emails and flags spelling and grammatical errors. It works in a similar manner to the spell checker in Microsoft Word and alerts you to errors as you type.
You can enable spell check in Outlook so that emails are automatically checked for errors before sending. You’ll receive a notification when an error is made and can therefore avoid accidentally sending emails with mistakes in them. It’s important to correct spelling mistakes before sending them because retrieving sent emails in Outlook is rarely possible. The spell checker includes suggestions for solutions and the correct spelling of words and sentences. The grammar checker alerts you in case of missing or incorrect punctuation marks or repeated words.
Reach out in your name every time you hit send — includes domain, 2 GB+ storage, and more.
How to turn on spell check in Outlook step by step
In the new version of Microsoft 365, there is no longer a File tab. Automatic spell check is enabled by default. You can still perform manual spelling and grammar checks as usual.
Step 1: Launch Microsoft Outlook and go to the File tab:

Step 2: Select Options to view the Outlook settings.

Step 3: In Outlook Options, click Mail and then Spelling and Autocorrect….
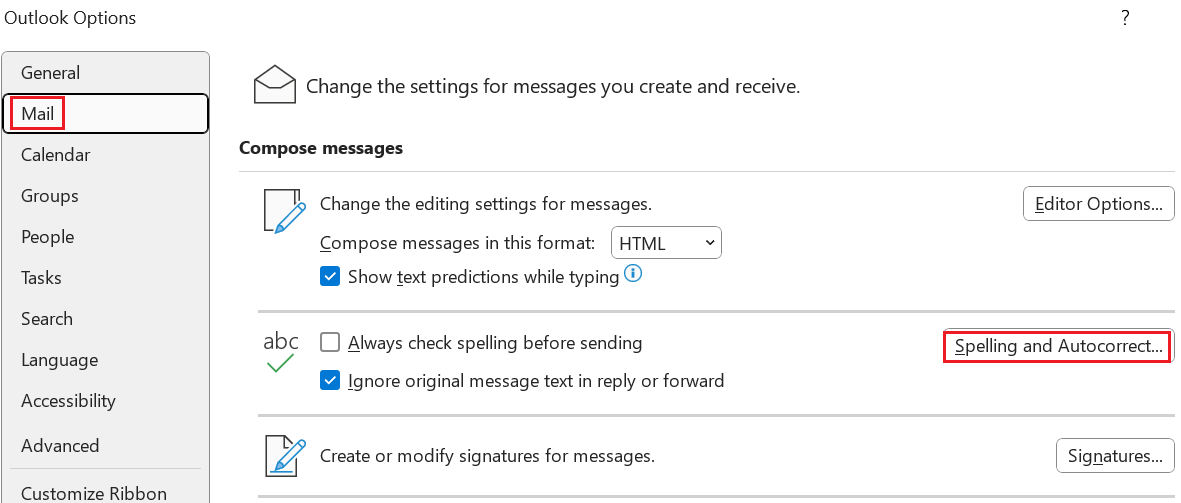
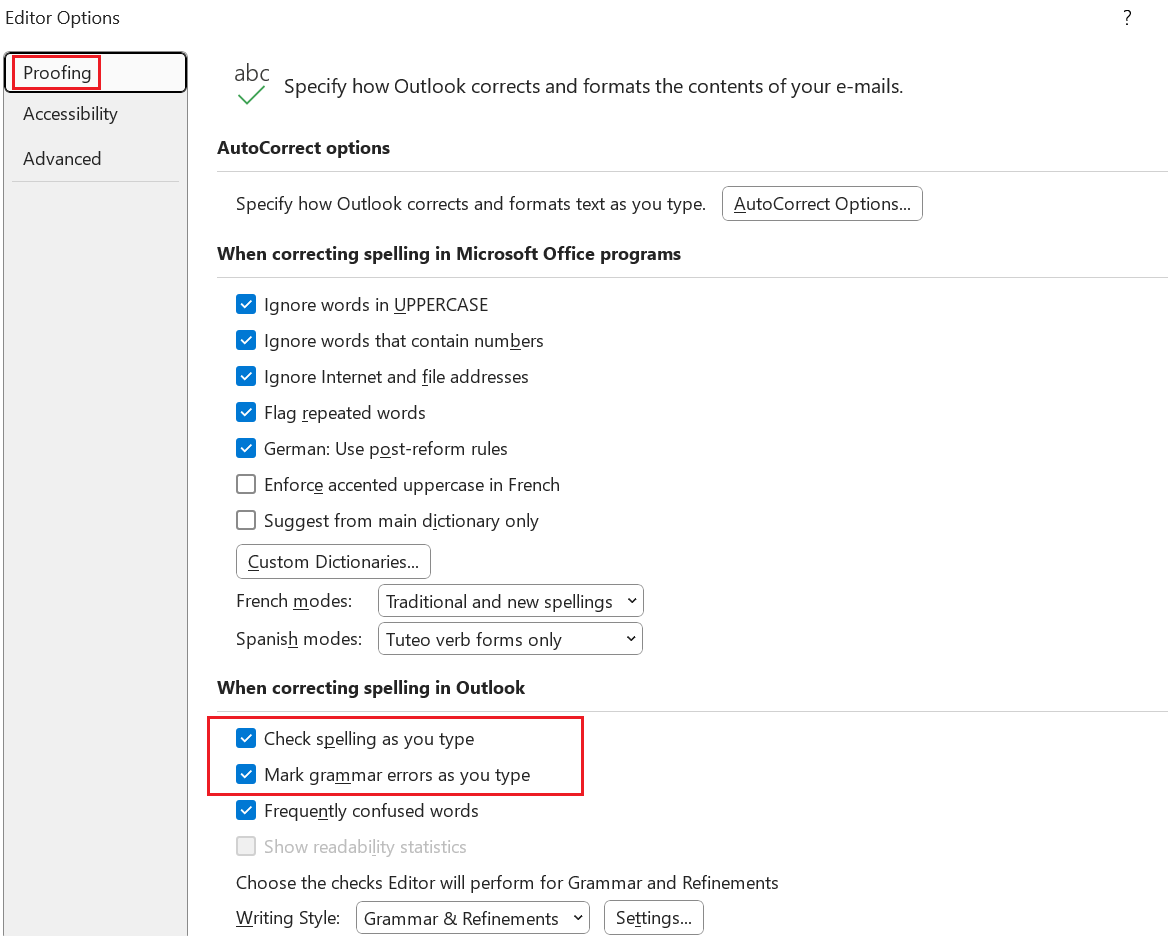
Step 4: In the editor options, you can now set your preferences for proofing the document and decide if Outlook should check your emails for errors. To enable automatic spell checking, select the options Check spelling as you type and Mark grammar errors as you type.
If you want to disable spelling and grammar checking later, simply uncheck the boxes you selected here.
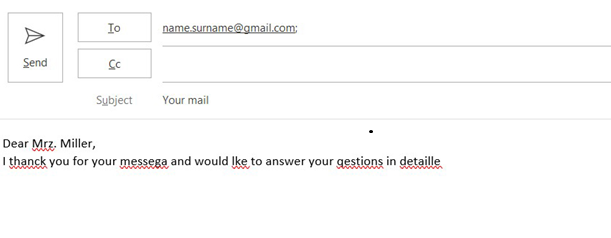
Once you’ve activated the spell and grammar checker, Outlook will now automatically check your texts when composing emails and highlight any spelling errors with a red wavy line. Grammar errors are highlighted in blue.
If the proofing tool doesn’t detect any errors or incorrectly highlights words that are spelled correctly, use these tips and tricks to find out why Outlook spell check isn’t working.
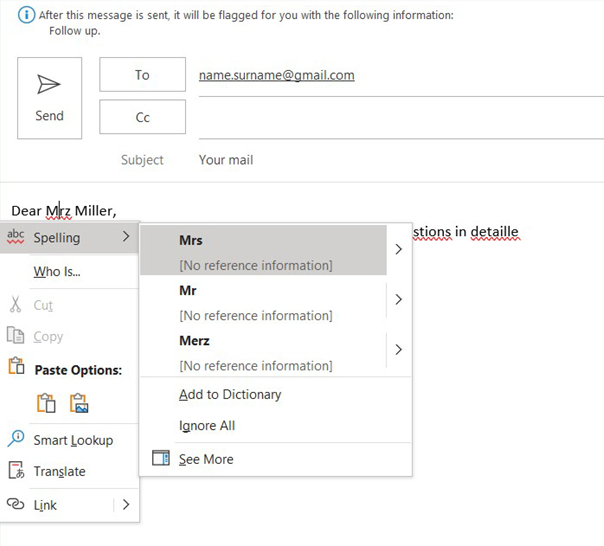
You can also correct errors as you type by using Outlook suggestions. Right-click on the word that’s been flagged in red and select Spelling. You will now be able to view Outlook suggestions for the correct spelling. By clicking on one of these suggestions, Outlook will automatically insert it in place of the misspelled word.
How to turn on manual spell check in Outlook
Irritated by the red and blue marks of misspelled words and sentences? You can quickly deactivate the automatic spell check as described above. This doesn’t mean that you need to forego spell checking. You can still use the manual spell checker, which works even when AutoCorrect is deactivated.
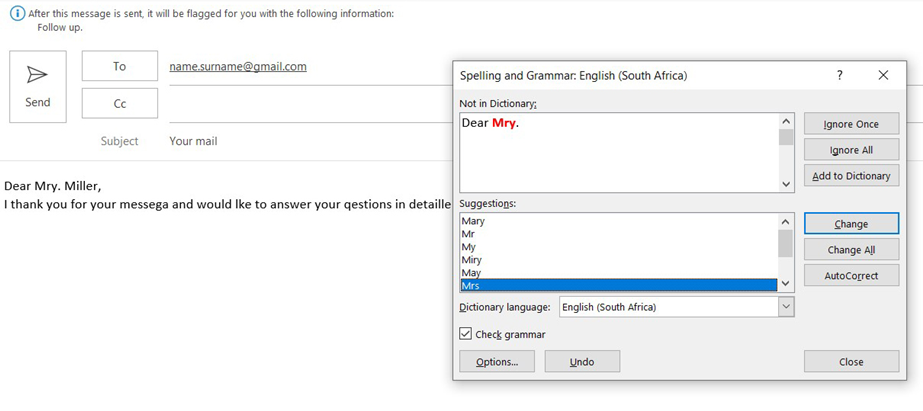
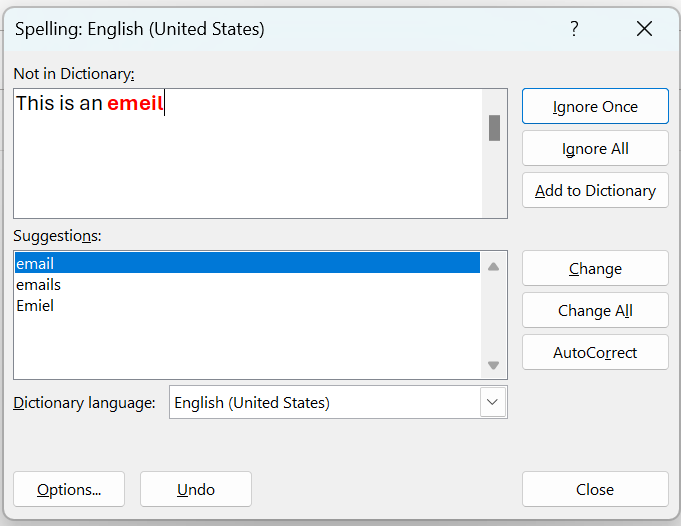
To do this, select the Review tab and click on Spelling and Grammar once you finish composing your email. The spell checker opens in a new dialog box and will suggest corrections for misspelled words or grammar errors. You can accept or reject suggestions and add your own corrections in the text field, or simply ignore them.
- Intuitive drag and drop editing
- AI-powered text generation
- Multiple templates to choose from
How to set up Outlook spell check before sending
Don’t want to be disrupted by red or blue lines while writing but regularly forget to manually check the spelling in your emails before sending them? Outlook has a solution for you too. The application now includes the option to auto-check your emails for errors just before sending them.
- Go to the File tab and click on Options.
- Select Mail.
- Activate Always check spelling before sending by adding a check mark. It’s a good idea to check the box next to Ignore original message text in reply or forward. This prevents notifications of errors in emails before sending.
- Now click on Send and Outlook will check the spelling of your message.

If your email is free of errors, it will be sent immediately. If errors are discovered, you will receive a corresponding alert.
The trusted Microsoft Office programs – accessible from anywhere, with external storage and up to five installations per user – are available as part of Microsoft 365 Business from IONOS.