How to create an email group in Outlook (distribution list)
Distribution lists and contact groups in Outlook allow you to send the same message to different people without having to add each recipient individually. In this tutorial, we show you how to create distribution lists and contact groups in the Outlook desktop or web app.
Reach out in your name every time you hit send — includes domain, 2 GB+ storage, and more.
How to create a distribution list in Outlook quick guide
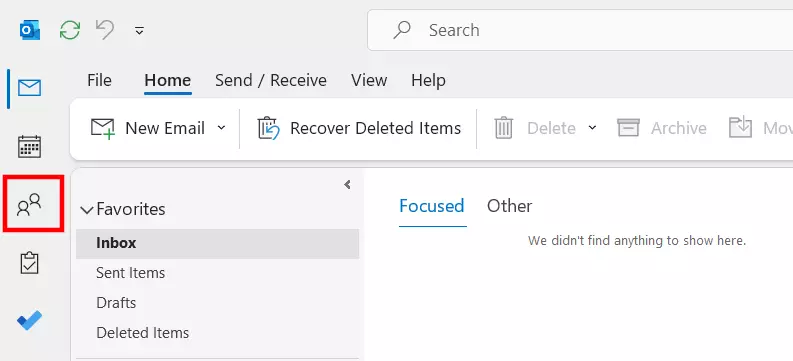
- Click on the People icon.
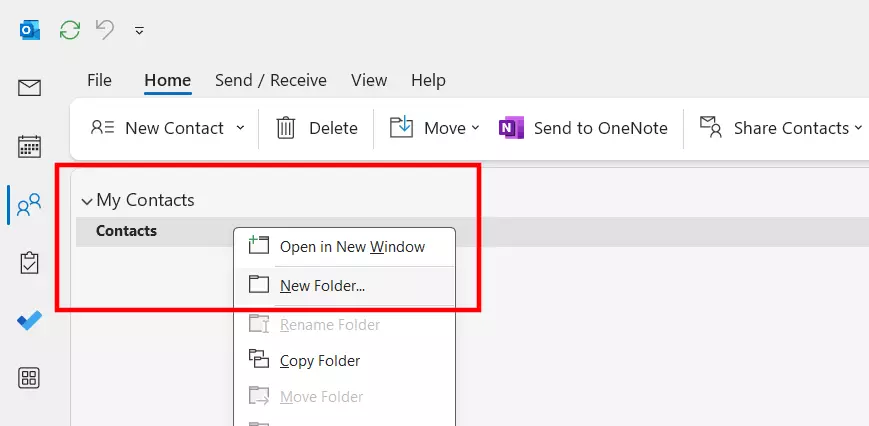
- Create a target folder for your distribution list under My Contacts.
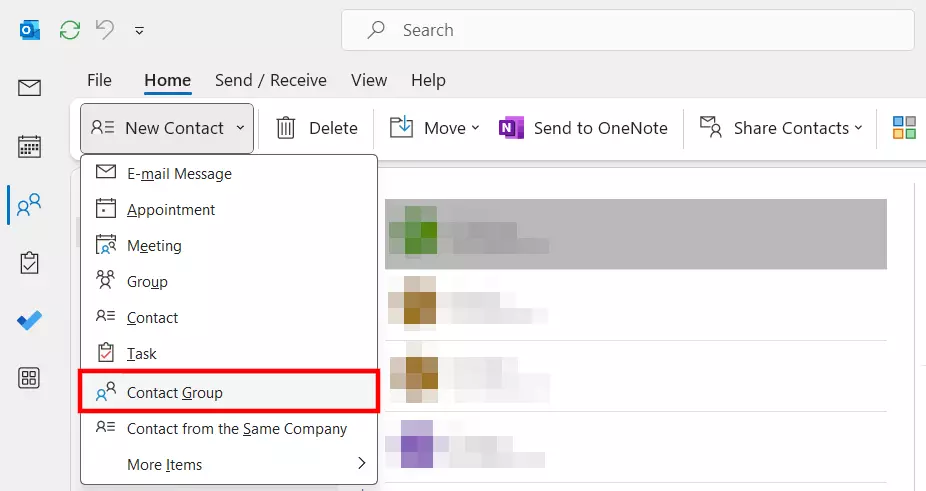
- Open the New Contact menu and click on Contact Group.
- Enter a name for your distribution list and add the contacts to the list.
How to create a distribution list in Outlook step by step
Distribution lists are also called contact groups in the current versions of Outlook. Creating an Outlook distribution list is therefore the same as creating an Outlook contact group. We have summarized the individual steps for you in detail below.
These instructions apply to the Outlook versions of Microsoft 365 as well as Outlook 2021, 2019 and 2016.
Step 1: Go to contact management in Outlook by clicking the People icon in the menu on the left.
Step 2: Under My Contacts, select the folder where you want to save the new contact group. The default folder is the Contacts folder, which Outlook automatically creates. If required, you can also simply create a new contact folder and select it by left clicking.
Step 3: Open the New Contact group by clicking on the small arrow pointing downwards. In the menu that pops up, select Contact Group.
Step 4: Enter a name for the Outlook distribution list you want to create in the Name field. Then click on Add Members and select one of three options:
- From Outlook Contacts
- From Address Book
- New E-mail Contact
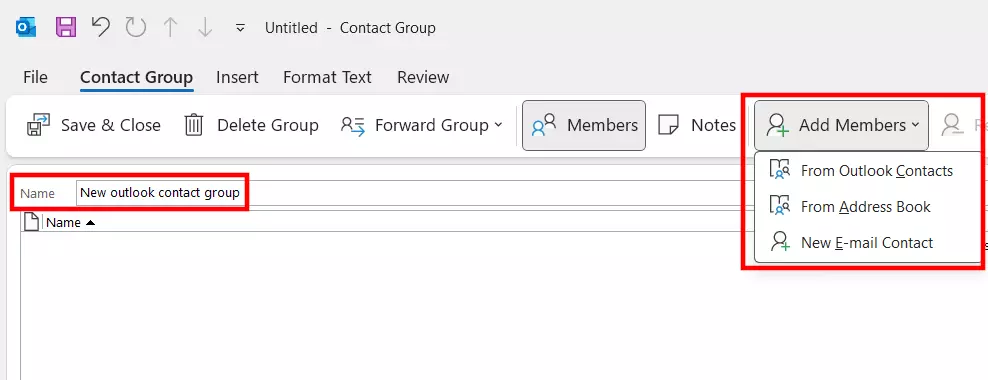
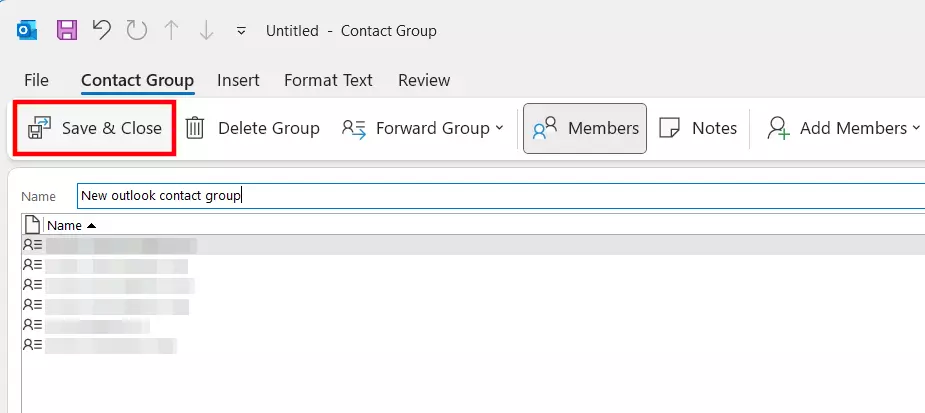
Step 5: Select the people you would like to add to your contact group or create new entries if the contacts are not yet in your Outlook account. Once your list has been created, click on Save & Close to create the Outlook group.
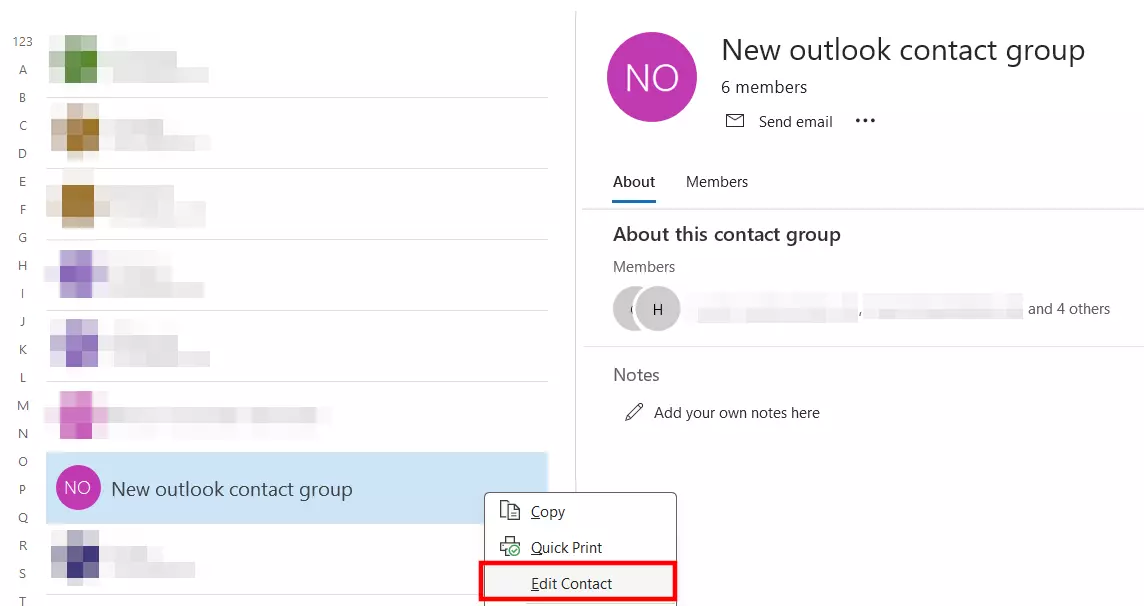
Step 6: The new contact group is now displayed in the contact folder you previously selected. If you would like to edit your distribution list in Outlook later, simply select the list and click on the Edit Contact button.
Want to add contact information from other applications to your Outlook address book? You can find clear step-by-step instructions in our article on importing Outlook contacts.
How to create distribution lists in Outlook on the web
You also have the option of creating Outlook contact groups in the web-based version of Outlook, which is available as part of Microsoft 365:
- Log in to Outlook via your browser.
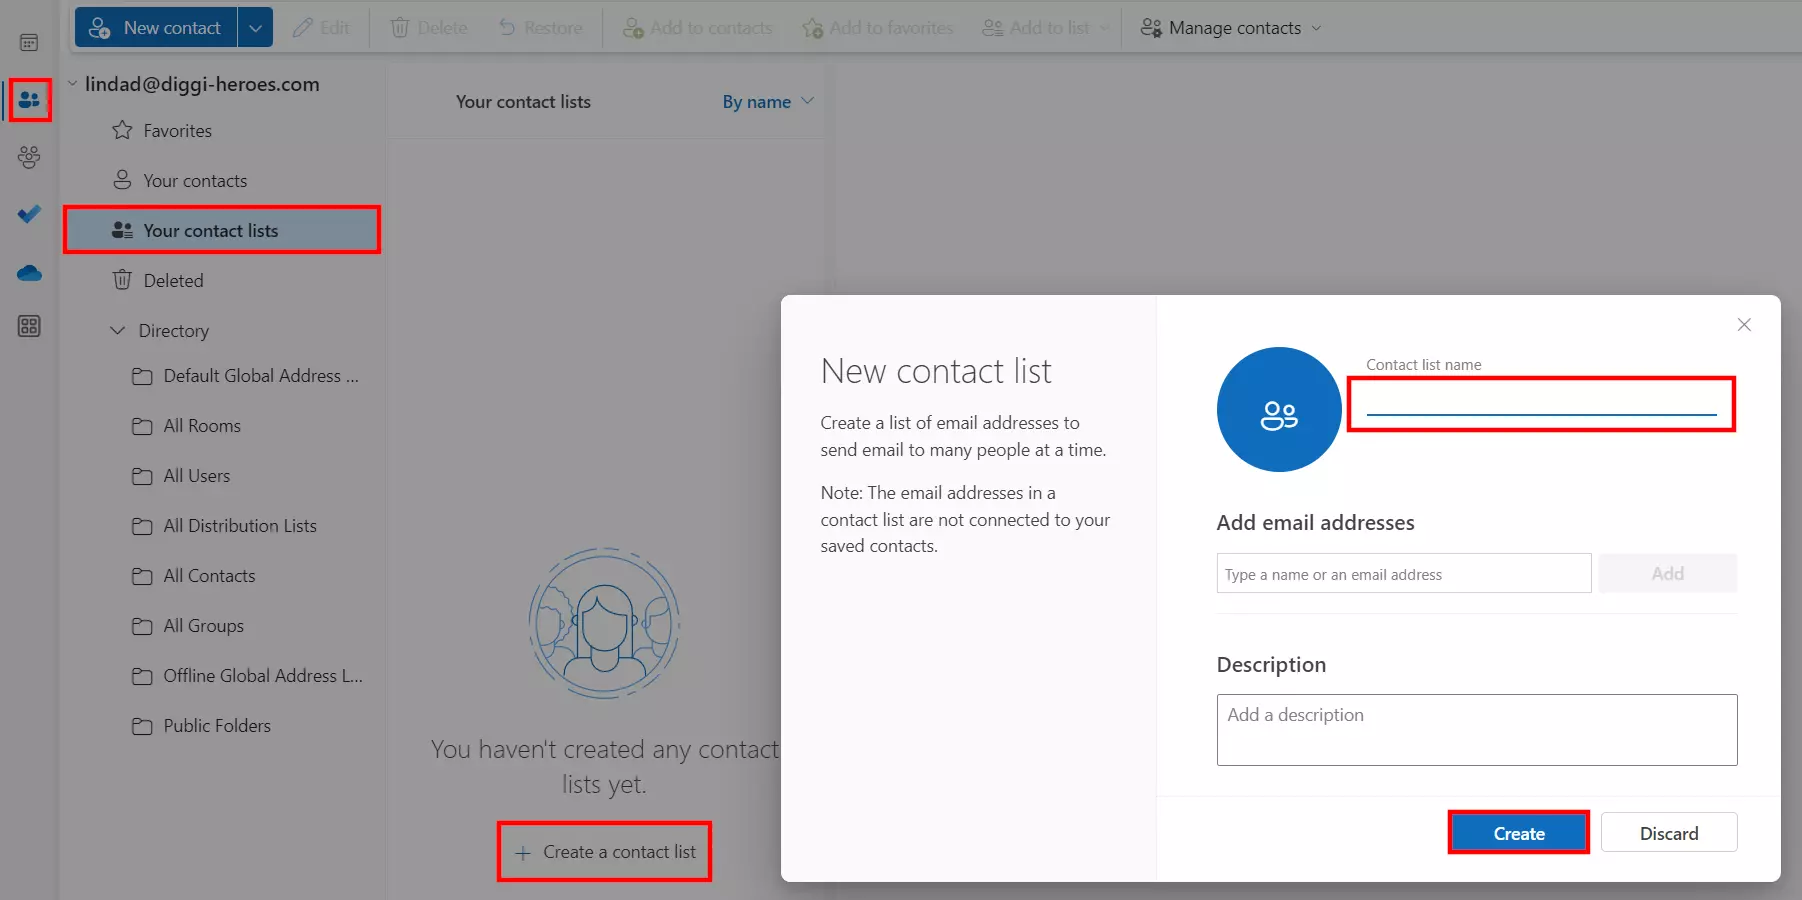
- Click on the People icon in the left-side menu.
- Click on Your contact lists and then Create a contact list.
- Enter a name for your Outlook distribution list and add the desired contacts.
- Finally, click on Create to create the Outlook distribution list.
Enjoy the benefits of Outlook and Outlook on the web in your company by getting Microsoft 365 Business from IONOS. Benefit from generous OneDrive online storage and security features such as virus protection and spam filtering.

