How to activate and deactivate Outlook AutoCorrect
Outlook’s AutoCorrect is a helpful tool that automatically corrects typos. Sometimes, however, it can be counterproductive, and you may want to turn it off. We show you how to activate and deactivate Outlook AutoCorrect and modify its options to suit your needs.
The following instructions apply to Outlook 2021, 2019 and 2016 as well as to the Outlook version currently included in Microsoft 365. Some steps or terms may differ slightly for older versions.
How to activate Outlook AutoCorrect quick guide
- Navigate to the AutoCorrect settings under File > Options > Email > Spelling and Autocorrect > AutoCorrect Options….
- Here you can either deactivate or activate Outlook AutoCorrect options as well as create new rules and exceptions.
How to use AutoCorrect and AutoFormat
Outlook’s automatic correction options AutoCorrect and AutoFormat have two main functions. AutoCorrect adjusts misspelled words and typos (e.g., replacing “woring” with “working”). With Outlook AutoCorrect, you can also convert character strings to symbols and special characters, for example (c) to © or (r) to ®. The autocorrection function also makes it even easier to use smileys and emojis in Outlook emails.
AutoFormat, on the other hand, automatically adds text formatting. When you enter the URL of a website, for example, the function will add a hyperlink automatically. If you start a list with “1.”, the list will be continued with “2.” when you press Enter.
Send emails safely and view your colleagues’ calendars anytime and from anywhere with Microsoft Exchange from IONOS.
How to deactivate Outlook AutoCorrect and why you might need to
Outlook AutoCorrect isn’t always helpful or desirable. For example, when you use abbreviations that end with a period, AutoCorrect will start the next letter with a capital, which isn’t what you want. You may also find the automatic addition of hyperlinks to website addresses to be irritating.
AutoCorrect can also be a nuisance when writing in a different language because the function automatically converts a foreign language into English. Often, you may not even be aware that AutoCorrect has corrected the text in an email. This can be embarrassing because it’s often difficult to retrieve sent Outlook emails.
The good news is that Outlook AutoCorrect can be disabled at any time or customized to suit your needs.
You don’t need to worry about email typos after you’ve turned off AutoCorrect. Outlook’s spellcheck scans your texts for errors while you write them and when you’re done.
How to enable, disable and customize Outlook AutoCorrect on Windows devices
Outlook AutoCorrect options in Windows are extensive and are fully customizable. You can even add new rules to AutoCorrect. Follow our step-by-step instructions to enable and disable Outlook AutoCorrect in Windows and adjust individual settings.
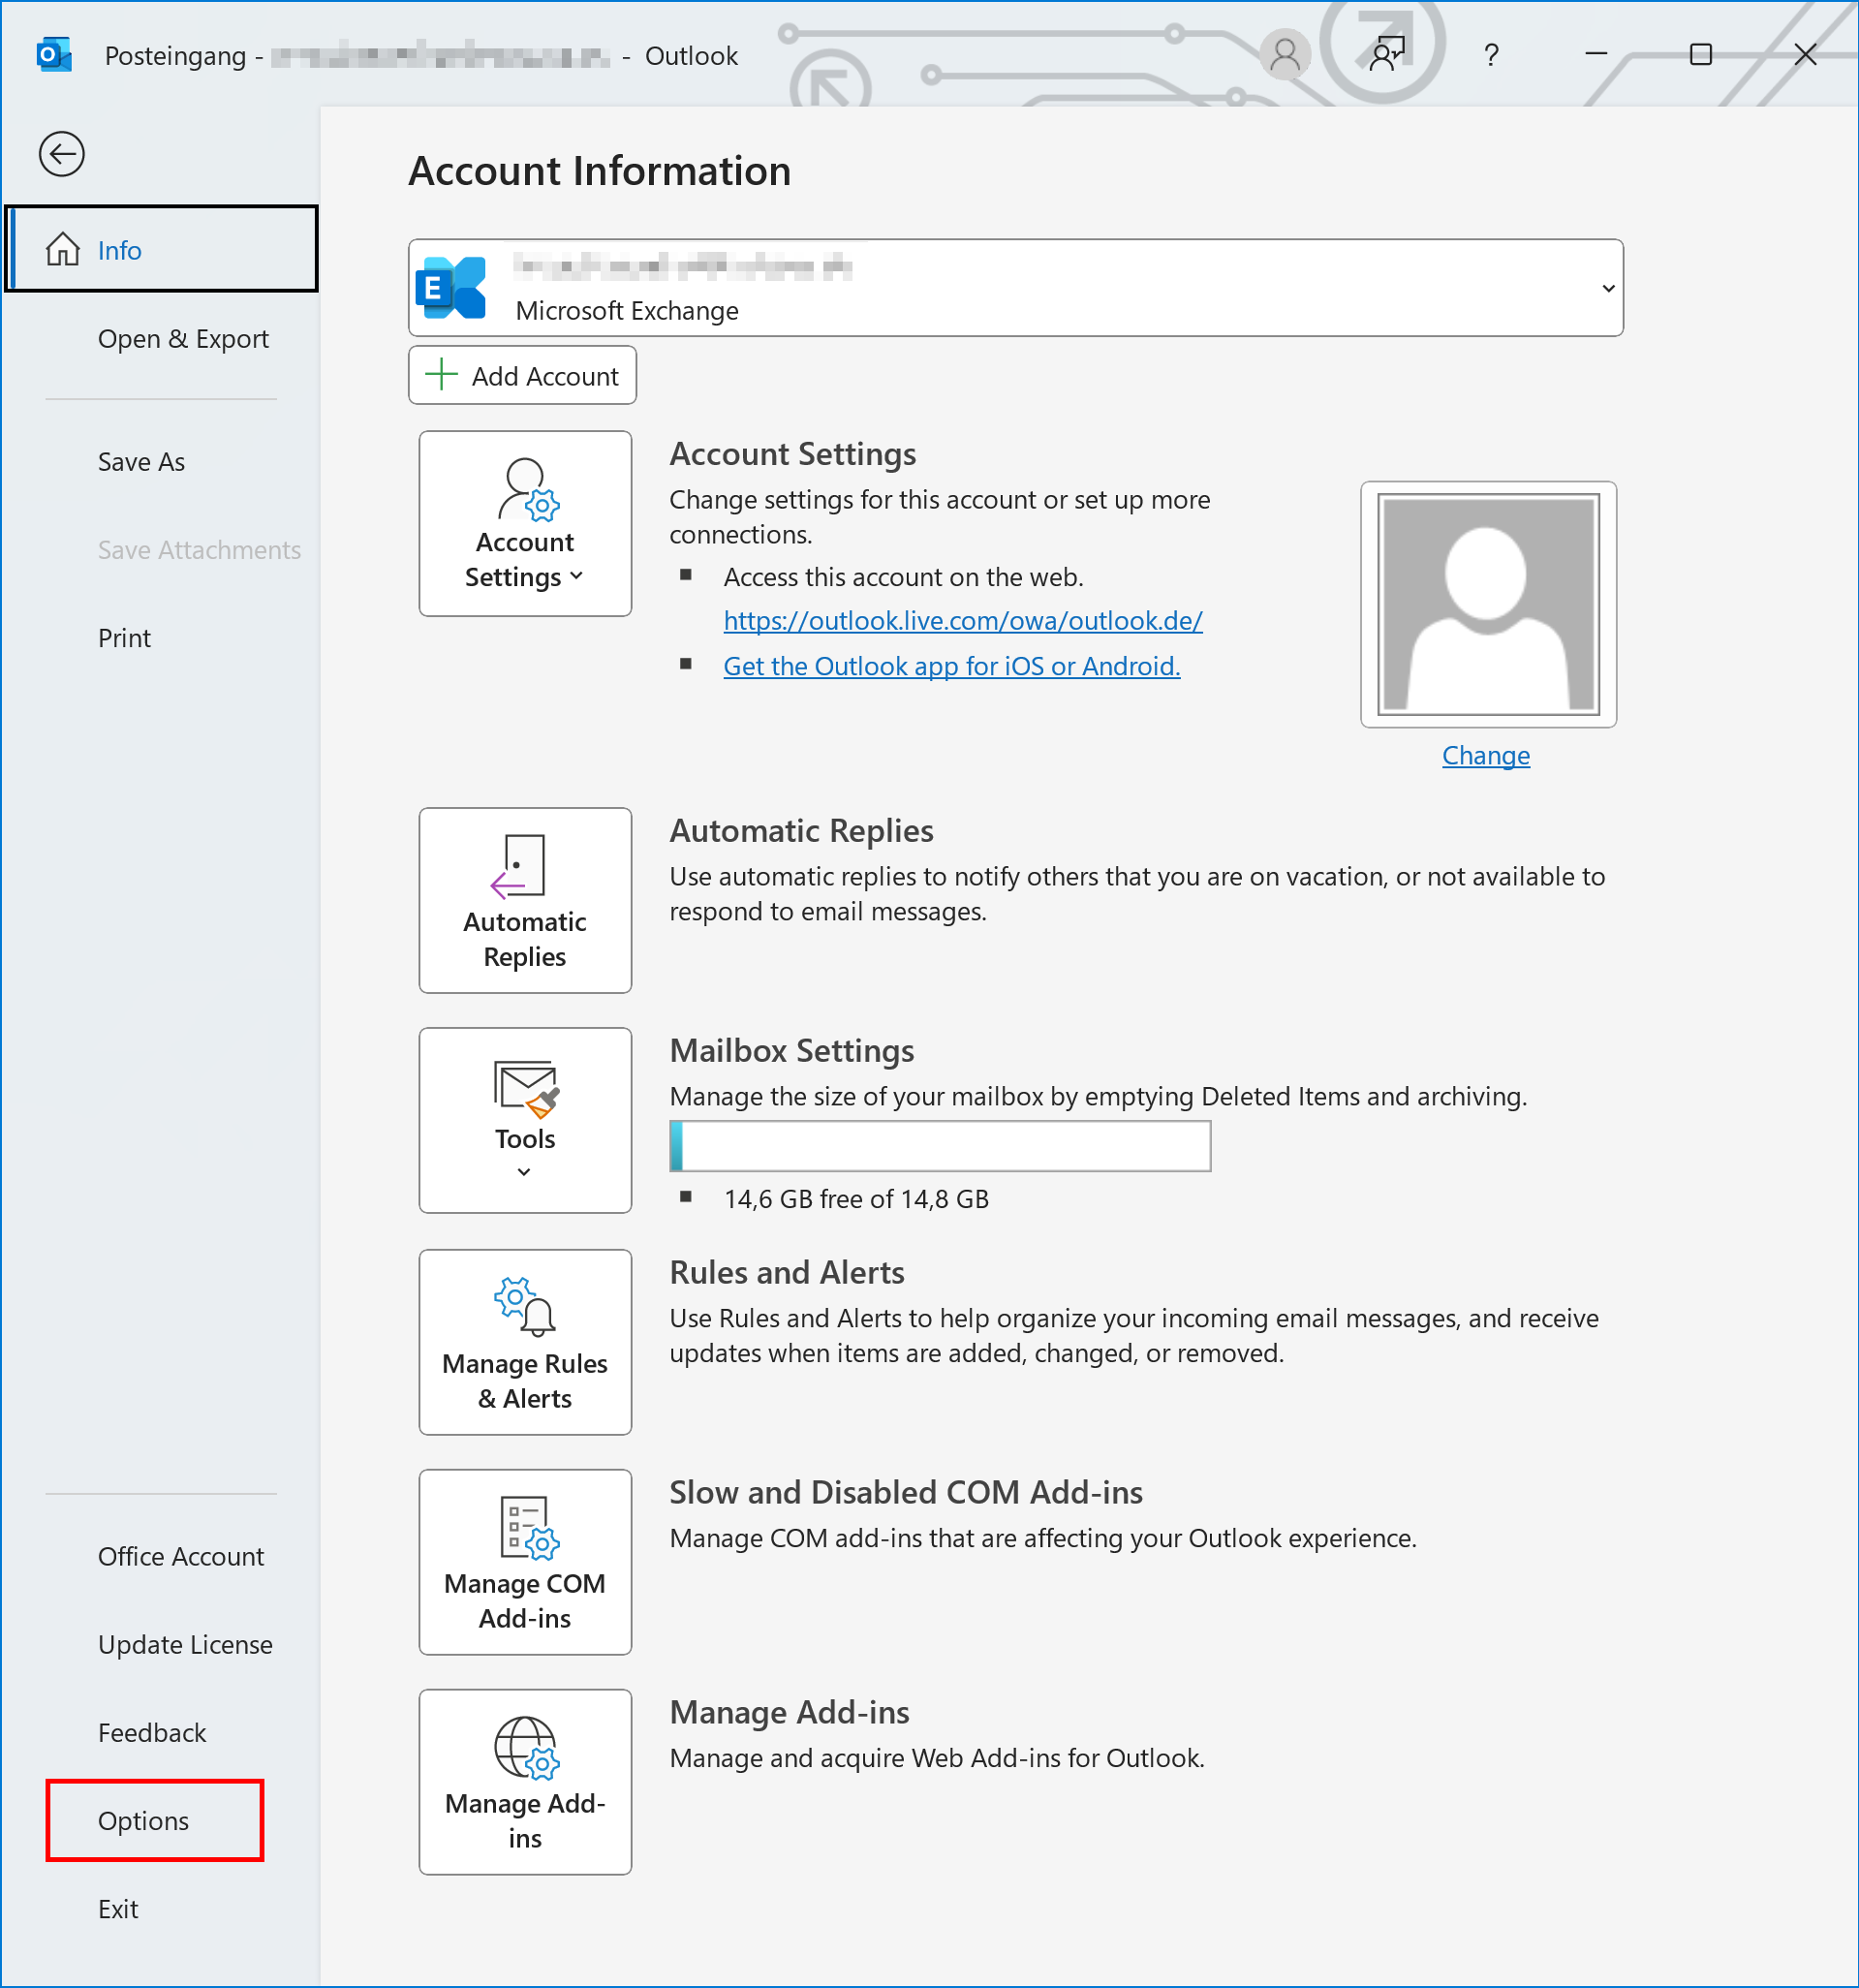
Step 1: Click File in the Outlook menu bar to launch the Info menu, which contains general information and options.
Step 2: Select Options from the Account Information window.
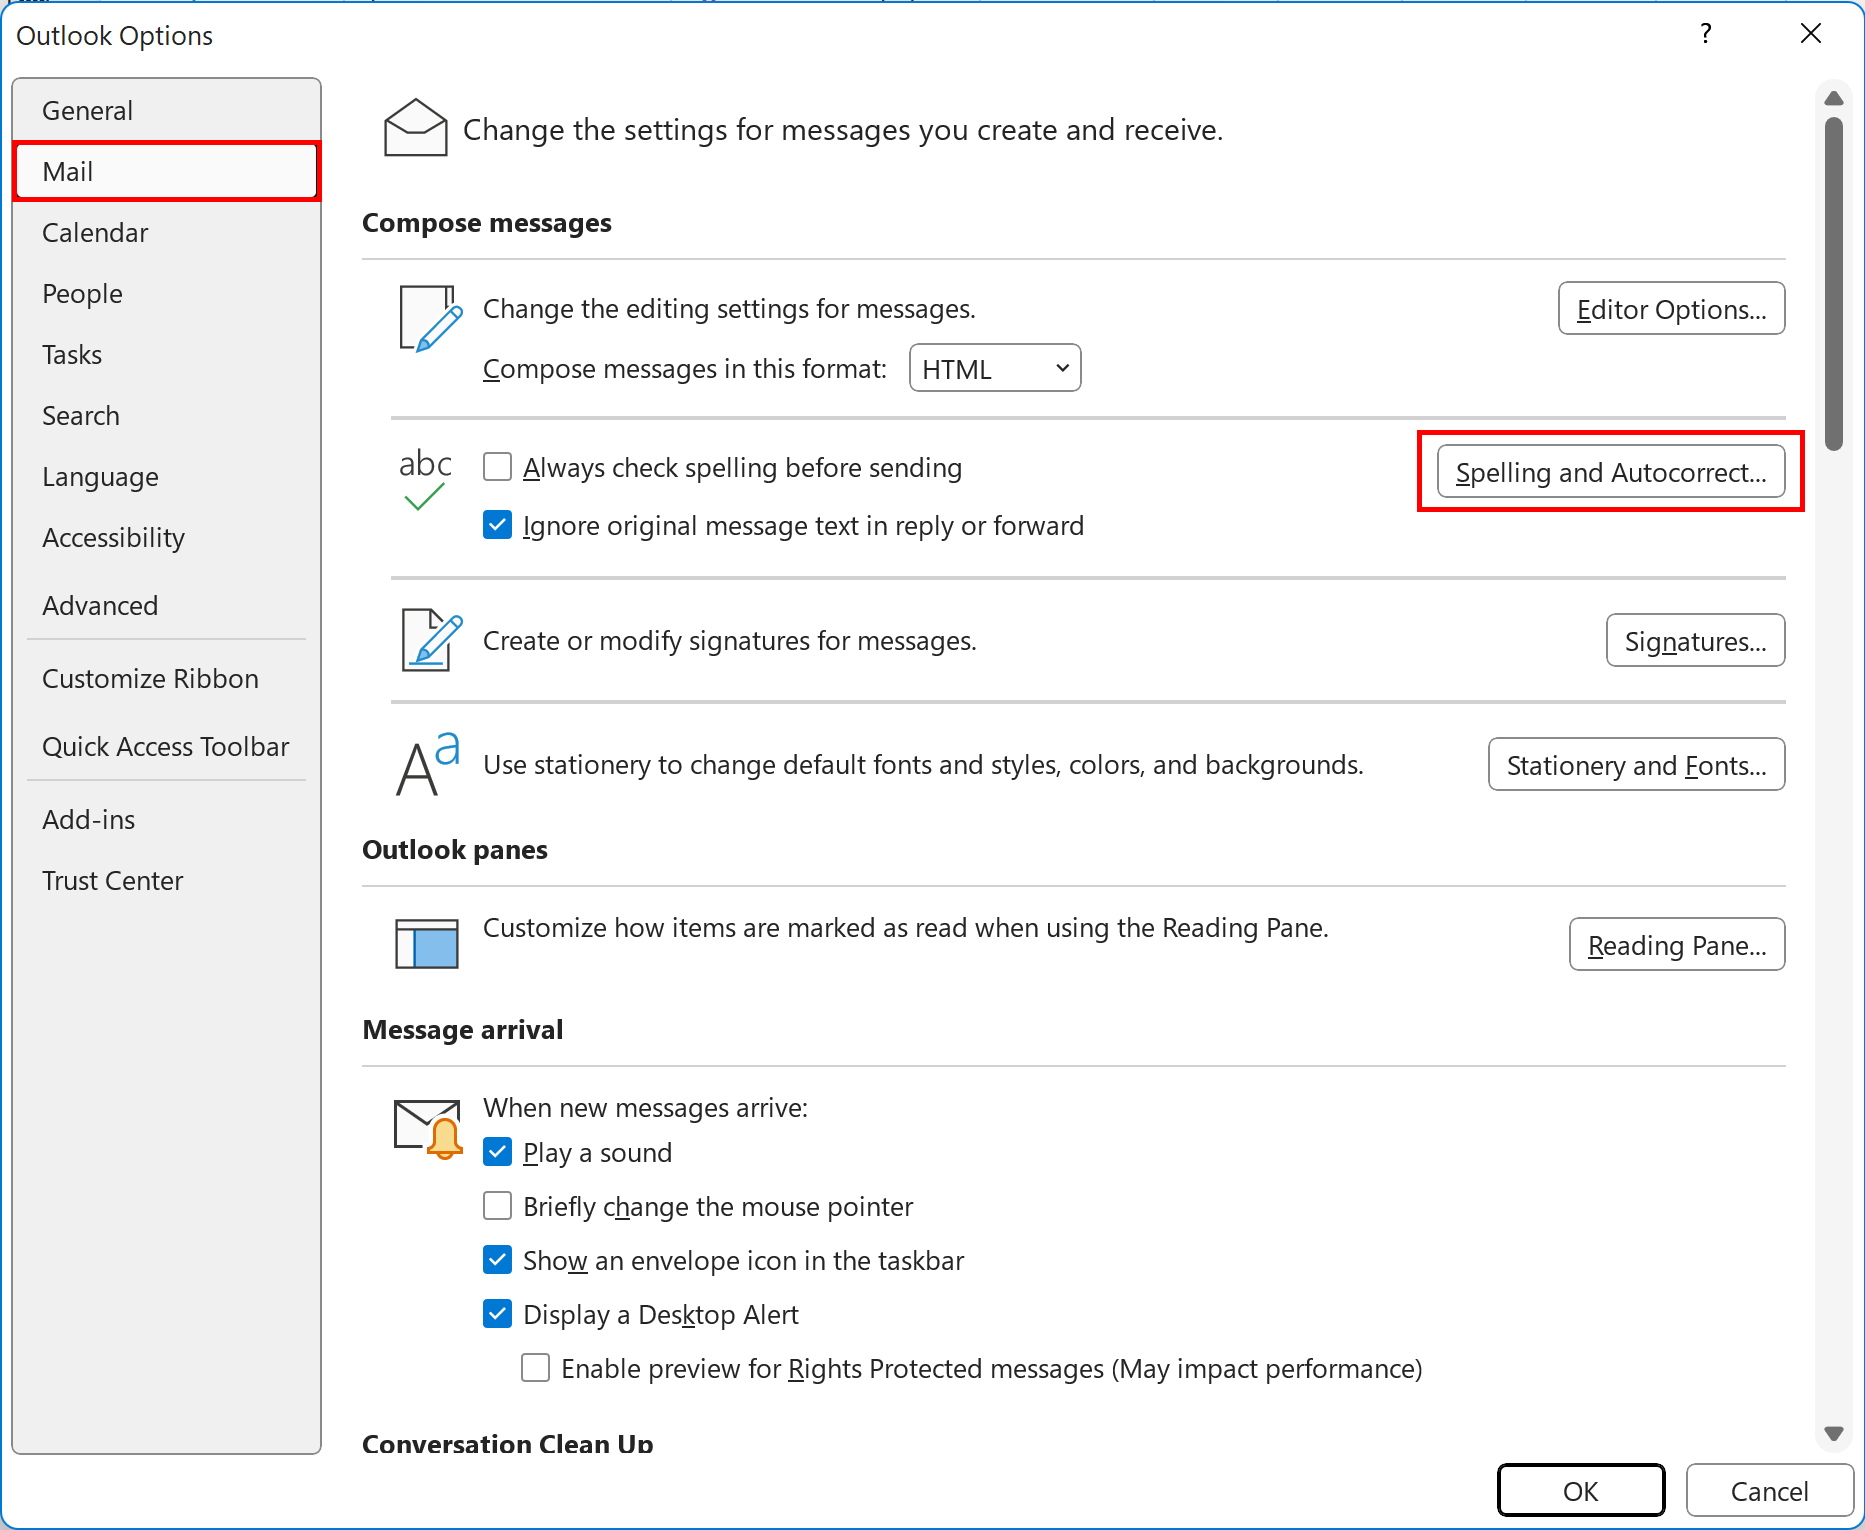
Step 3: In Options, switch to the Mail section and select Spelling and Autocorrect….
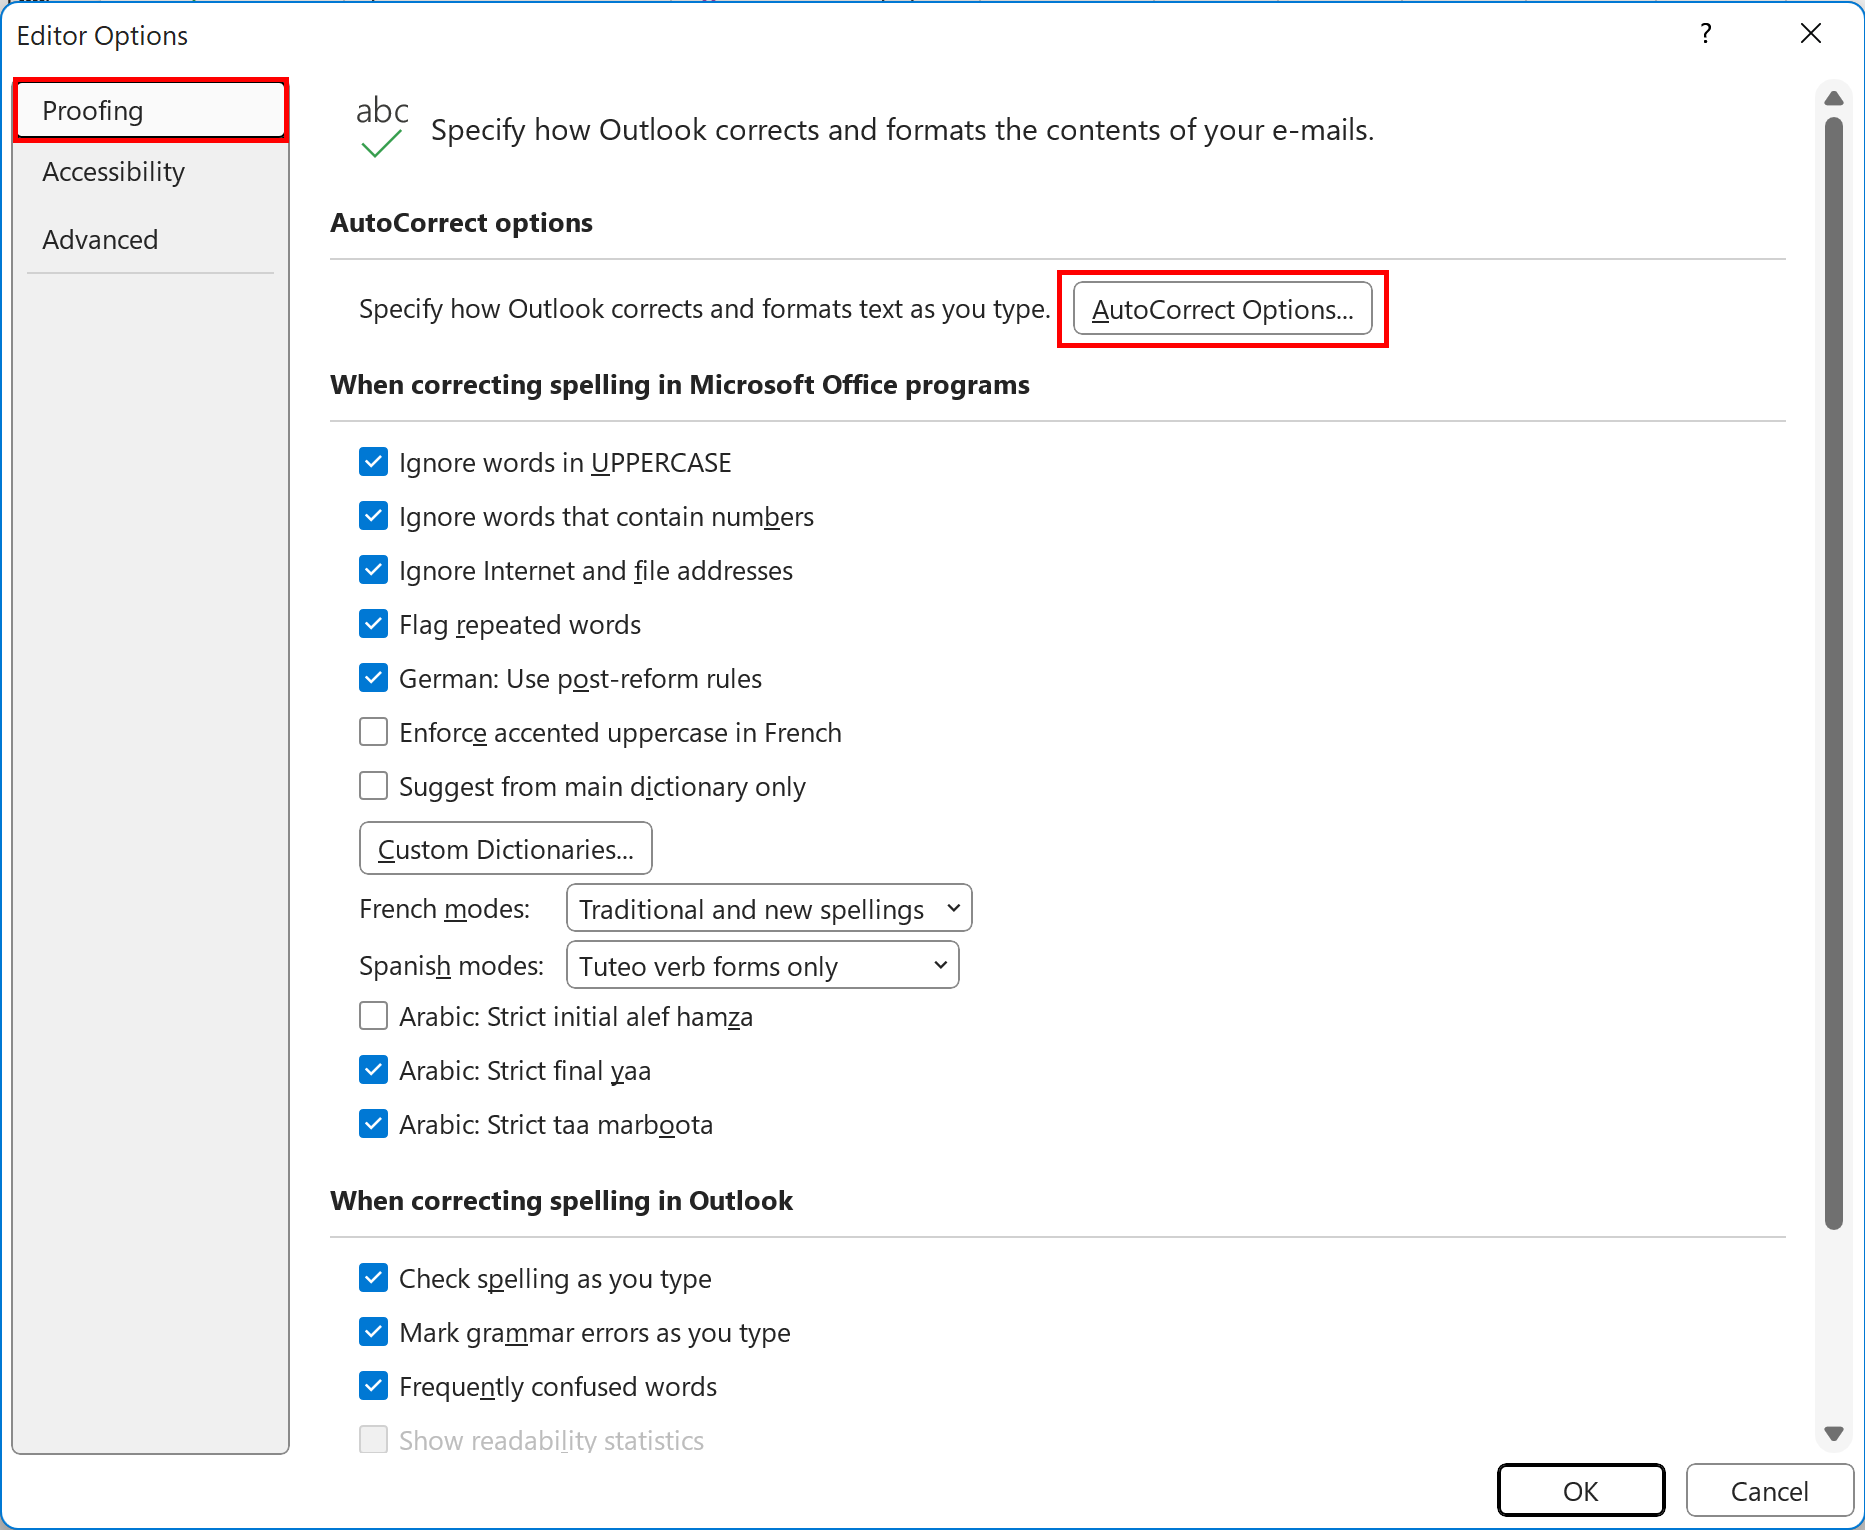
Step 4: If it doesn’t automatically launch, select Proofing from the Editor Options and click AutoCorrect Options….
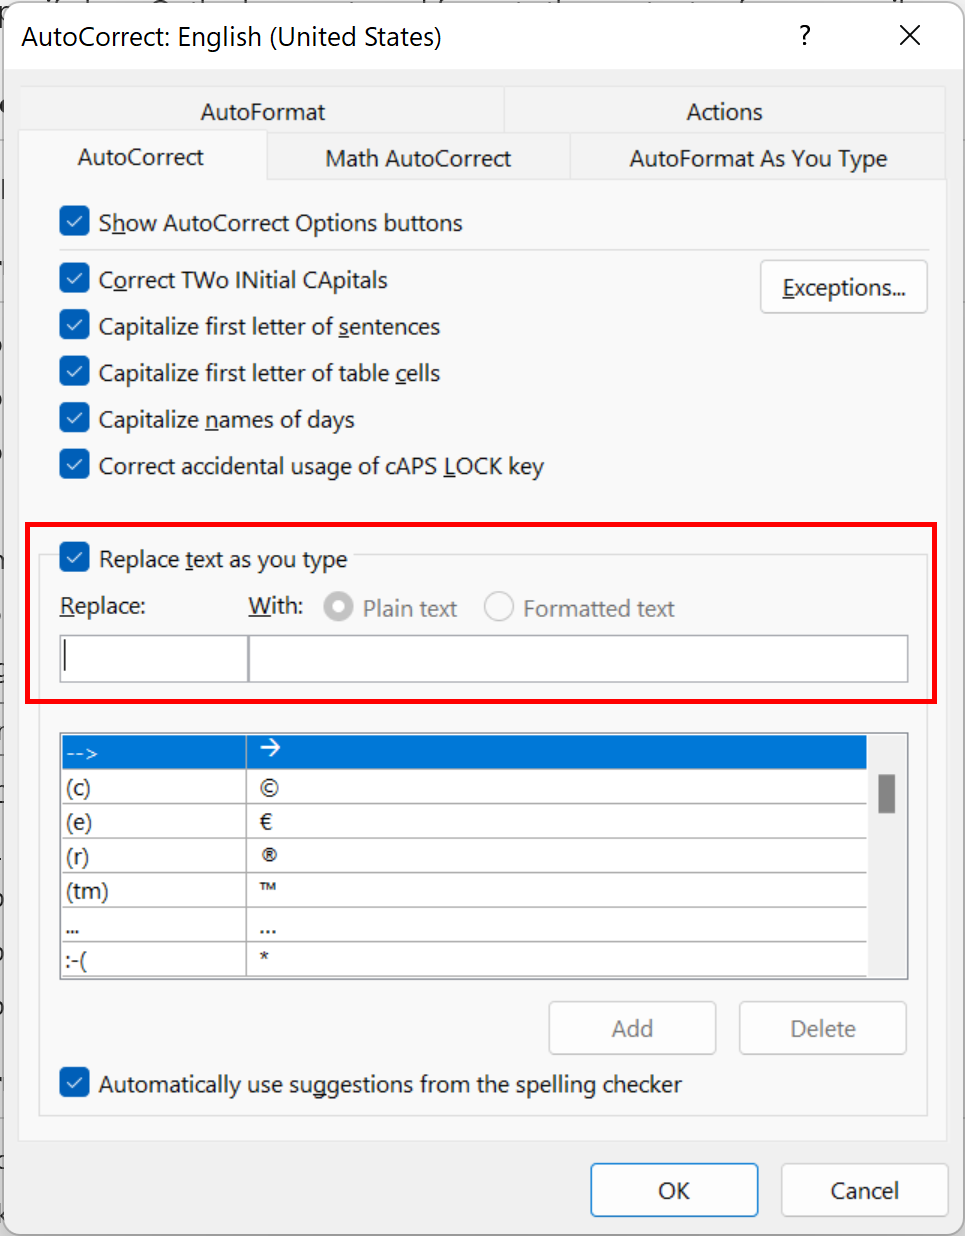
Step 5: Outlook AutoCorrect options will now launch in a new window. Here, you can activate or deactivate options by checking the box or removing the checkmark.
Below the AutoCorrect tab you can, for example, adjust whether you want to start new sentences or table cells using uppercase letters. A list of strings and misspellings of common words that Outlook has autocorrected can be viewed in this section. You can add words and common misspellings to the list. To do this, simply add your own entries in the Replace and With section.
Powerful Exchange email and the latest versions of your favorite Office apps on any device — get started with our free setup assistance.
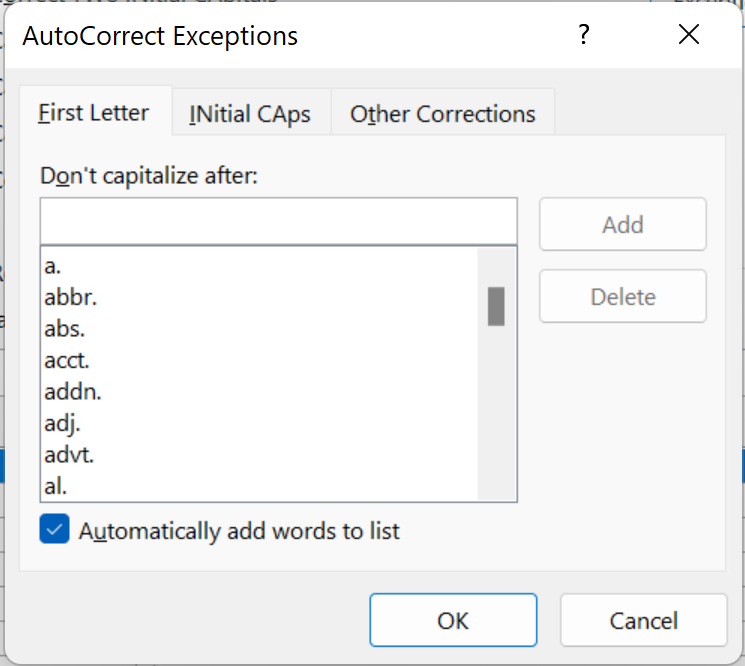
Step 6: If you click on Exceptions in AutoCorrect, you can define individual rules for what you would like exempted from automatic corrections. Here, you’ll also find a long list of abbreviations that are not capitalized, and which can be changed as needed. Since Microsoft Outlook uses the Microsoft Word settings and dictionaries, the Outlook options are similar to those that are available in AutoCorrect and spell check in Word.
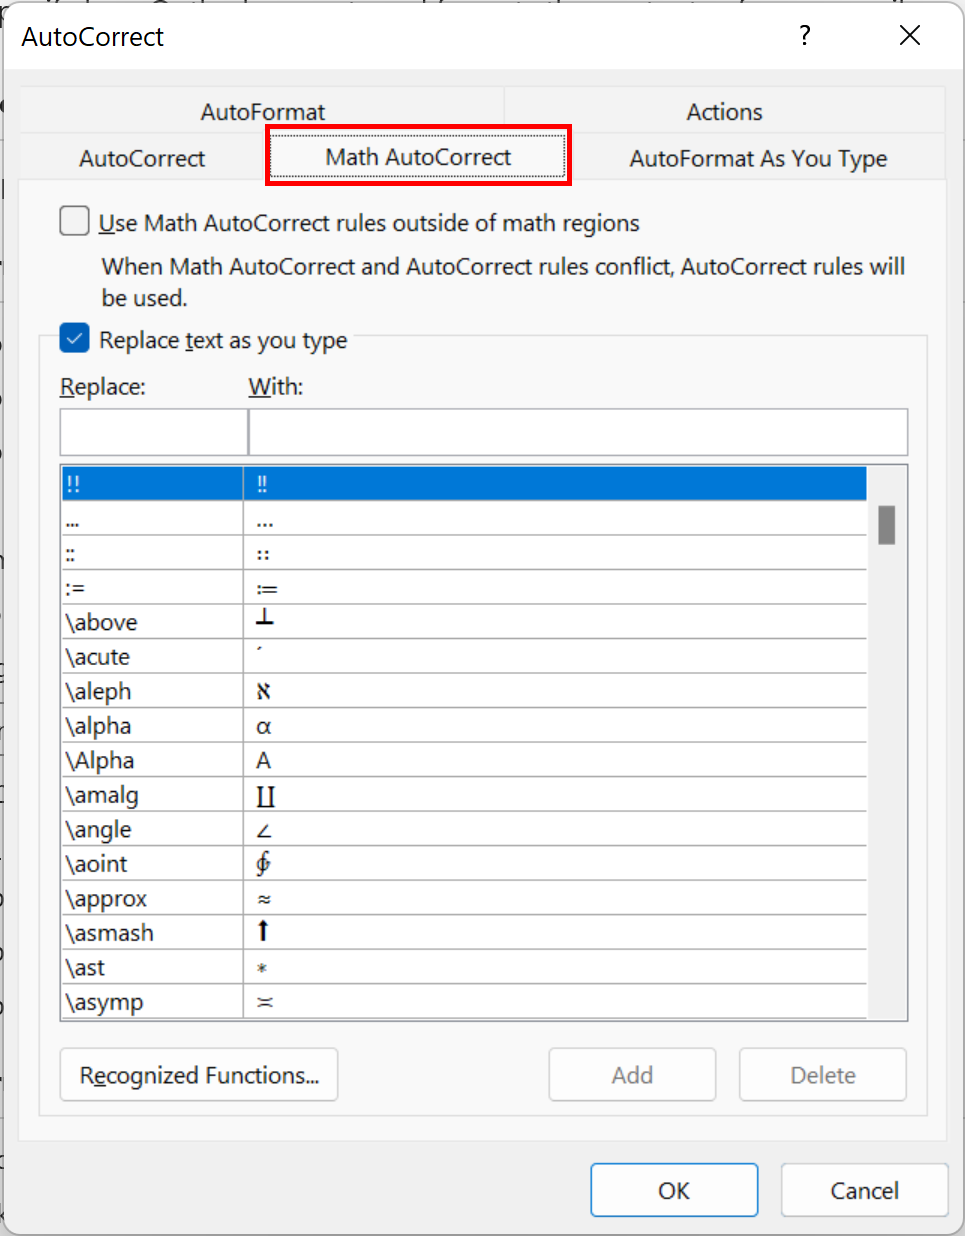
Step 7: Tend to use a lot of mathematical formulas in your emails? You can adjust the Math AutoCorrect tab options, which include a long list of character combinations and arithmetic symbols that can be activated for AutoCorrect.
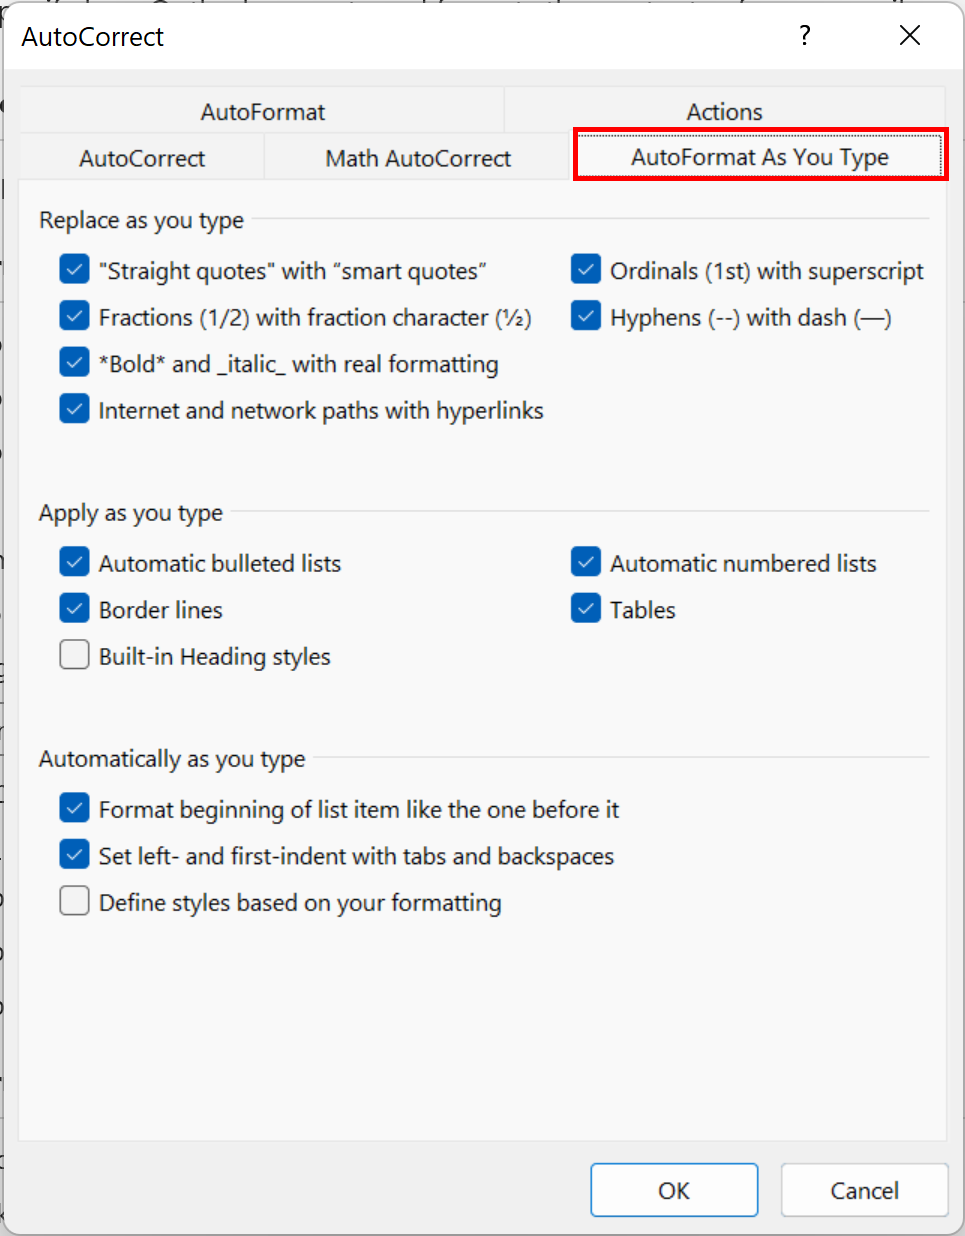
Step 8: Enable and disable options for auto-formatting from the AutoFormat As You Type and AutoFormat tabs. You can, for example, enable certain options for the creation of fractions and hyperlinks, the insertion of auto-bullets and numbering and the formatting of quotation marks.
Always use the latest version of the popular Microsoft Office programs and benefit from external storage and up to five device installations per users with IONOS’ Microsoft 365 plan.
How to enable, disable and customize Outlook AutoCorrect on macOS devices
Outlook AutoCorrect on macOS devices can be toggled on or off and customized in a few simple steps. Find out how you can customize Outlook AutoCorrect below.
Step 1: Click on Outlook in the Outlook menu bar and select Preferences…. Alternatively, you can navigate to the settings using the key combination [Command] + [,].
Step 2: Click on AutoCorrect in the Personal Settings section.
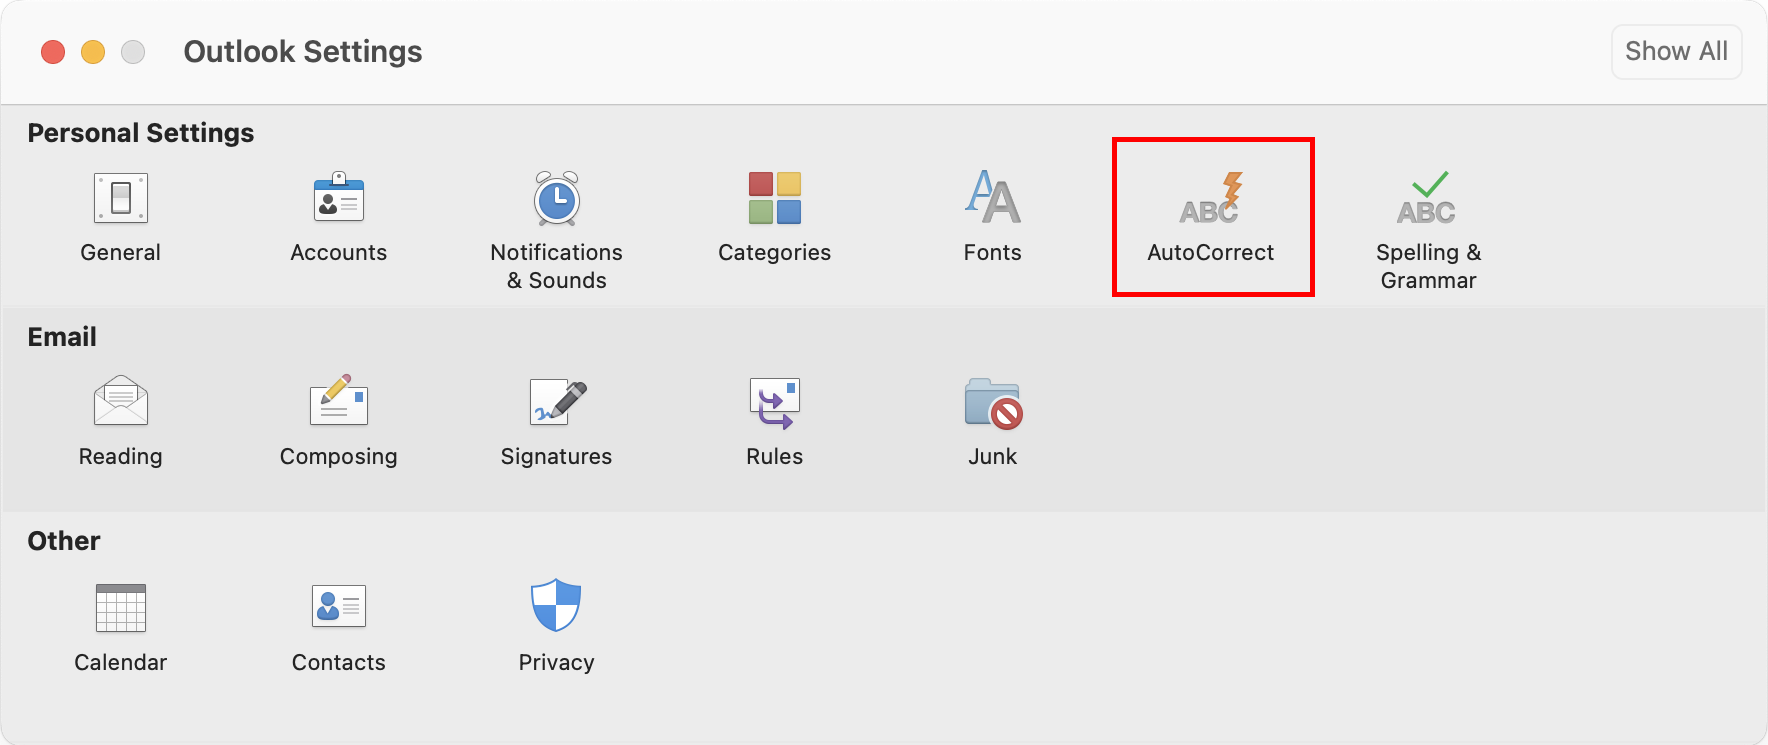
Step 3: You now have three options: AutoCorrect, AutoFormat and Text Completion. With AutoCorrect, you can specify whether Outlook should automatically correct typos and errors of symbol entries such as capitalization of letters following a period. You can add commands to the Outlook AutoCorrect list by clicking the plus sign (+) and making a new entry.
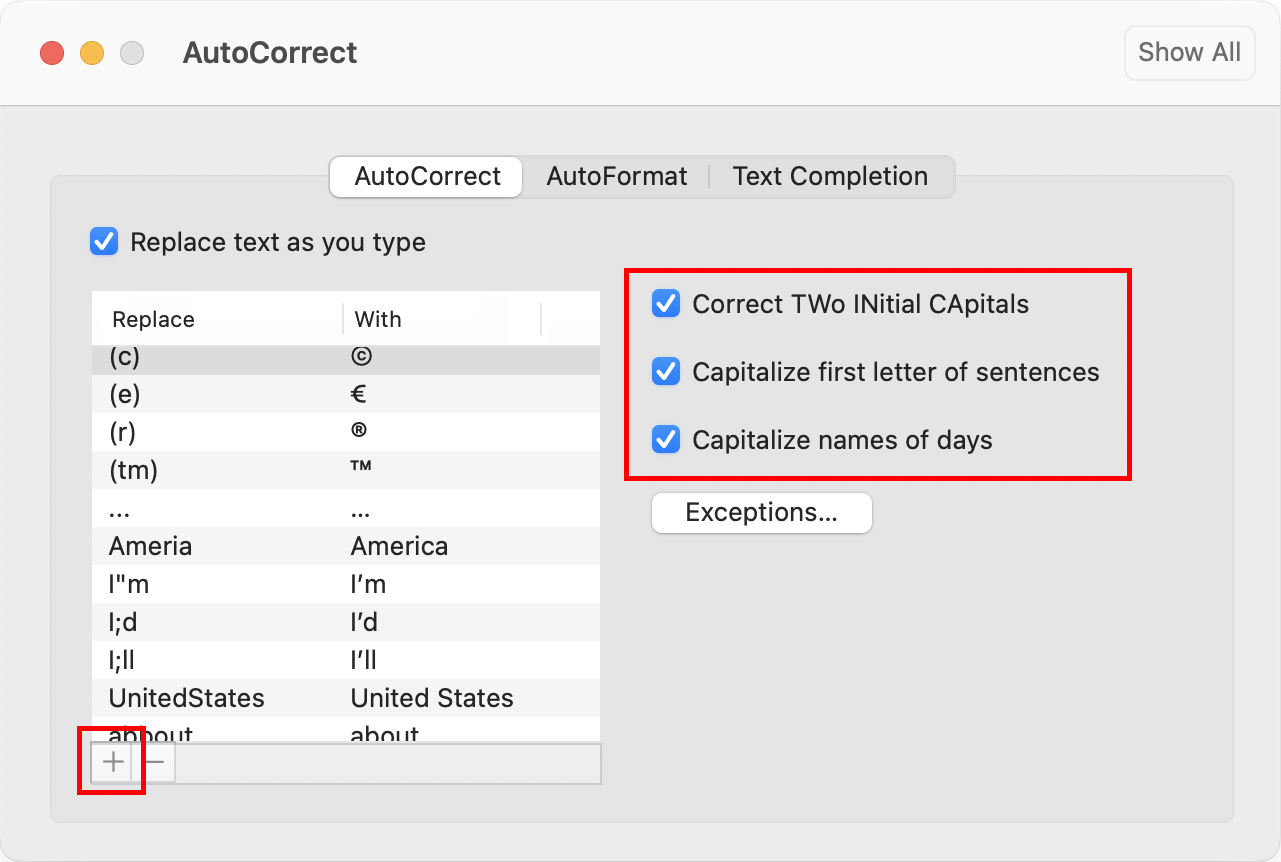
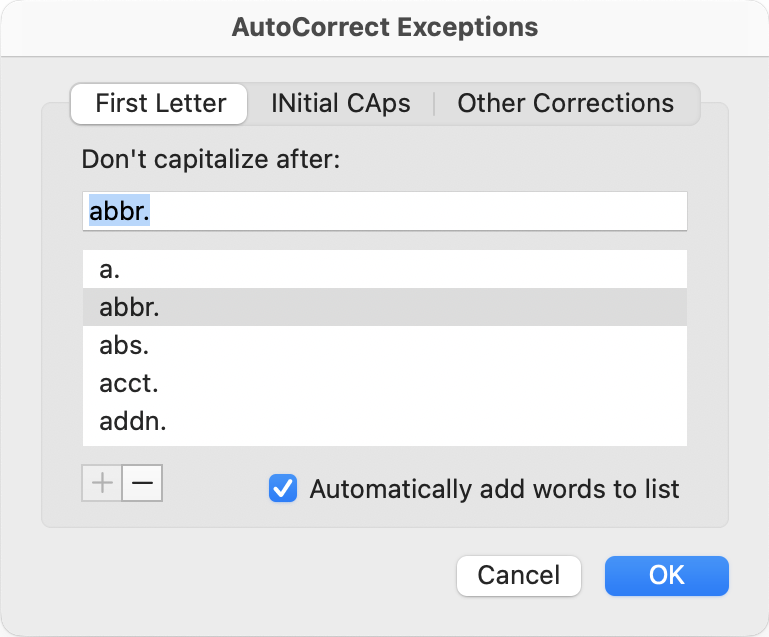
Step 4: Select Exceptions … to view which abbreviations should not be followed by automatic capitalization. Add further exceptions as required.
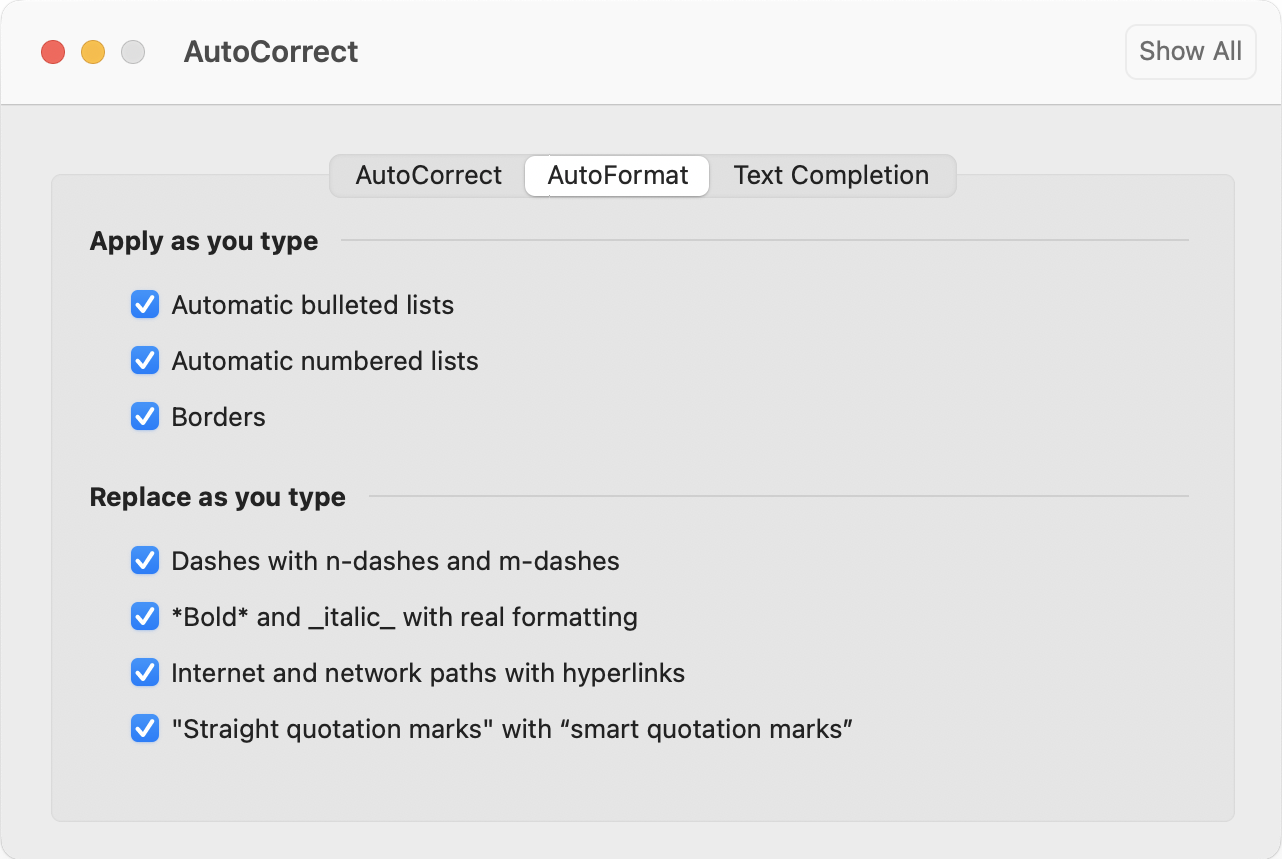
Step 5: When you click on AutoFormat, you can view automatic formatting options that can be customized in Outlook. For example, you can active and deactivate the options for adding automatic numbered lists, inserting hyperlinks and formatting quotation marks.
- Free Wildcard SSL for safer data transfers
- Free private registration for more privacy
- Free 2 GB email account

