Gmail out-of-office: here’s how to set it
Around 76% of the US adult population used the internet to send and receive emails in 2019. Even if it is assumed that a shocking 55% of all emails worldwide are classified as spam, a considerable proportion of serious communication still occurs via email.
The professional use of email created a demand for email etiquette. This is why an out-of-office message in Gmail is an important thing to know how to do: being absent without letting people know you’re away can be seen as rude and unprofessional. In the following, we explain how to activate and deactivate a Gmail out-of-office service. Take a look at our examples of perfectly worded out-of-office messages and save yourself the hassle of having to compose them yourself!
Gmail out-of-office: an overview
Setting up the out-of-office note in Gmail starts in the settings, with a few differences between the desktop browser and app versions.
In need of your own email address? Make use of IONOS’ offer for email accounts to complement your business.
Gmail out-of-office: quick guide for the browser version
- Open the Gmail site in your browser
- Sign in to your Google account
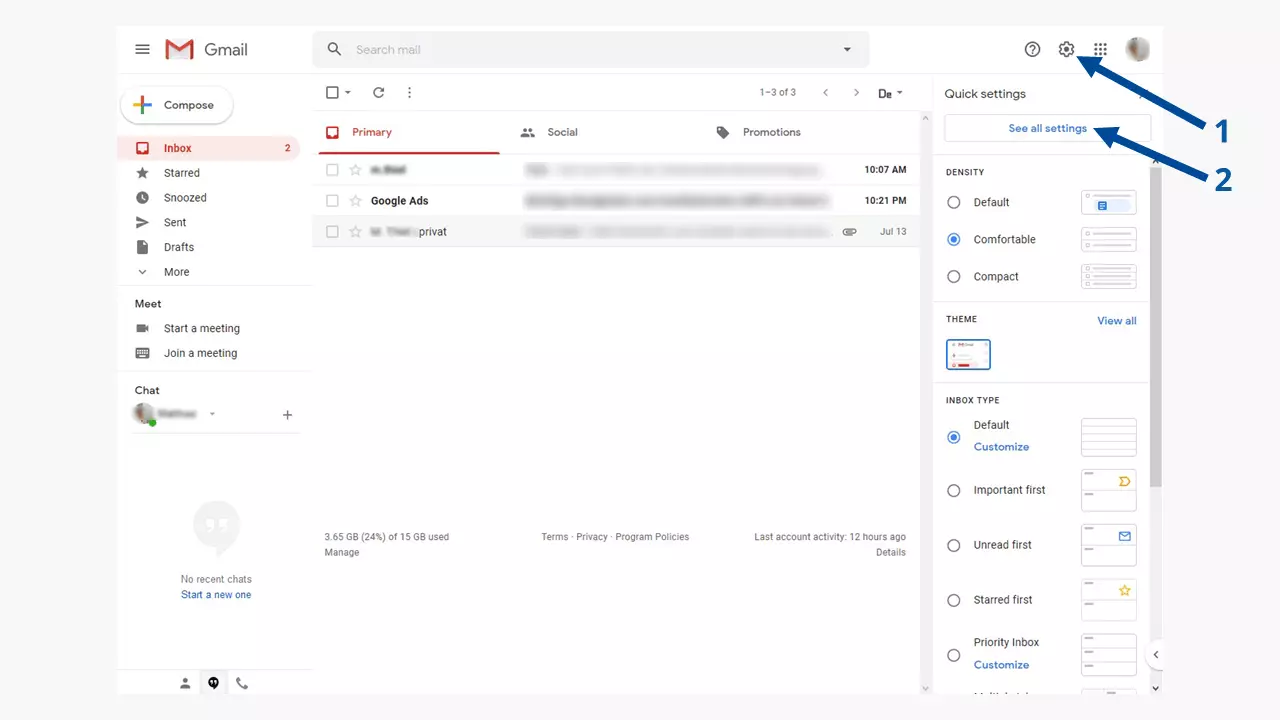
- Click on the gear-like icon in the upper-right corner
- Click the “See all settings” button at the top of the menu that appears
- Under the tab “General” you will find the “Out-of-office AutoReply” note at the bottom
- Write your message making sure you include when you’ll be back
- Click “Save changes” – you’re done!
Gmail out-of-office: quick guide for the app version
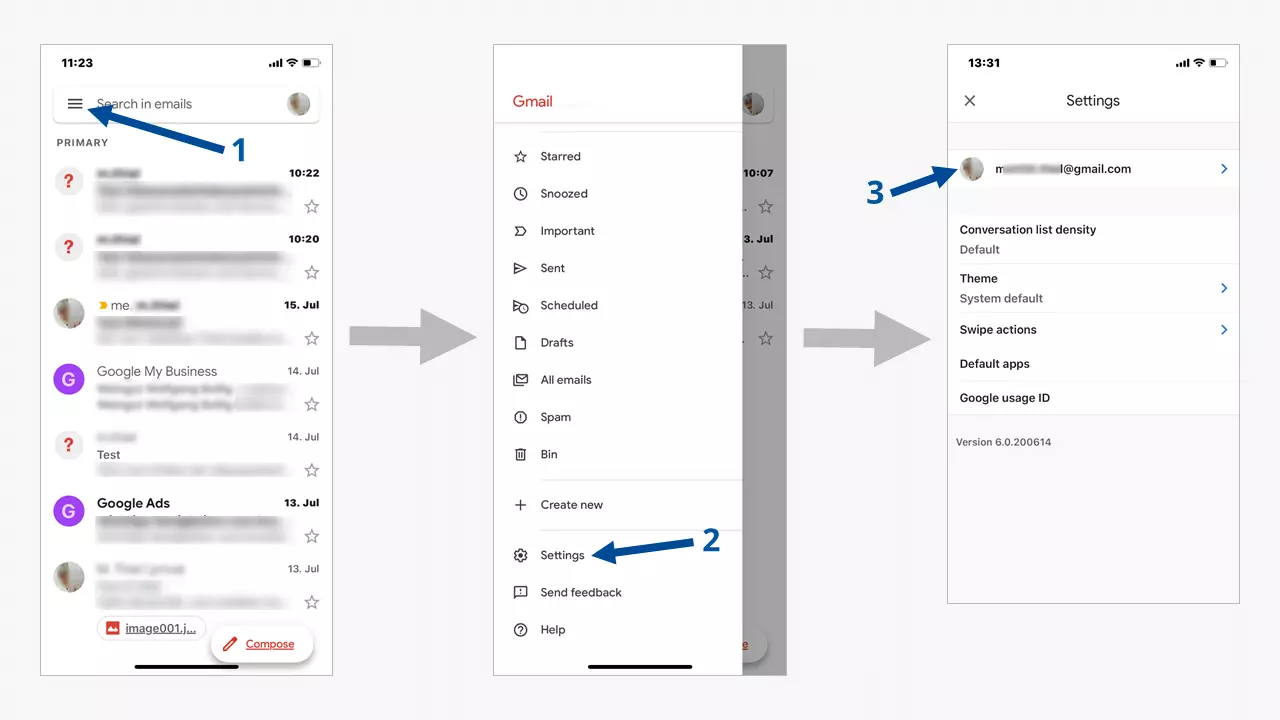
- In the Gmail app, tap the hamburger button (the three horizontal bars)
- Select “Settings”
- Select which Gmail address you want to set up the out-of-office for
- Under the menu option “General” you will find “out-of-office” options
- Activate it with the slide switch and add your out-of-office message
- Select “Save” – you’re done!
This method of setting an out-of-office message is only available for Gmail addresses (xyz@gmail.com) and Microsoft Exchange accounts. If you want to set up an out-of-office message with another provider, you’ll have to use another method. Check out our article on out-of-office messages with Thunderbird which has a useful guide for other providers, too!
How to set an out-of-office in Gmail – step by step
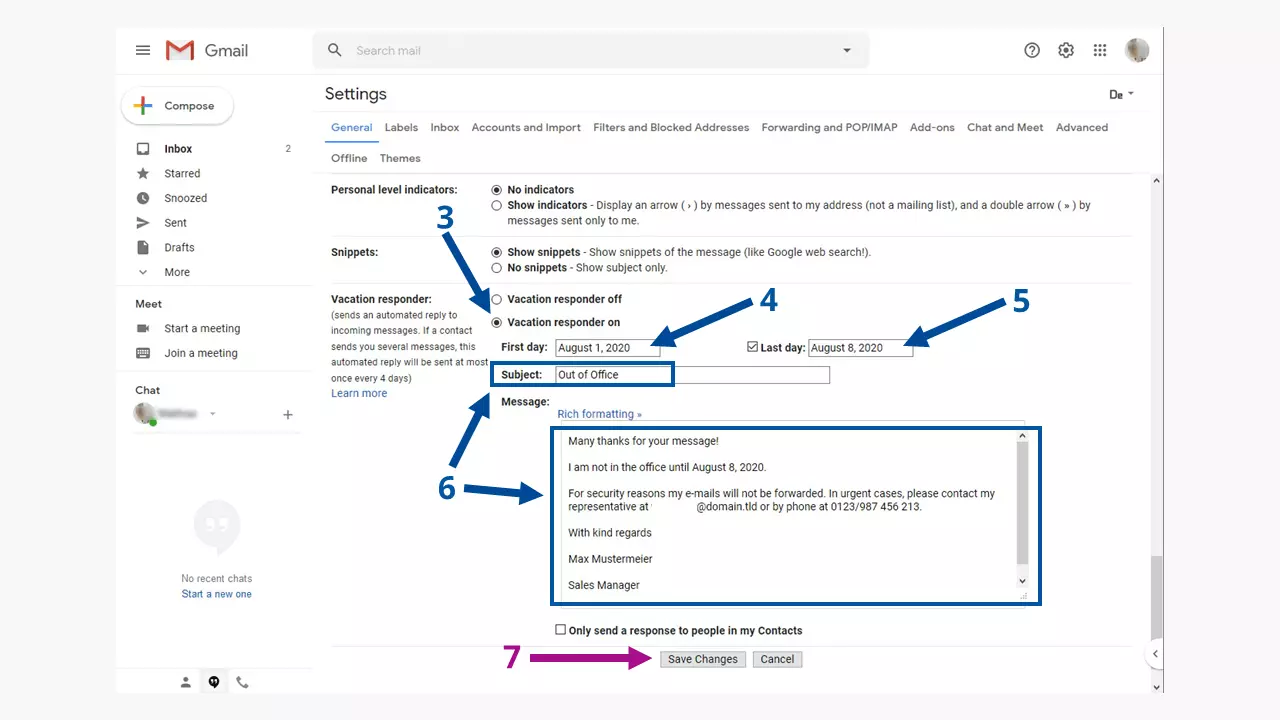
In the section “out-of-office AutoReply” there are two buttons (3) to activate and deactivate the notification. Your message can also be created in advance and then you can use “First Day” (4) to define from when your out-of-office message will be sent in Gmail. The choice of an end date (5) is optional. If this is activated, the sending of the out-of-office note in Gmail ends after the last day.
In the fields “Subject” and “Message” (6) you’ll have the chance to write a personalized message. If necessary, you can format the actual text using the tools in the bar above the text field and add images and links if required.
If you have to change your message frequently, save your composed message in a separate file to copy and paste it each time you need it.
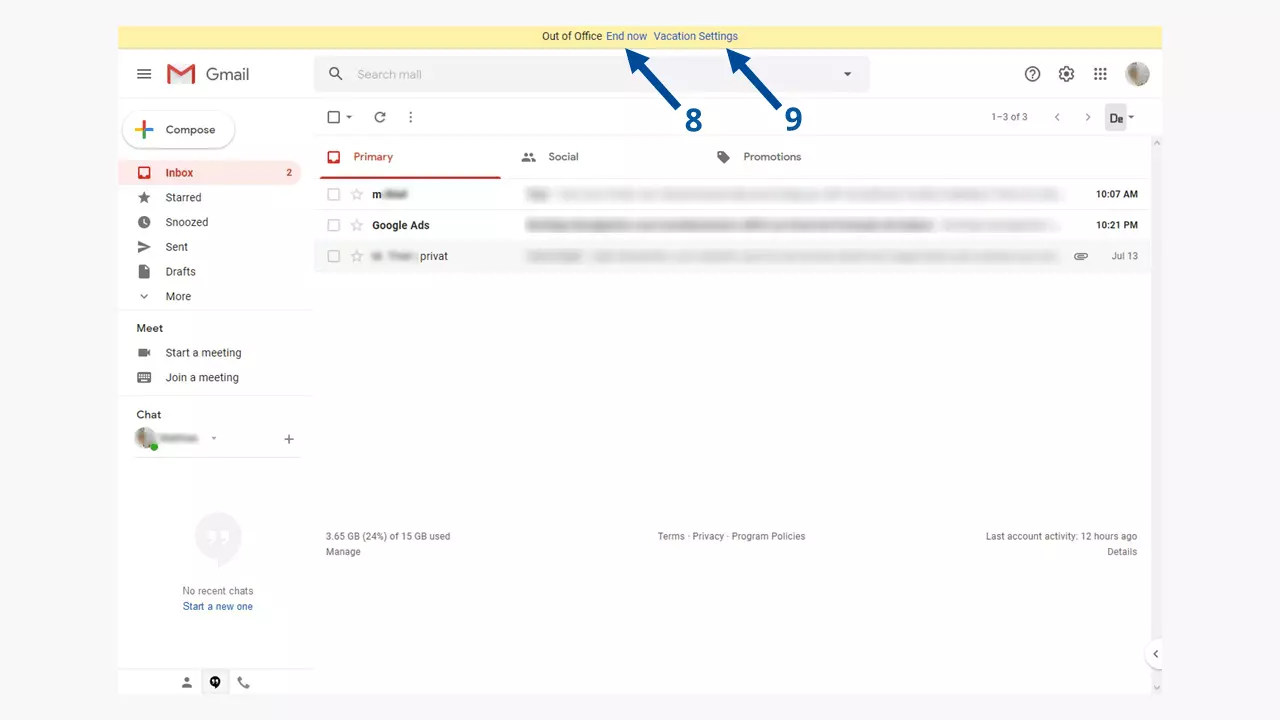
A highlighted, yellow banner at the top of the browser window indicates that the out-of-office note is active in Gmail. Using the two links there, you can immediately deactivate your message (8) or revise the message (9) without having to access the settings via the gear symbol.
Reach out in your name every time you hit send — includes domain, 2 GB+ storage, and more.
Gmail out-of-office in the app: step by step
Google's email client Gmail is available as an app for smartphones and tablets. You can also set up your out-of-office message under the settings here. On mobile devices, you’re usually always logged in – unlocking your device is considered enough security for logging in.
After entering the menu of the Gmail app, you will find the settings in the lower area (2). After that, the email address of the account you want to edit will be displayed (3). Tap the account you want to edit. After this, there are further setting options, starting with “Account.”
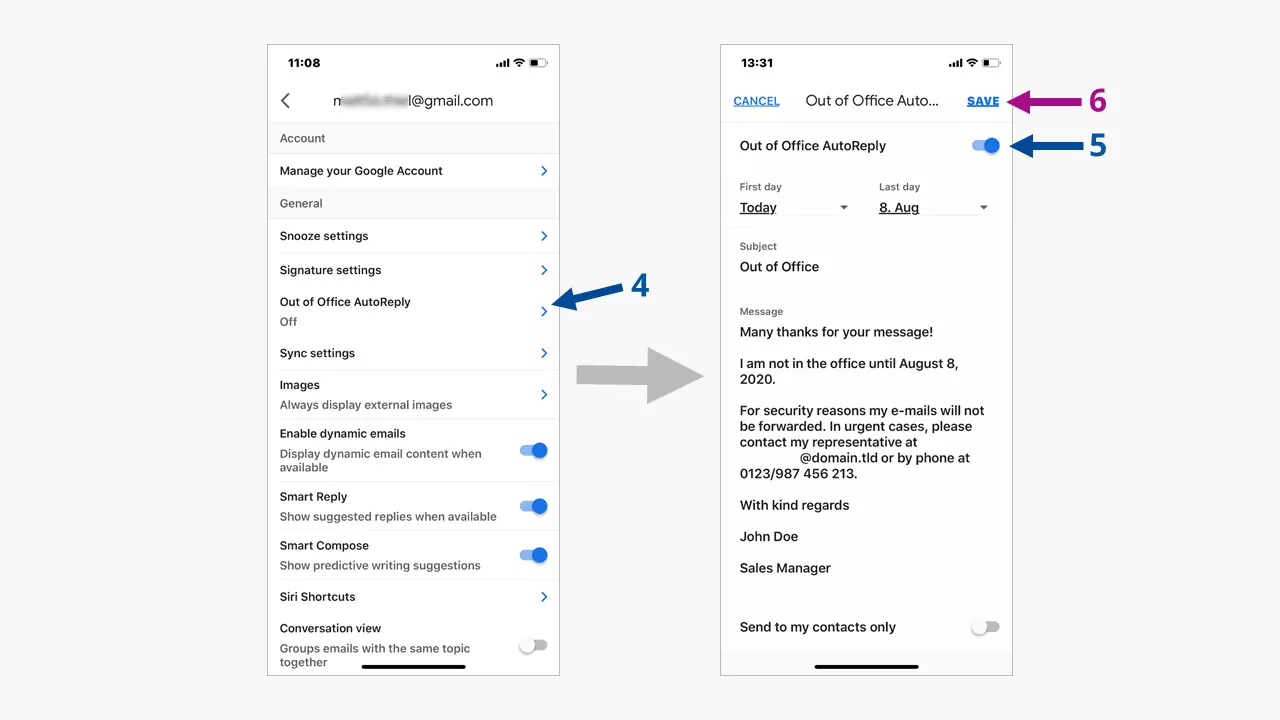
Just under account management, you will find “Out of Office AutoReply” under “General” with its status in light gray letters (4). Tap on this menu item and a new window with your current message (if any) will appear. This can be activated or deactivated with the slide switch (5). As in the browser version, you can also set the period for your out-of-office. Do not forget to save everything at the end (6).
Use a notes app on your mobile device to store the texts for various absence messages. This saves you from having to type them out again. If you have already saved a message on the desktop in your Google account, it will also appear in the app.


