How to export contacts from Outlook
Exporting contacts in Microsoft Outlook is crucial for safeguarding your address book and ensuring a seamless transition when upgrading to a new version. With just a few steps, you can export your Outlook contacts into a CSV file, making it easy to share with others or import into a newer version of Outlook.
- 2 GB+ storage
- Sync across all your devices
- Spam filter and ad-free
Exporting contacts from Outlook quick guide
- File > Open & Export > Import/Export
- Select Export to a file > Choose Comma Separated Values
- Select folder > Browse > Choose location > Enter file name > Finish
How to export contacts from Outlook step by step
The instructions below apply to the Outlook versions in Microsoft 365 as well as Outlook 2021, Outlook 2019 and Outlook 2016. Depending on your version and Outlook view settings, the user interface may vary. However, the process for exporting contacts from Outlook is generally the same.
Regardless of the version you use, you can export your Outlook contacts at any time without the need for additional tools. This feature is particularly helpful if you’ve relied on older editions, such as Outlook 2010, as it simplifies the transition to modern platforms like Outlook 365.
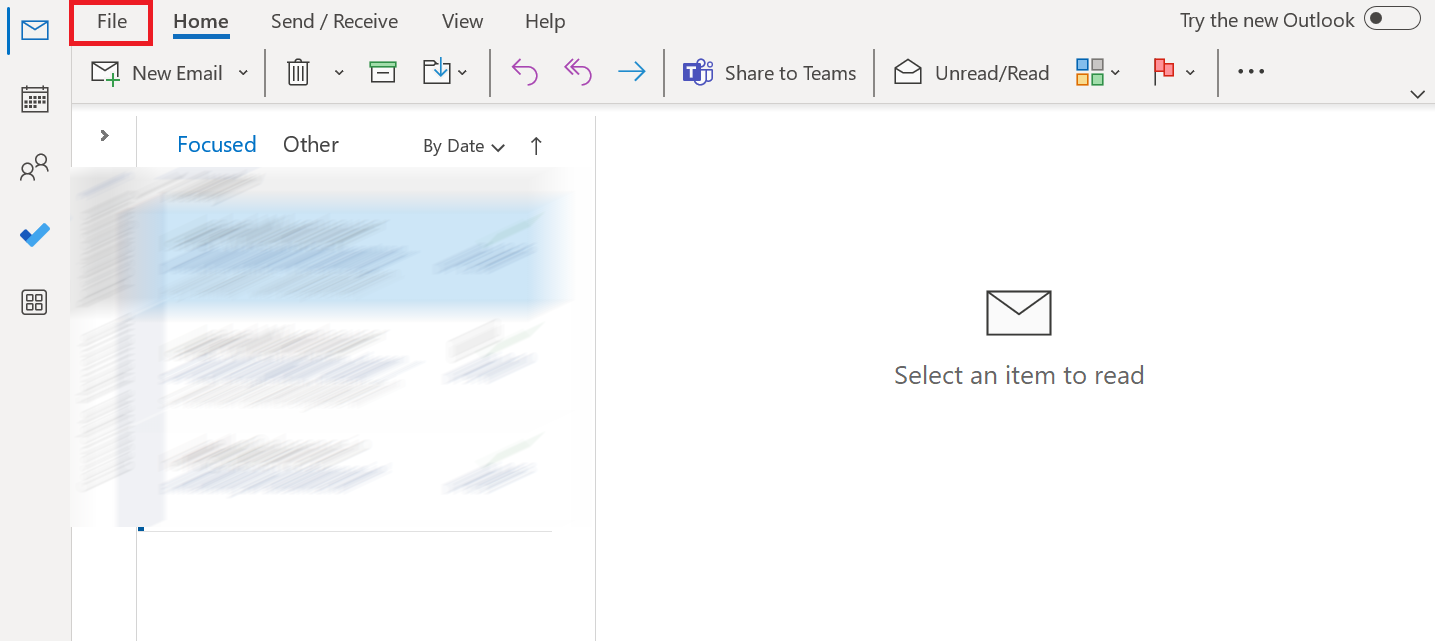
Step 1: As a user of Outlook 2013 onwards, you must first open the File tab. You’ll find this tab on the left in the upper menu bar.
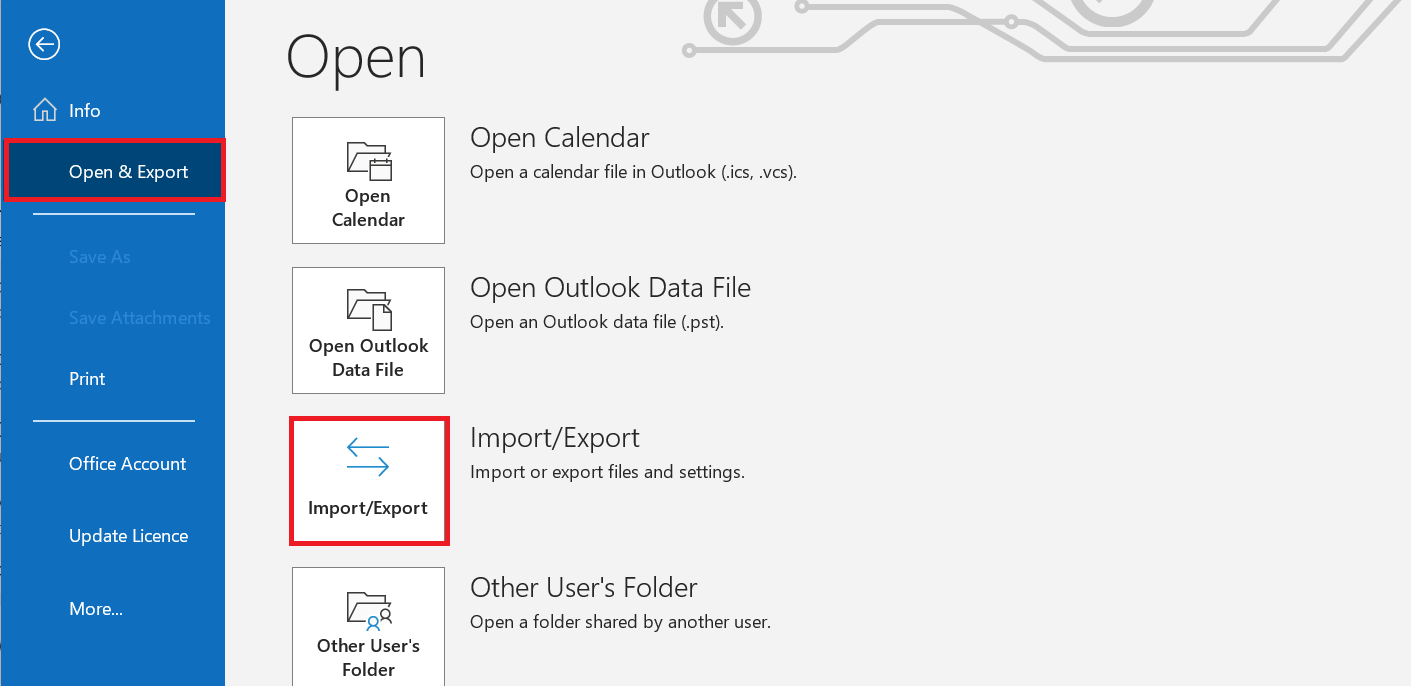
Step 2: Select the Open & Export option and then Import/Export.
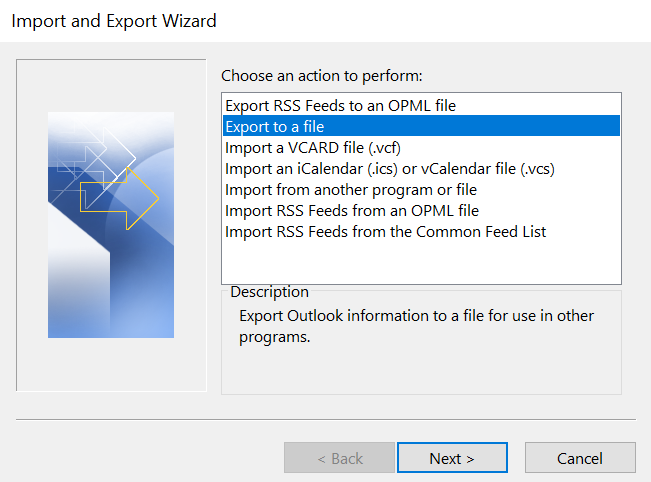
Step 3: Outlook will start the Import and Export Wizard, where you can choose from a number of actions. Click on Export to a file and then Next.
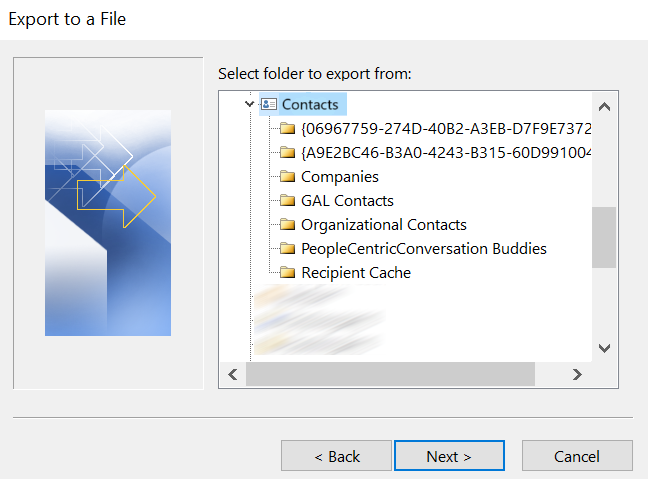
Step 4: In the following menu, keep the option Values separated by delimiters and click Next again. You’ll then reach an overview of your Outlook folders, where you can select Contacts by double-clicking it:
Finally, click Browse to select a location and name for the contact file you want to export.
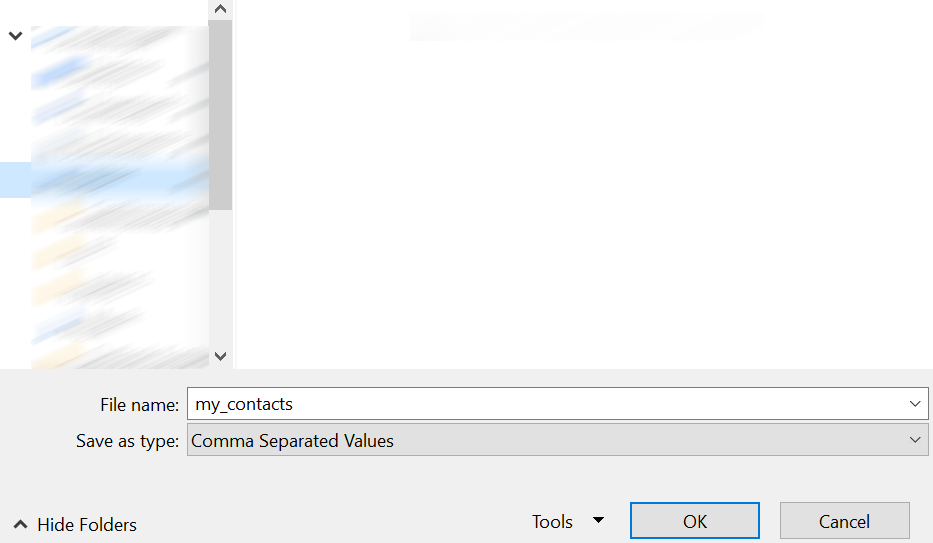
Confirm the storage location and file name by clicking OK. Then click Next one last time. Make sure that the correct folder has been selected and then click Finish to export your Outlook address book. After Outlook has successfully completed the export process, you’ll find a CSV file containing your Outlook contacts at the selected location. Alternatively, you can also save the contact details in a PST file.
In older versions of Outlook, you can open the Import and Export Wizard by navigating to File > Options > Advanced > Export.
How to export contacts from Outlook on the web
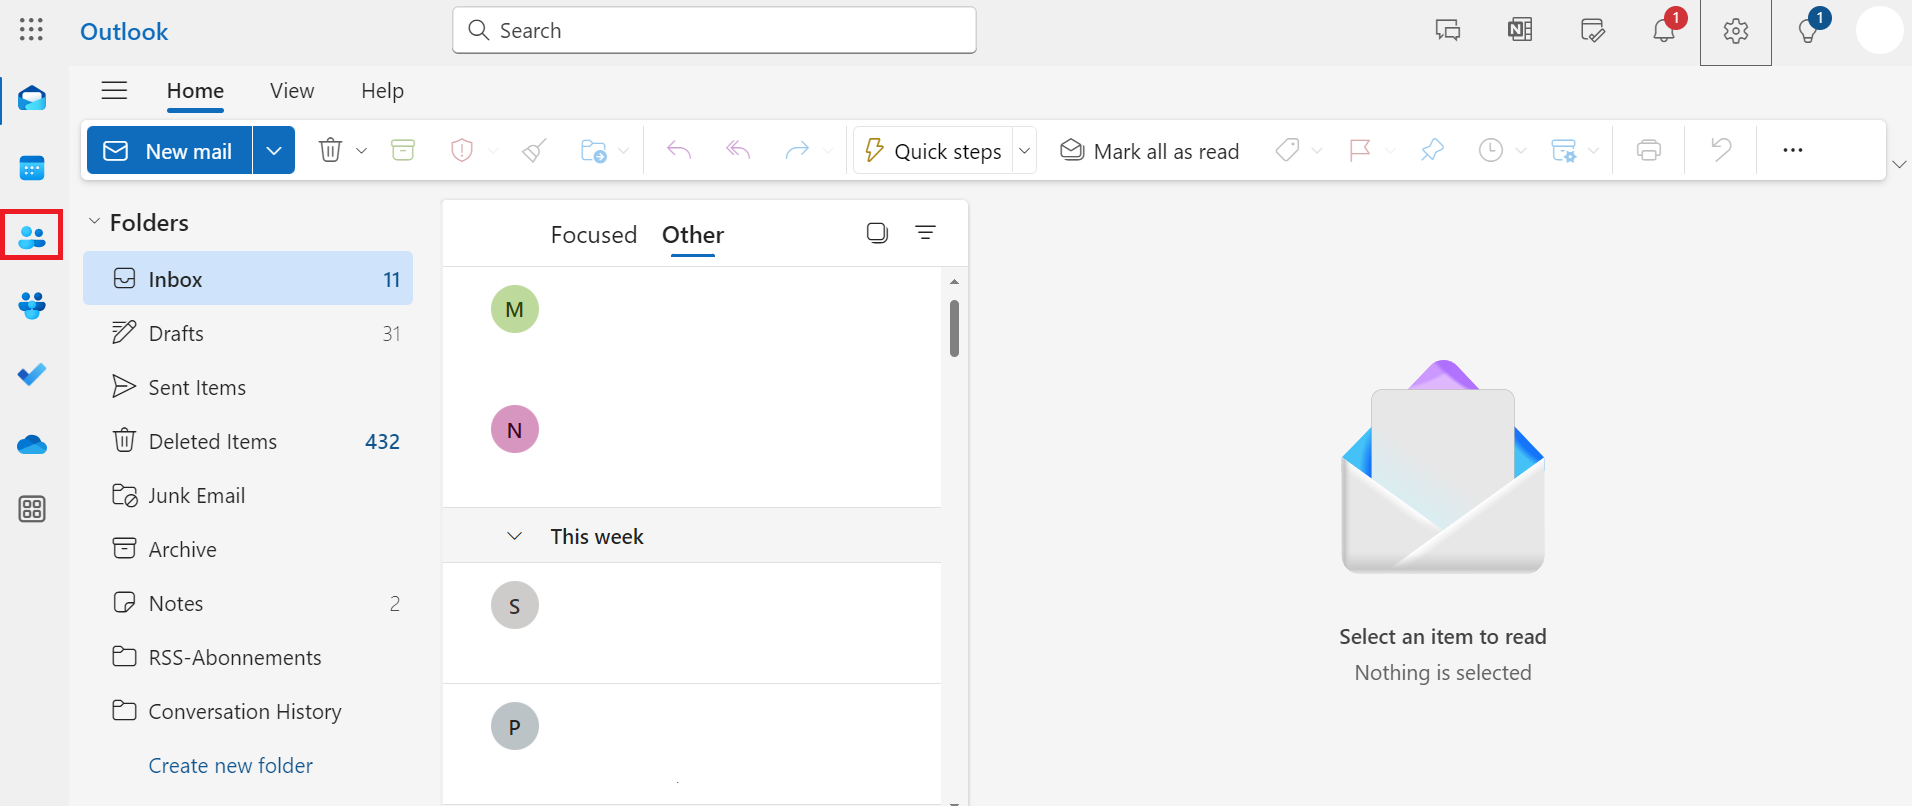
You can also export your address book in the web version of Outlook. First, log in to your Outlook contact and click on the icon with two people (this may be in a different place depending on your version):
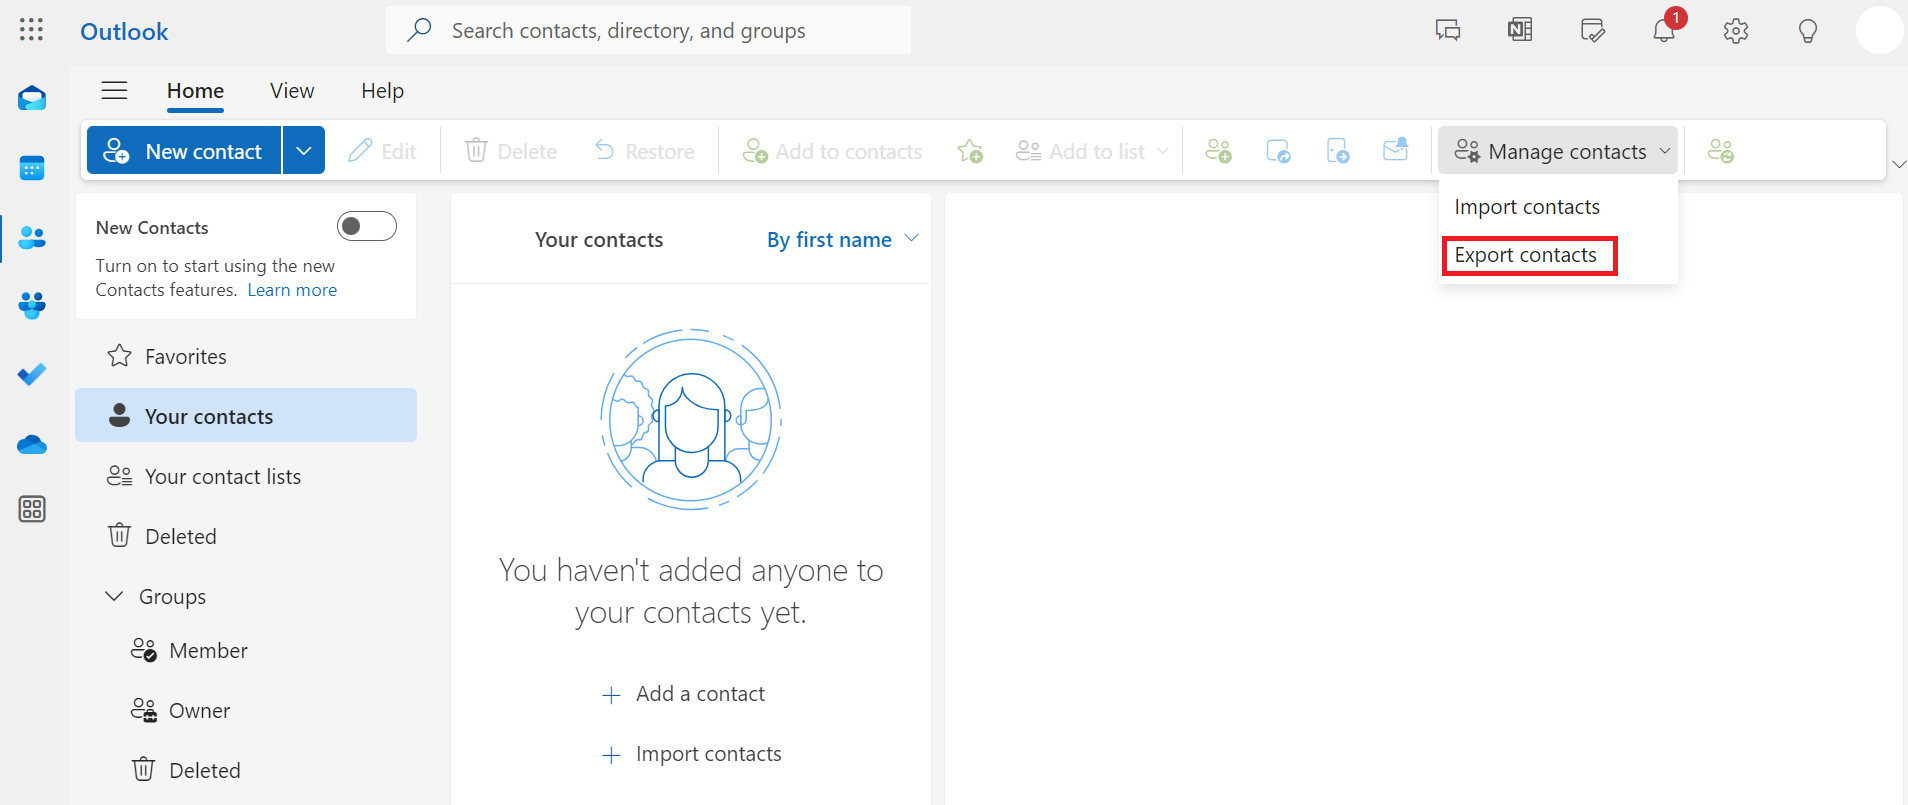
In the following menu, click Manage contacts. From the drop-down options, select Export contacts. You can then choose to export all or only specific contacts. Finally, click the Export button to open the download window, where you can download the CSV file to your PC or an external storage device.
- Fast drag and drop editing
- Simple personalization
- AI-powered text generation

